Guide
Create a wallet and connect to apps
Head to peaq control
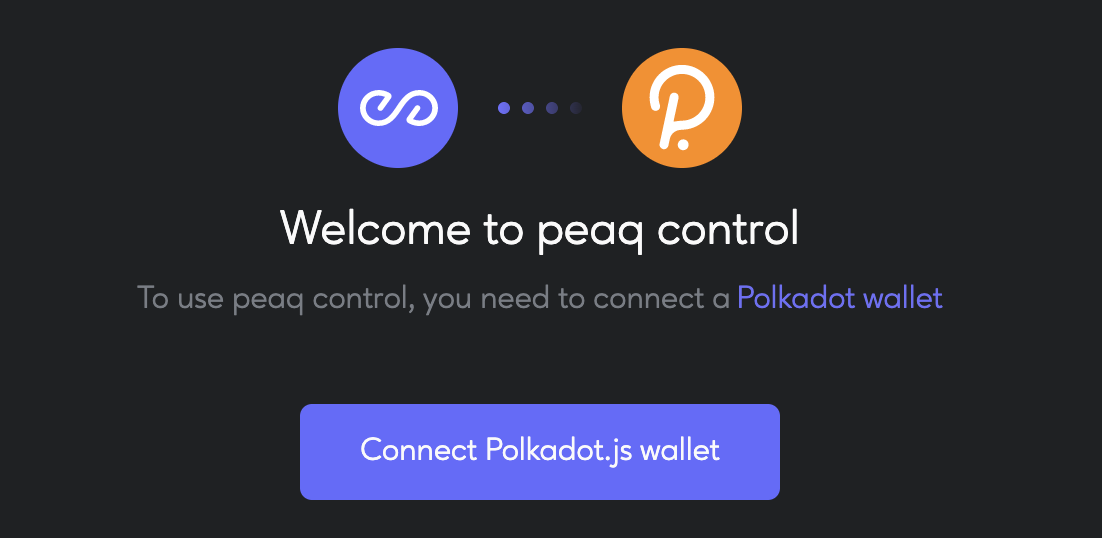
To start using peaq control, you need to log in with your polkadot.js wallet. If you don't have one:
Go to polkadot.js wallet
Choose and download an extension
Open your browser extension and add an account
Now return to the peaq control and click "Connect Polkadot.js wallet"
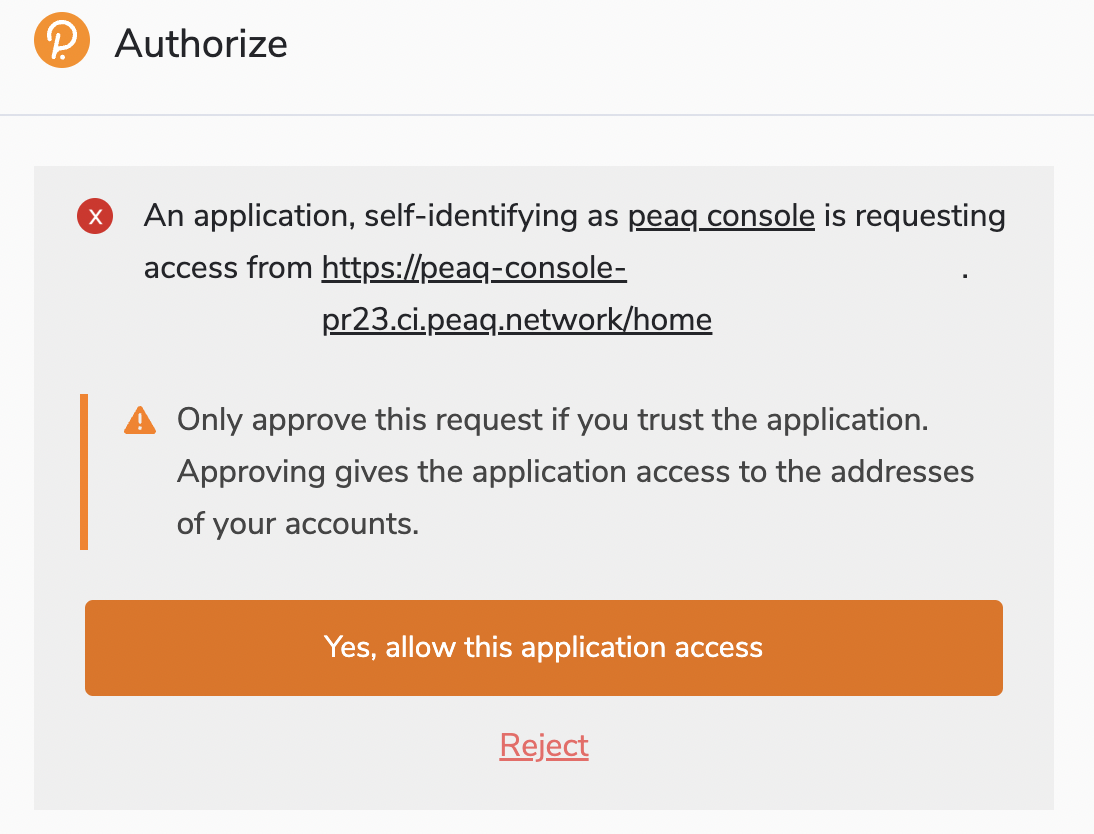
- You will see a pop-up window asking you to allow access to the application. Carefully verify that you are connecting to the right application and click "Yes, allow this application access".
Create Organization
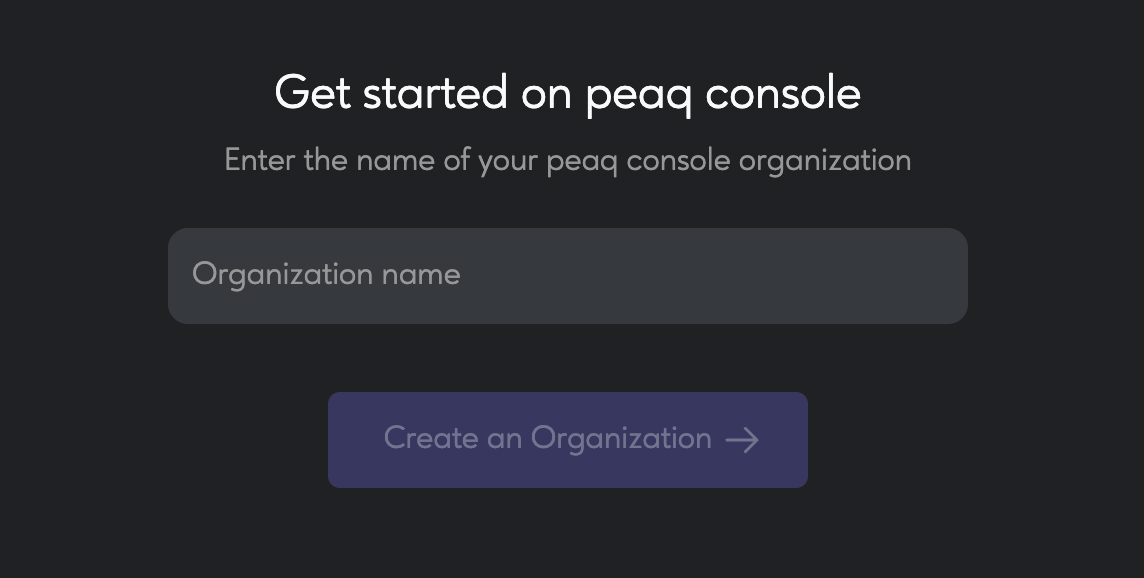
- Now you'll need to create a name for your organization in peaq control. The organization will be a central point for managing your team members' permissions and access to your machine fleet.
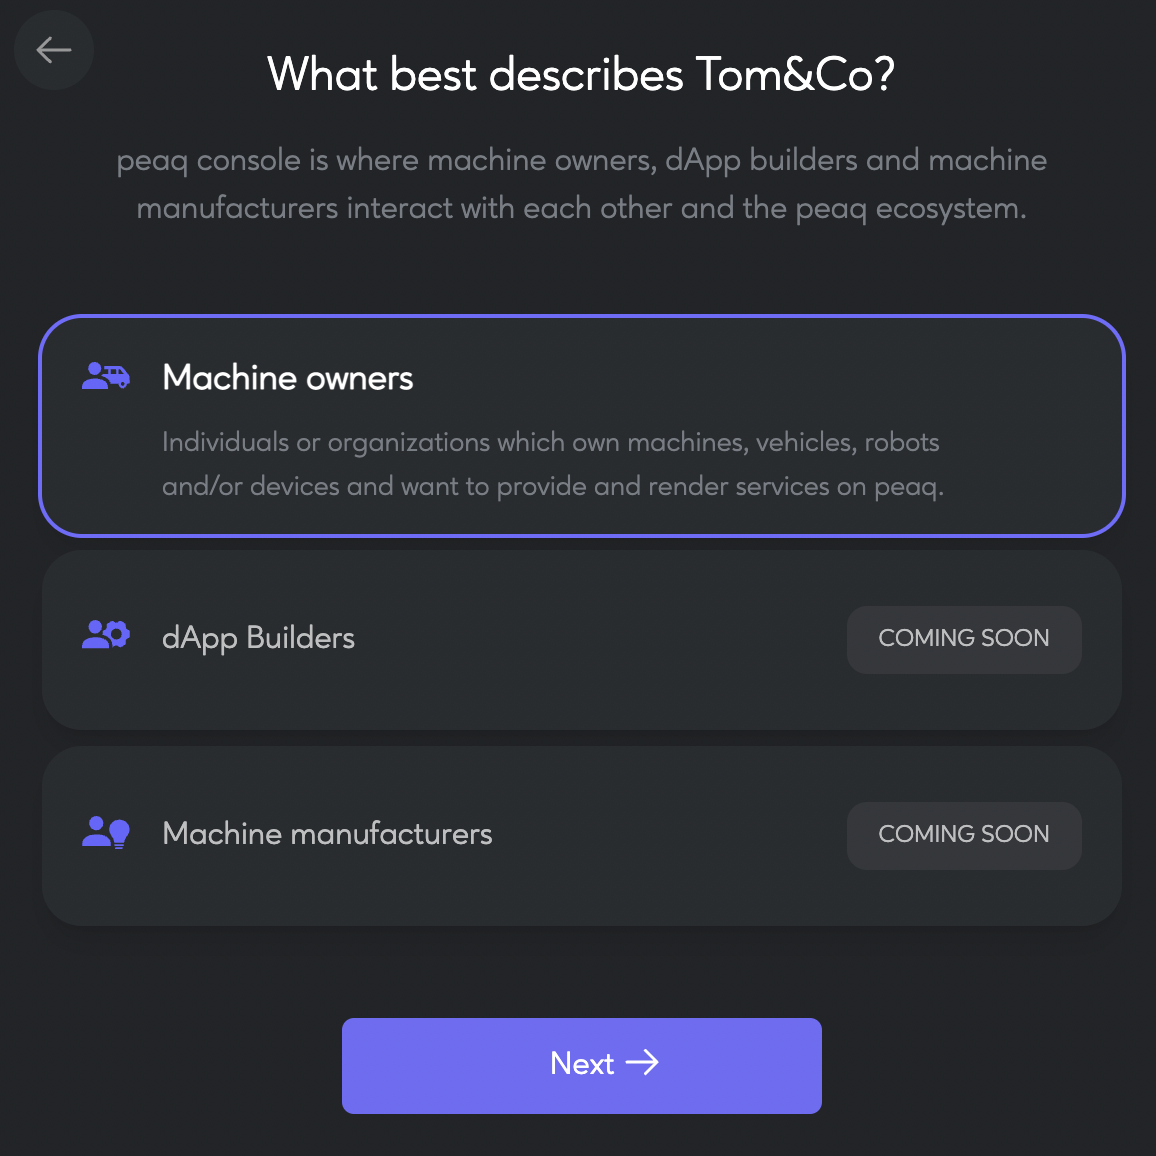
- Next, you'll need to select the type of your organization. In the current version, only one option is available, so select "Machine Owners" and click "Next".
- After that, your personal dashboard will be created. The process may take up to one minute to complete, so don't be discouraged by the loading screen.

- Congratulations! You just created your organization in peaq control.
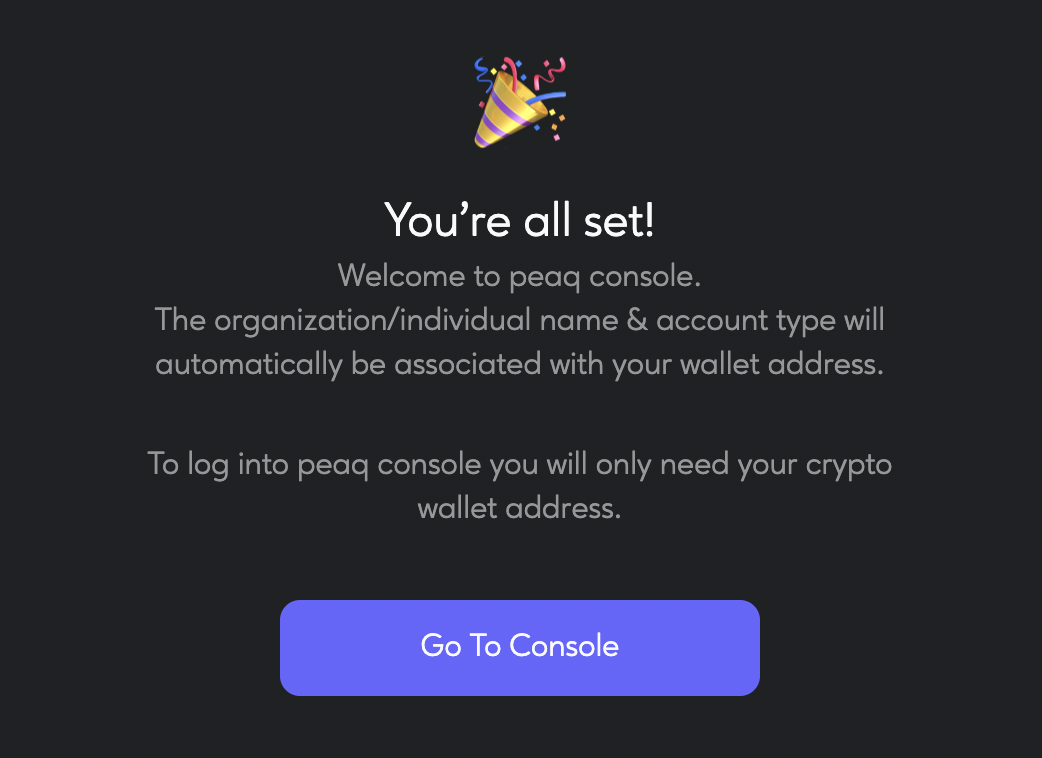
- Click "Go To Control" and you will see this screen
Connect a machine to peaq control
Demo Machine
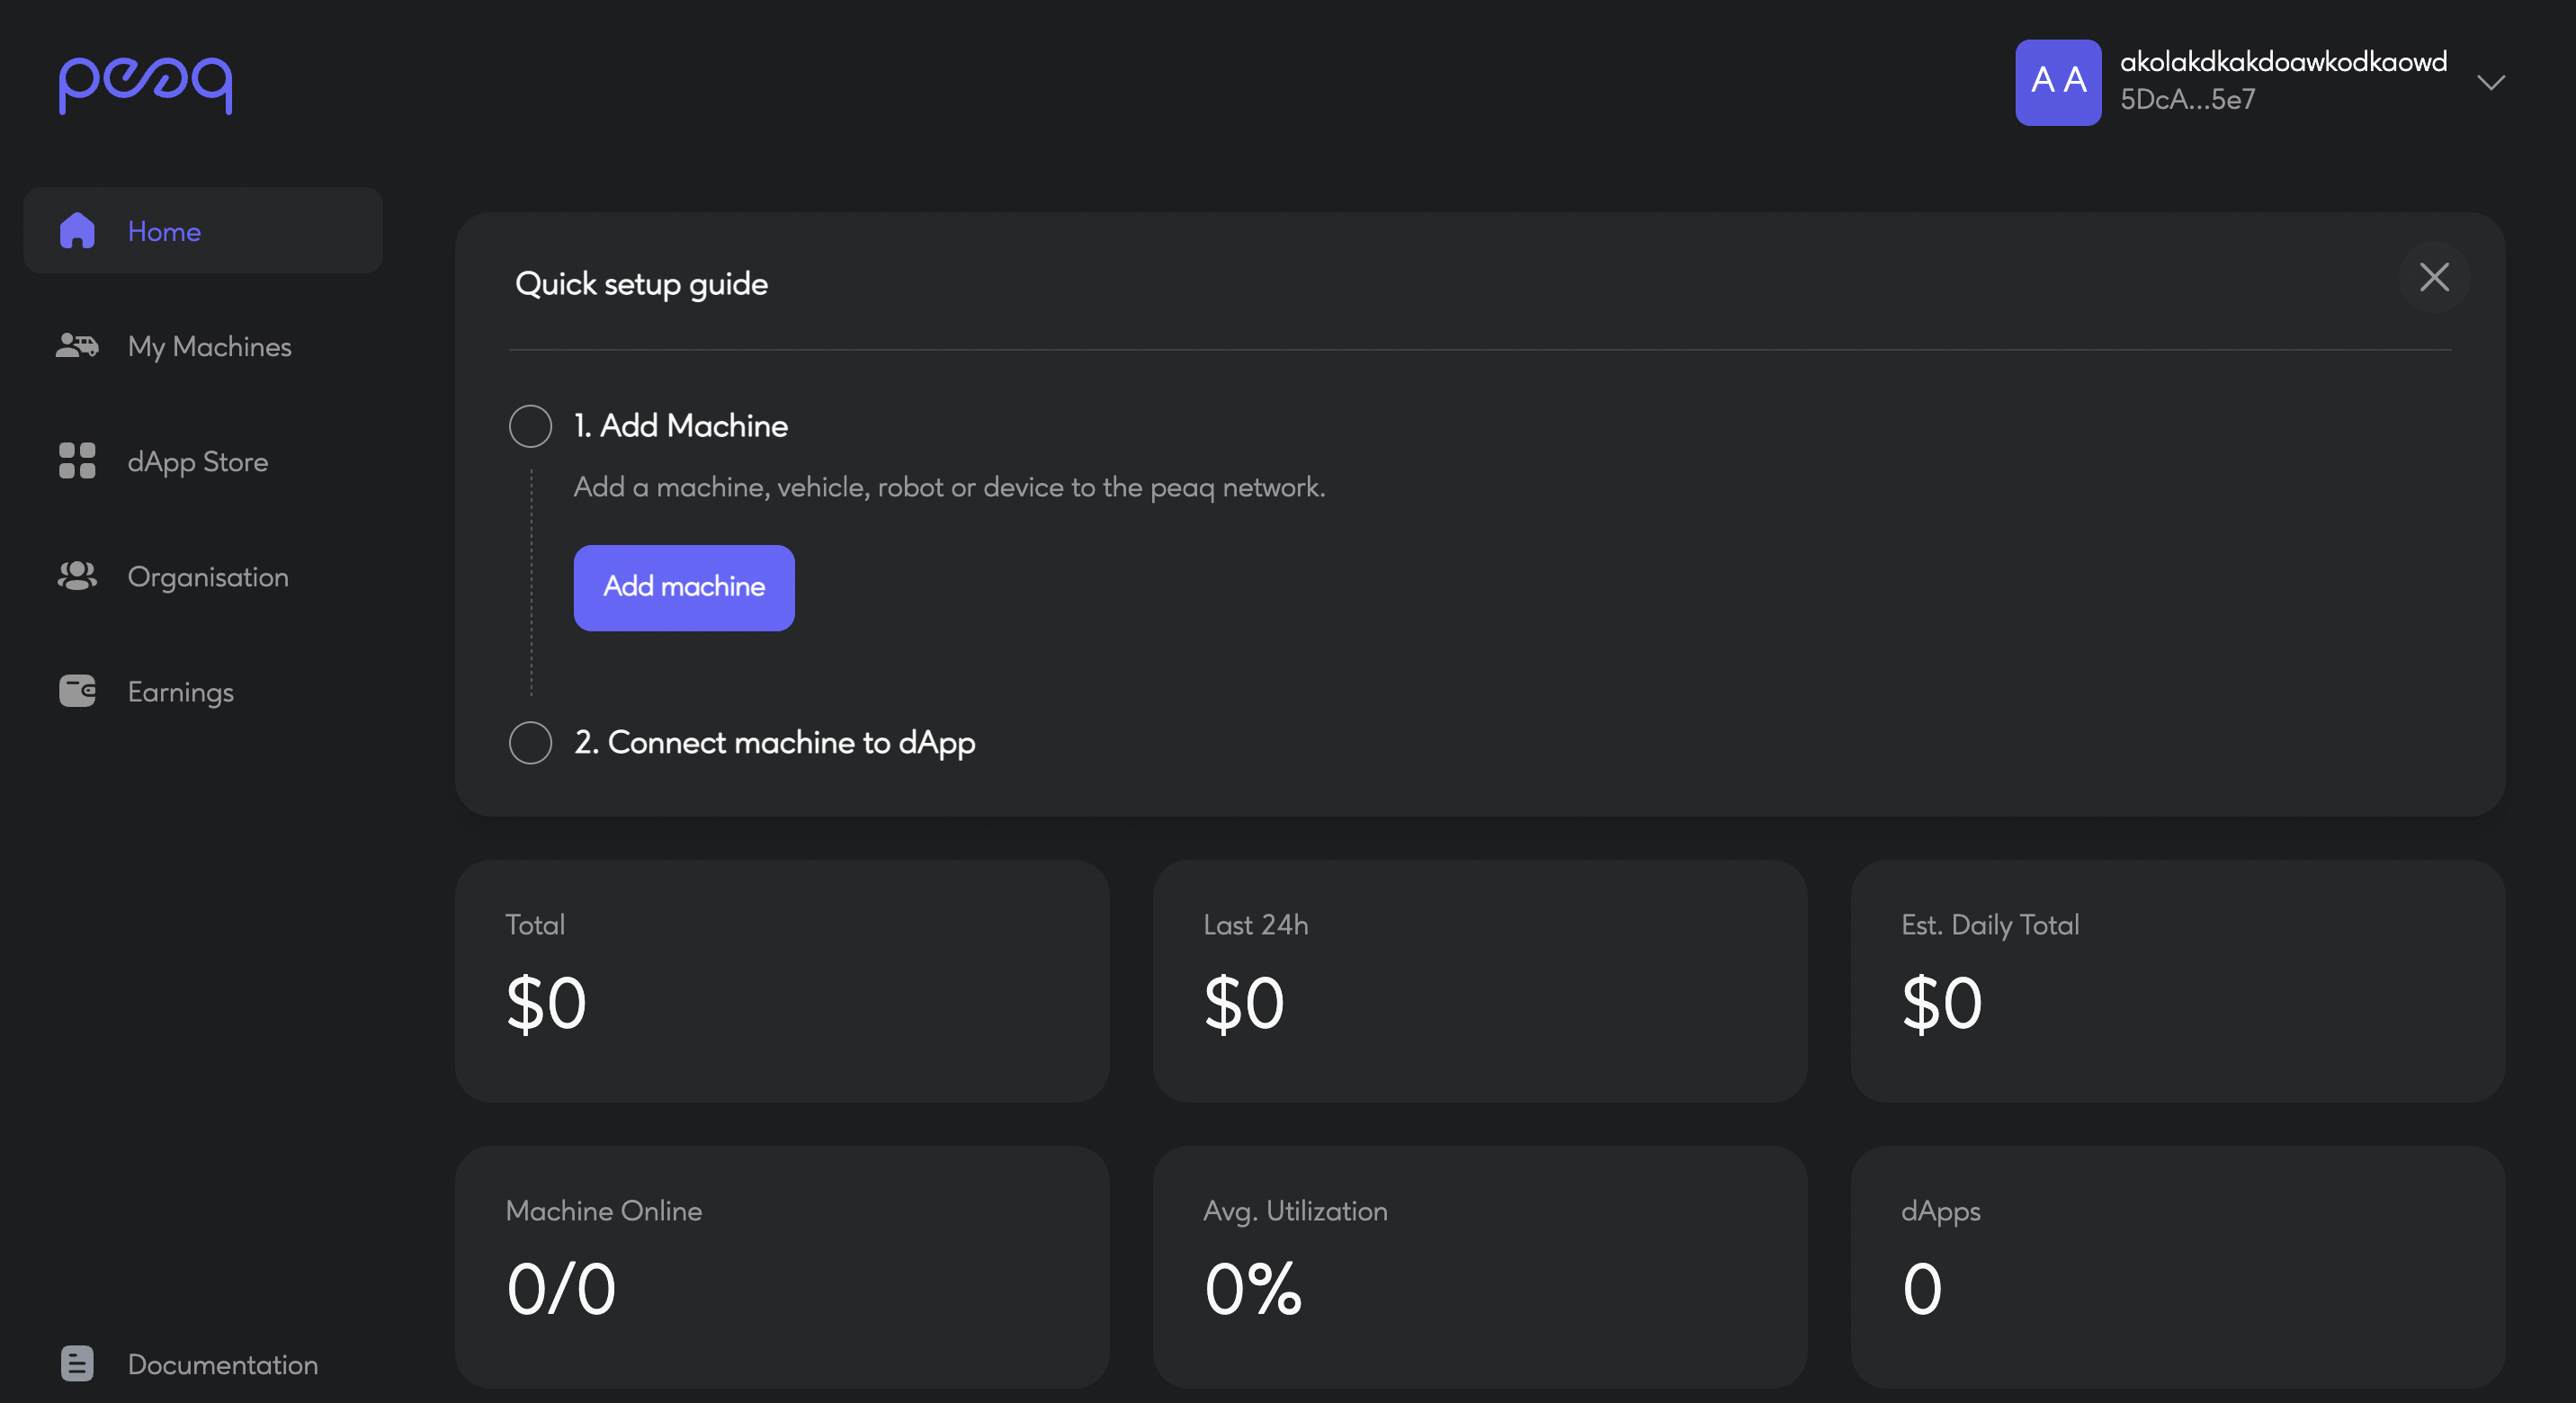
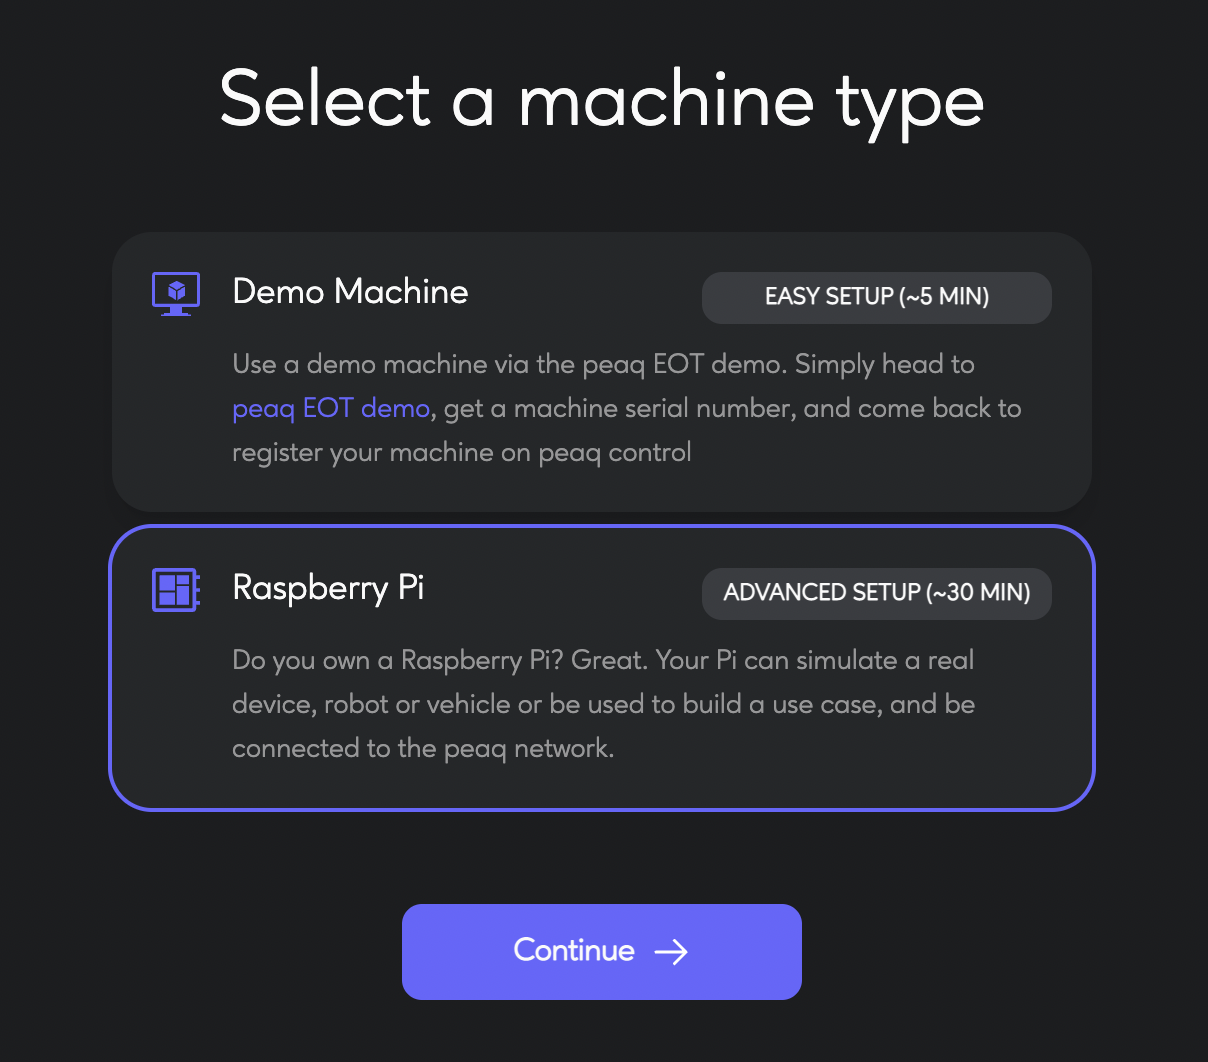
- Now it's time to add your first machine! Click on "Add Machine". You'll see 2 options here:

We're first going to take a look at the easiest onboarding option - Demo Machine - but if you're a Raspberry Pi owner, please feel free to skip this step and jump straight to option 2. The demo machine onboarding process won't take more than five minutes and is ideal for beginners. Select the Demo Machine option and click "Continue→".
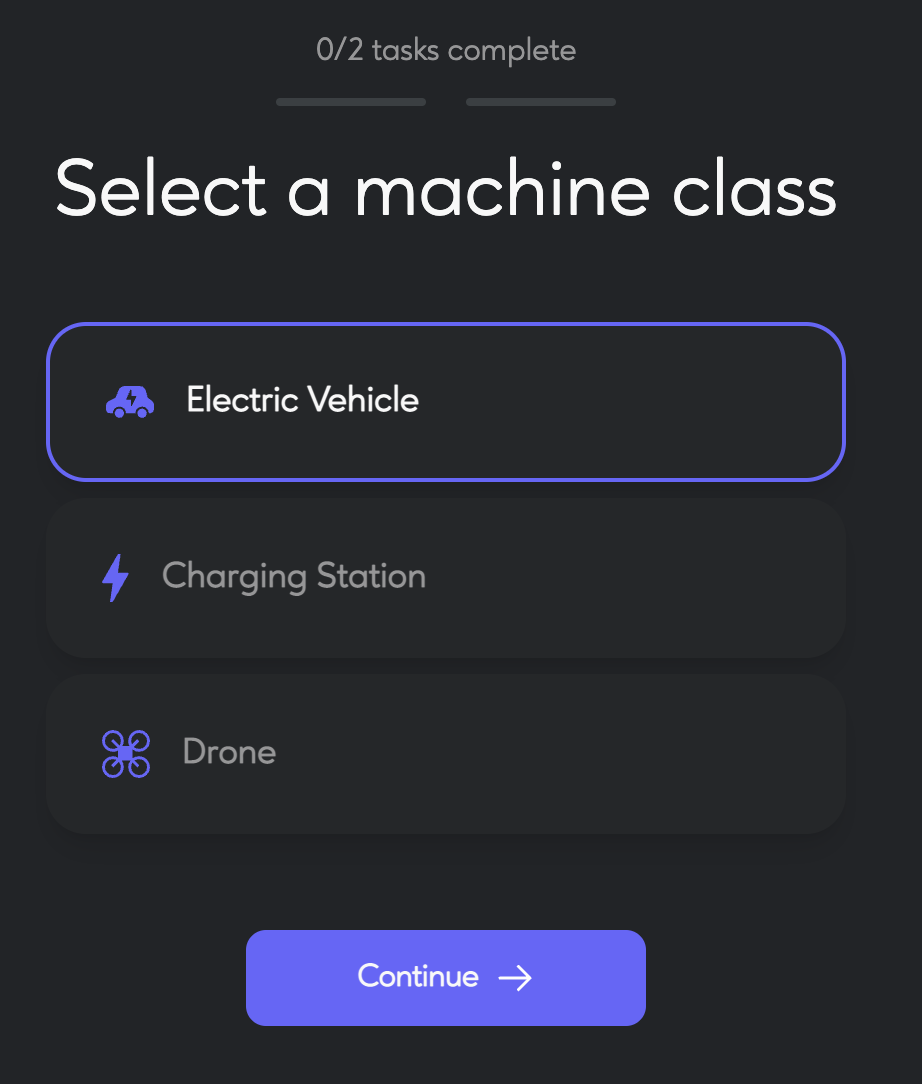
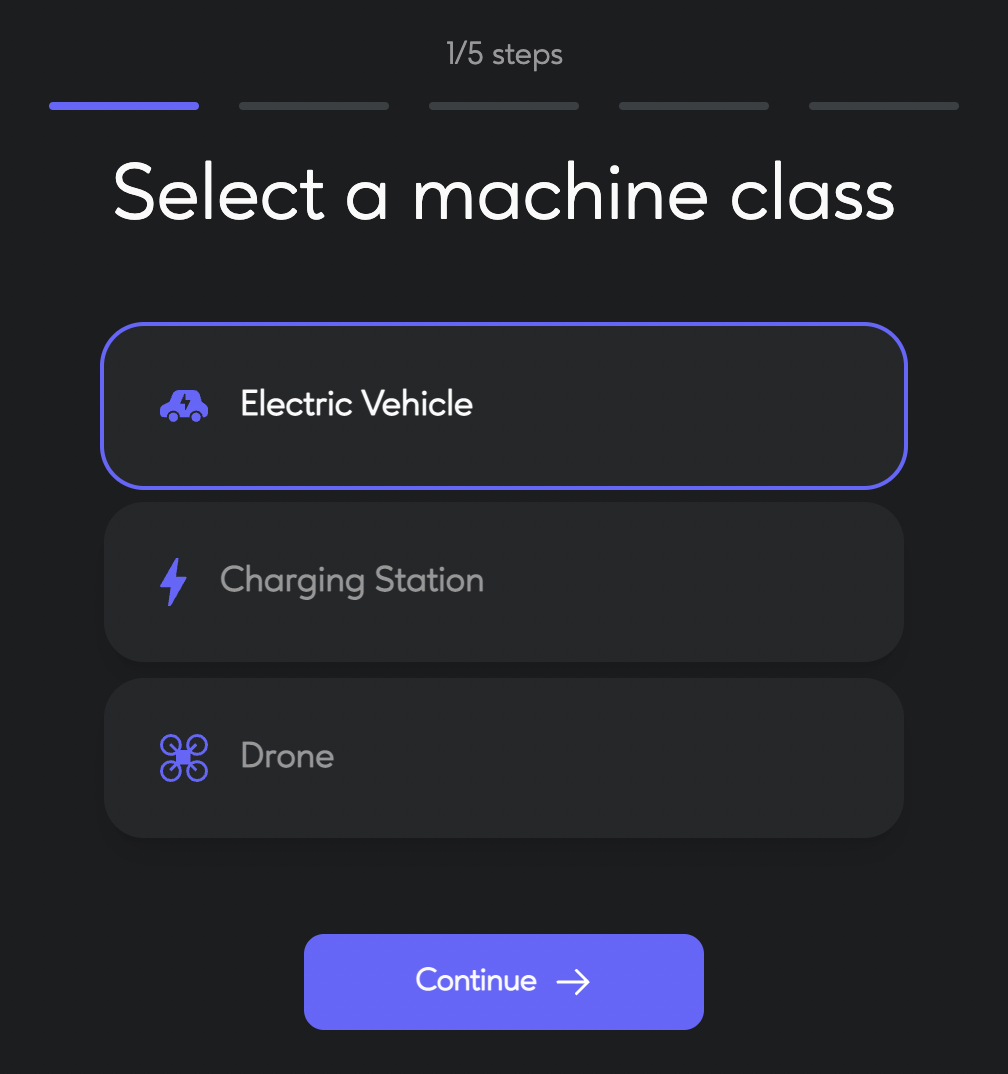
On the next screen, you will be asked to select machine class. Select whichever you like the most and click "Continue →". Here we chose "Electric Vehicle".
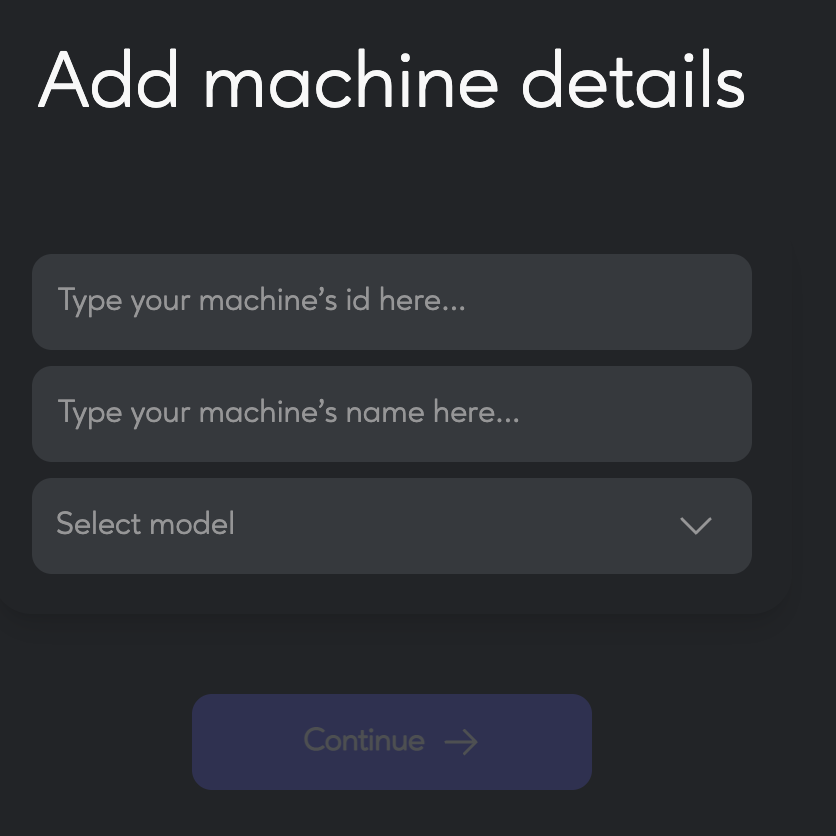
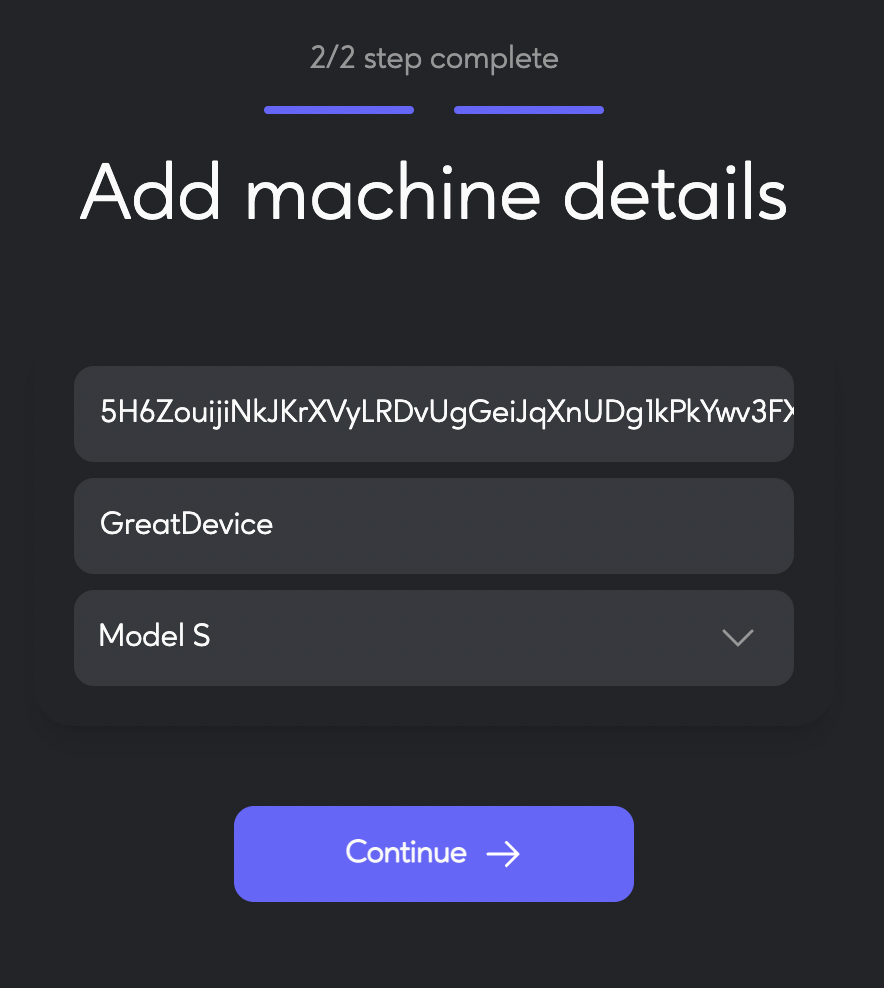
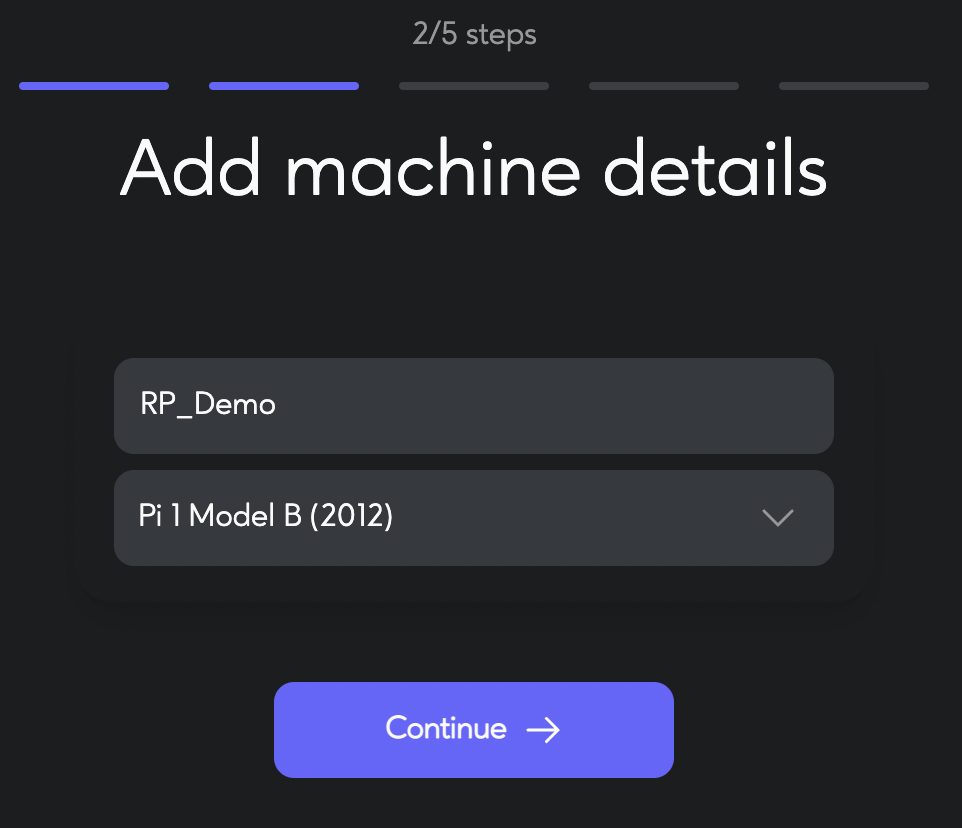
- On the next screen, you'll be asked to provide machine details, like the machine serial number, machine name, and model. Don't have this info? Worry not, we will get it from peaq eot demo app. Don't close this tab yet, we will return to it in a minute.
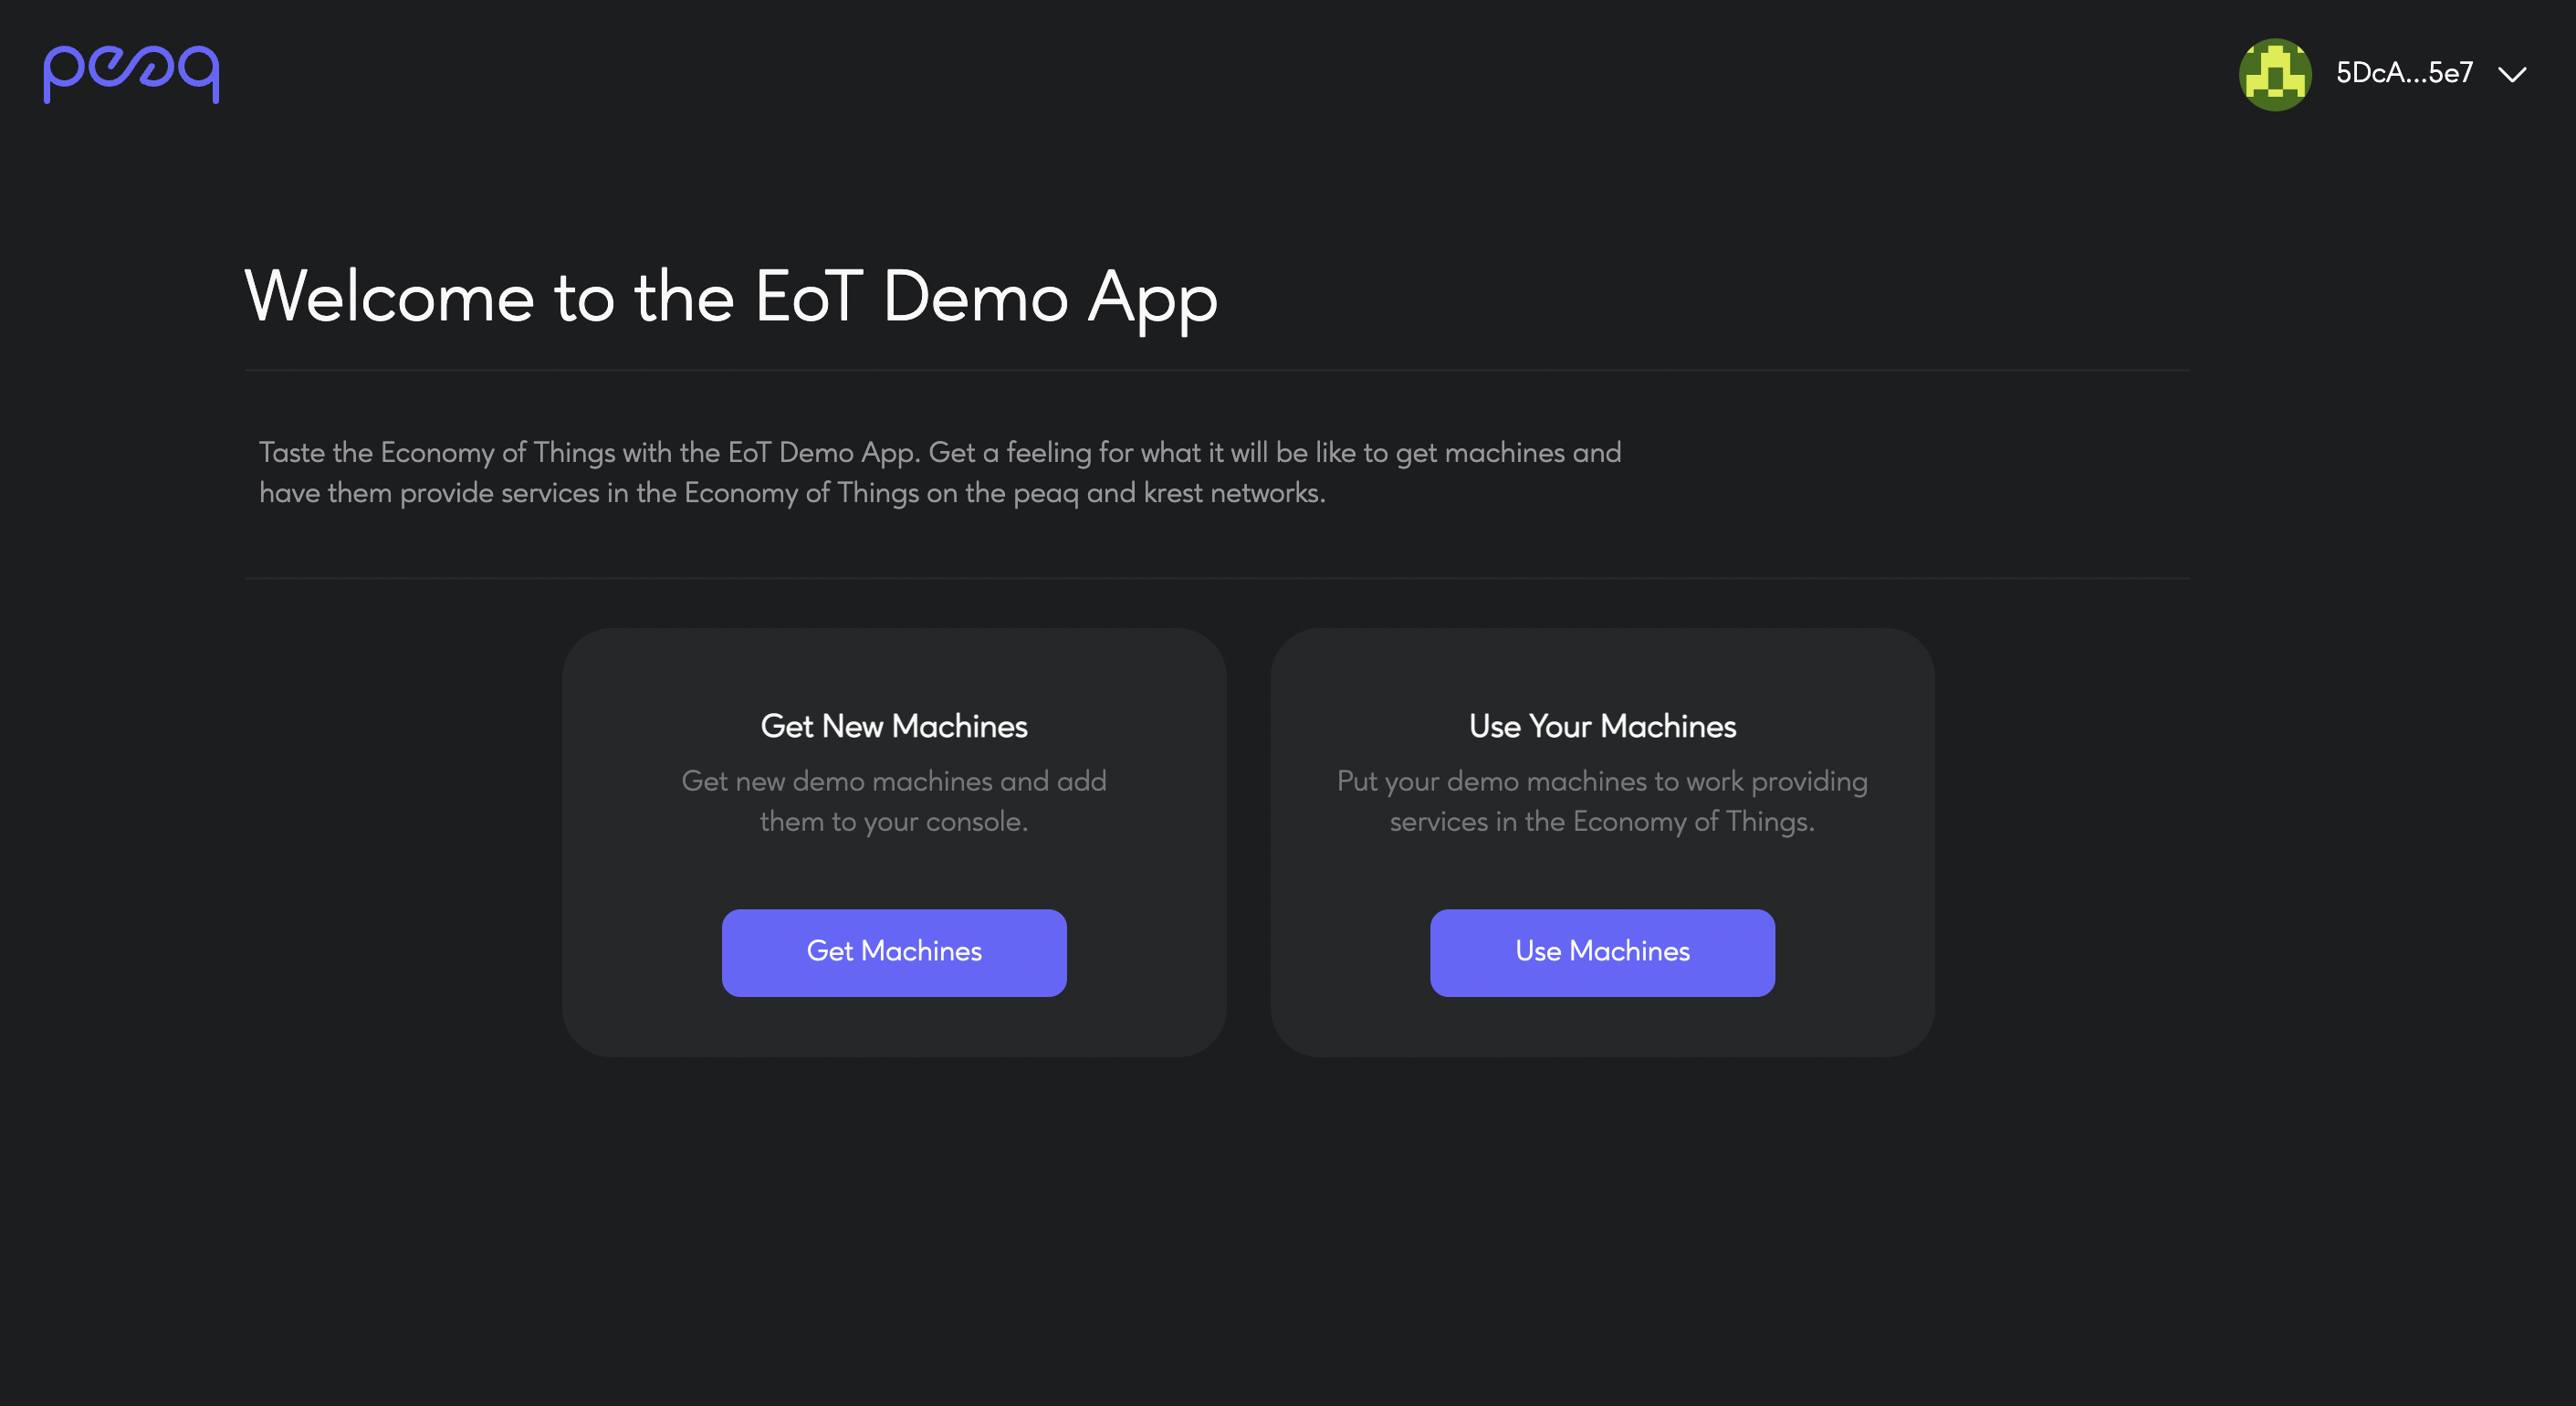
- Go to peaq eot demo app and connect with your polkadot.js wallet. Make sure to use the same wallet as for peaq control.
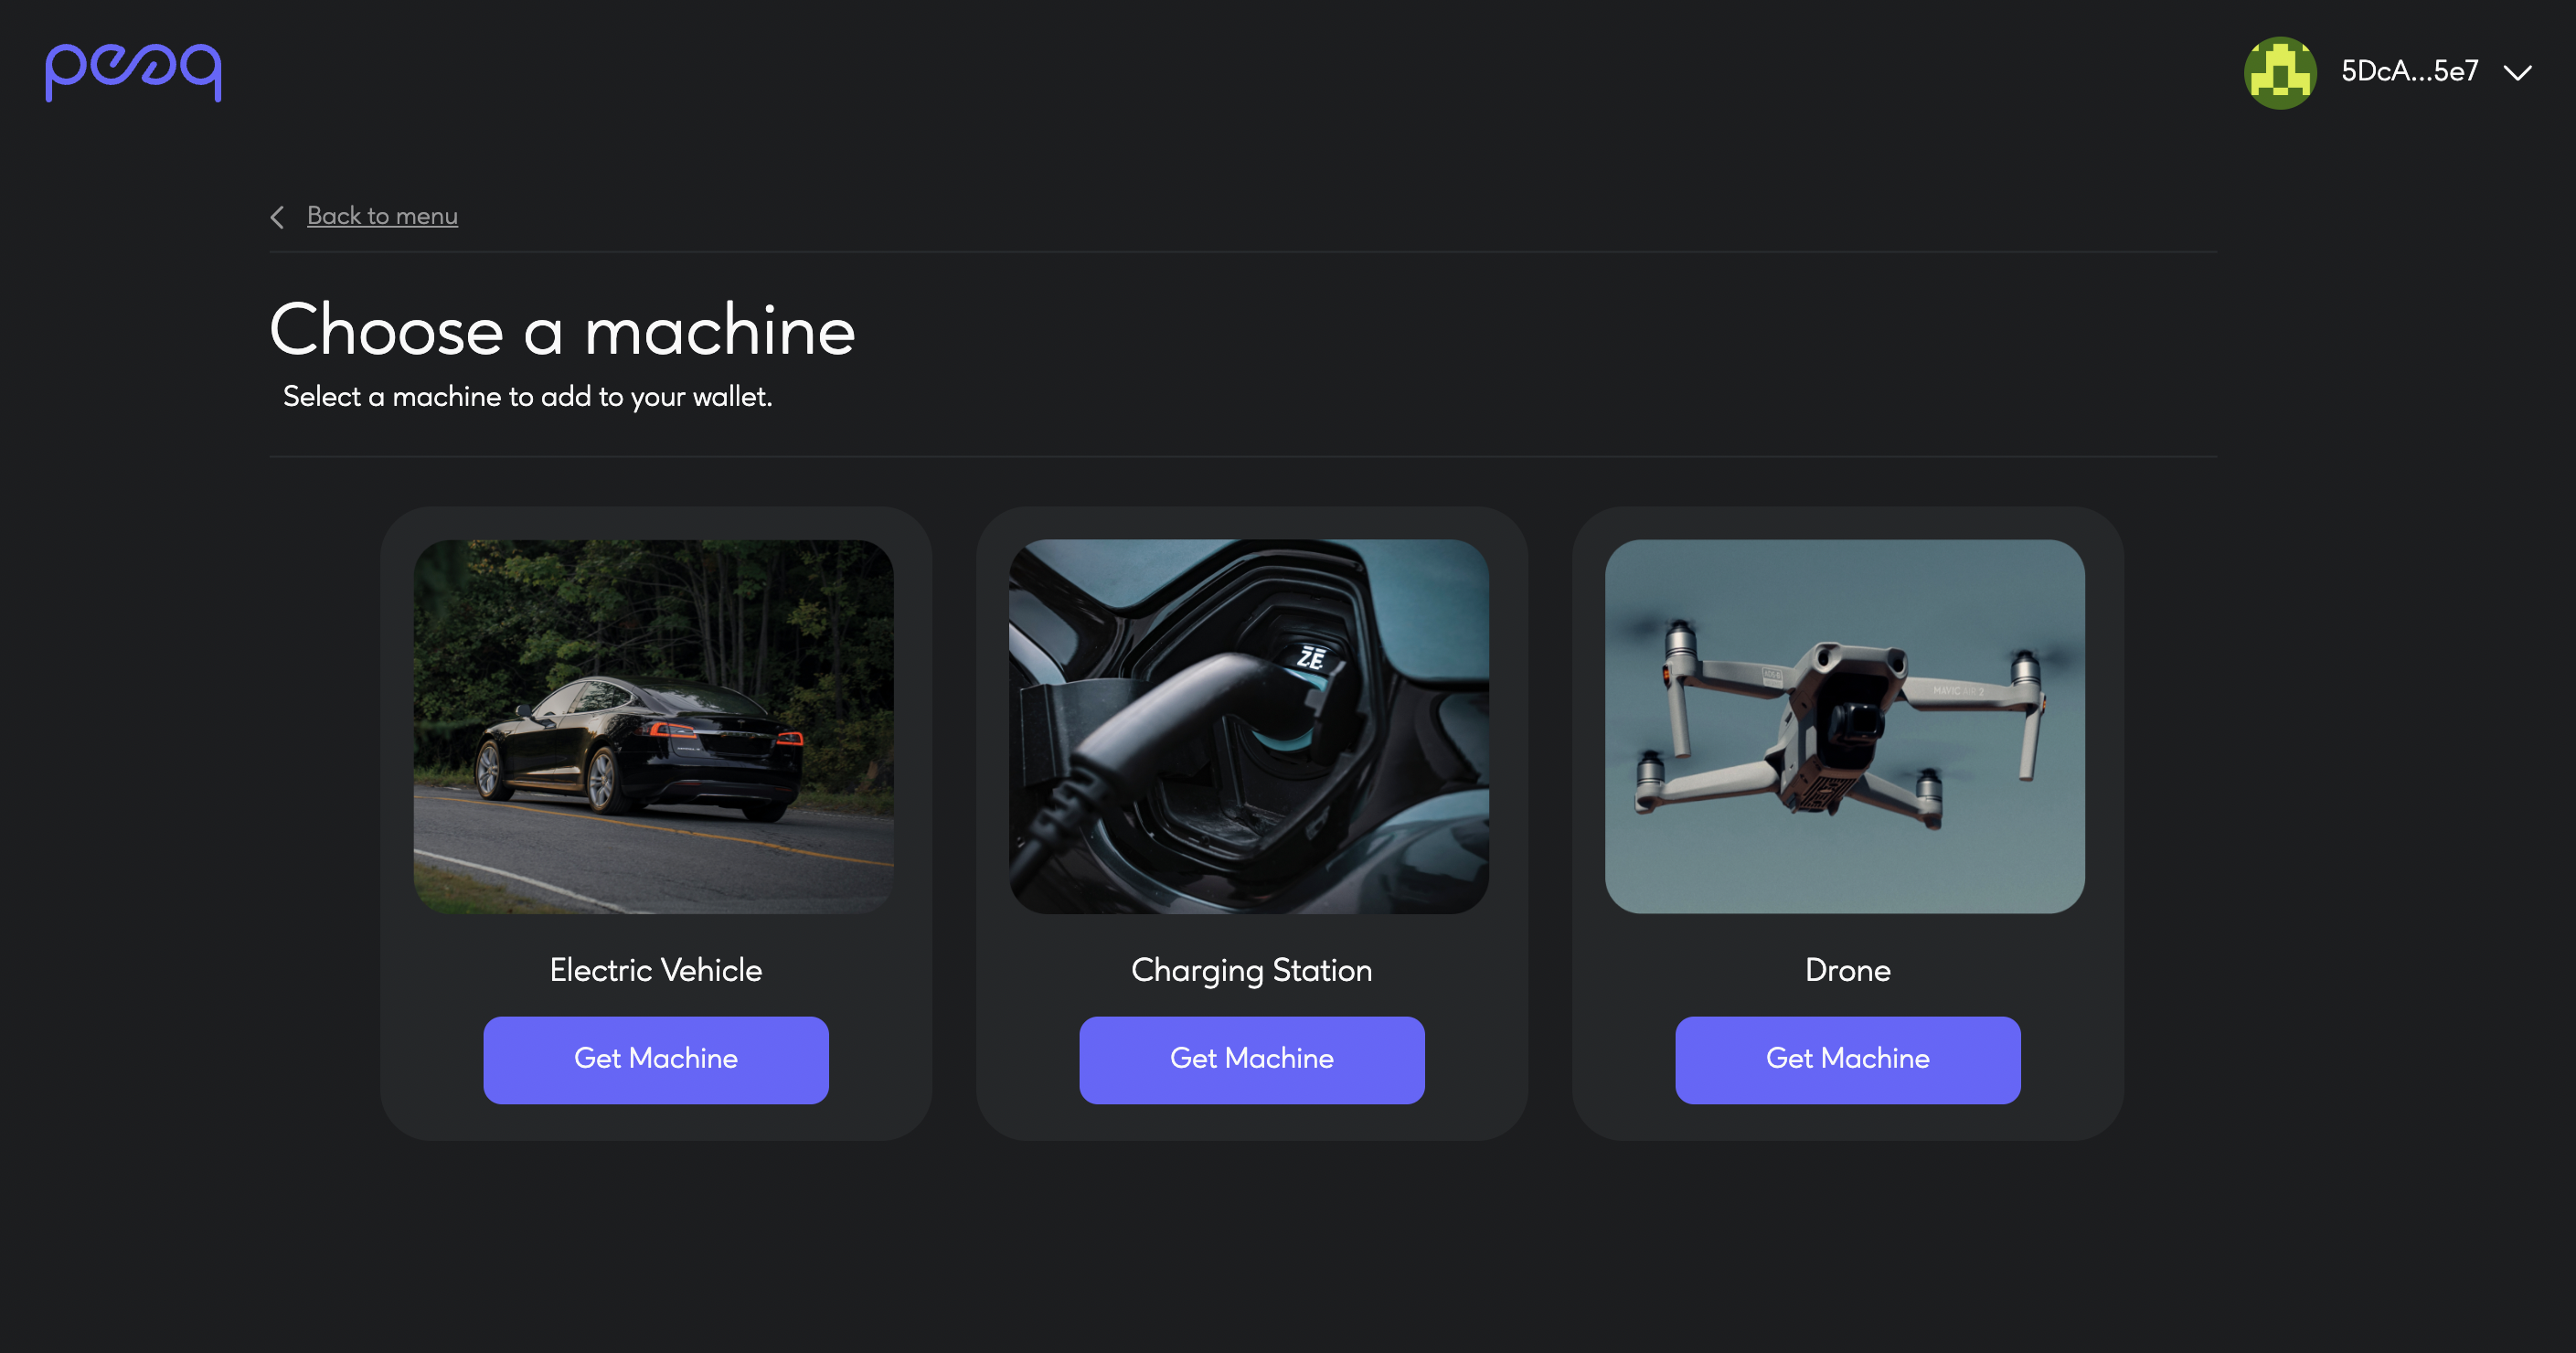
- Click "Get Machines" and select a machine of the same class as you selected in peaq control. In this case we chose "Electric Vehicle".
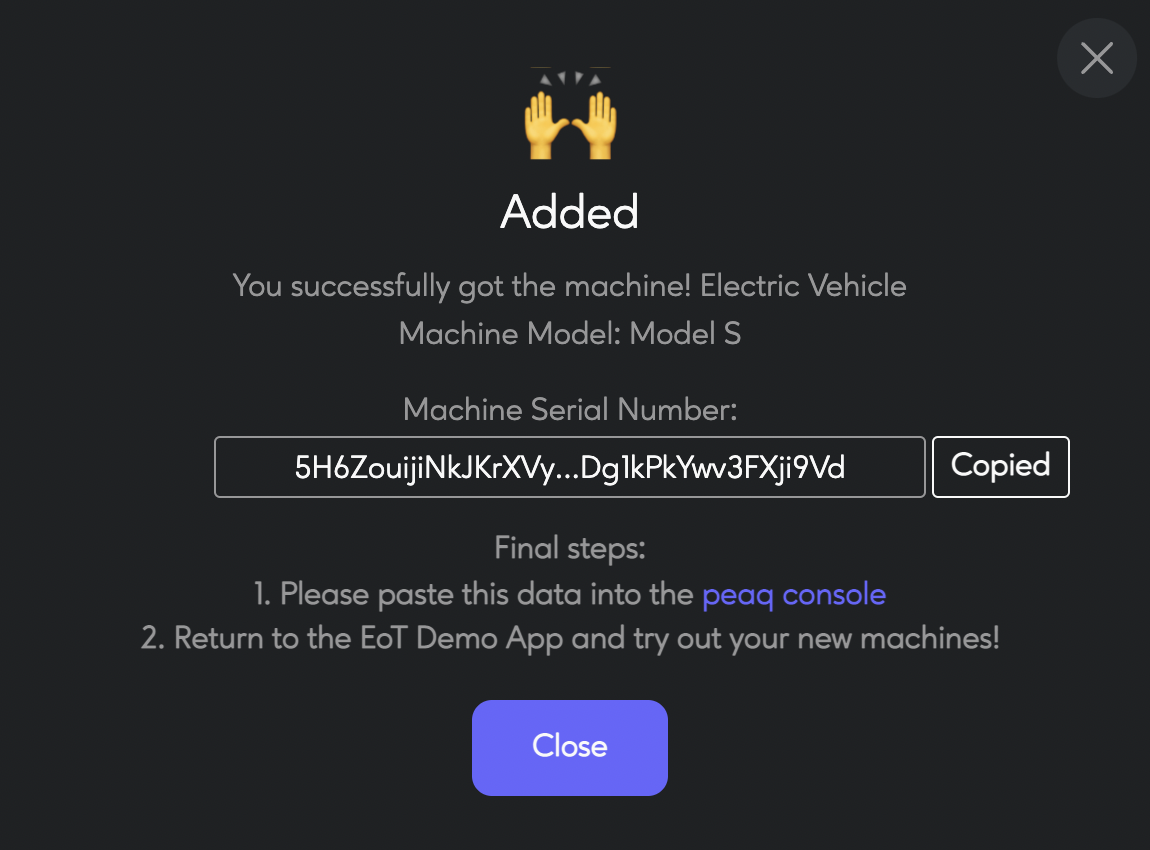
- Once you click "Get Machine", you will see the pop-up with machine details. Copy the serial number and head back to peaq control tab.
- Back on the peaq control tab, enter the serial number, enter a cool name for your machine, and select its model. Then, click "Continue →".
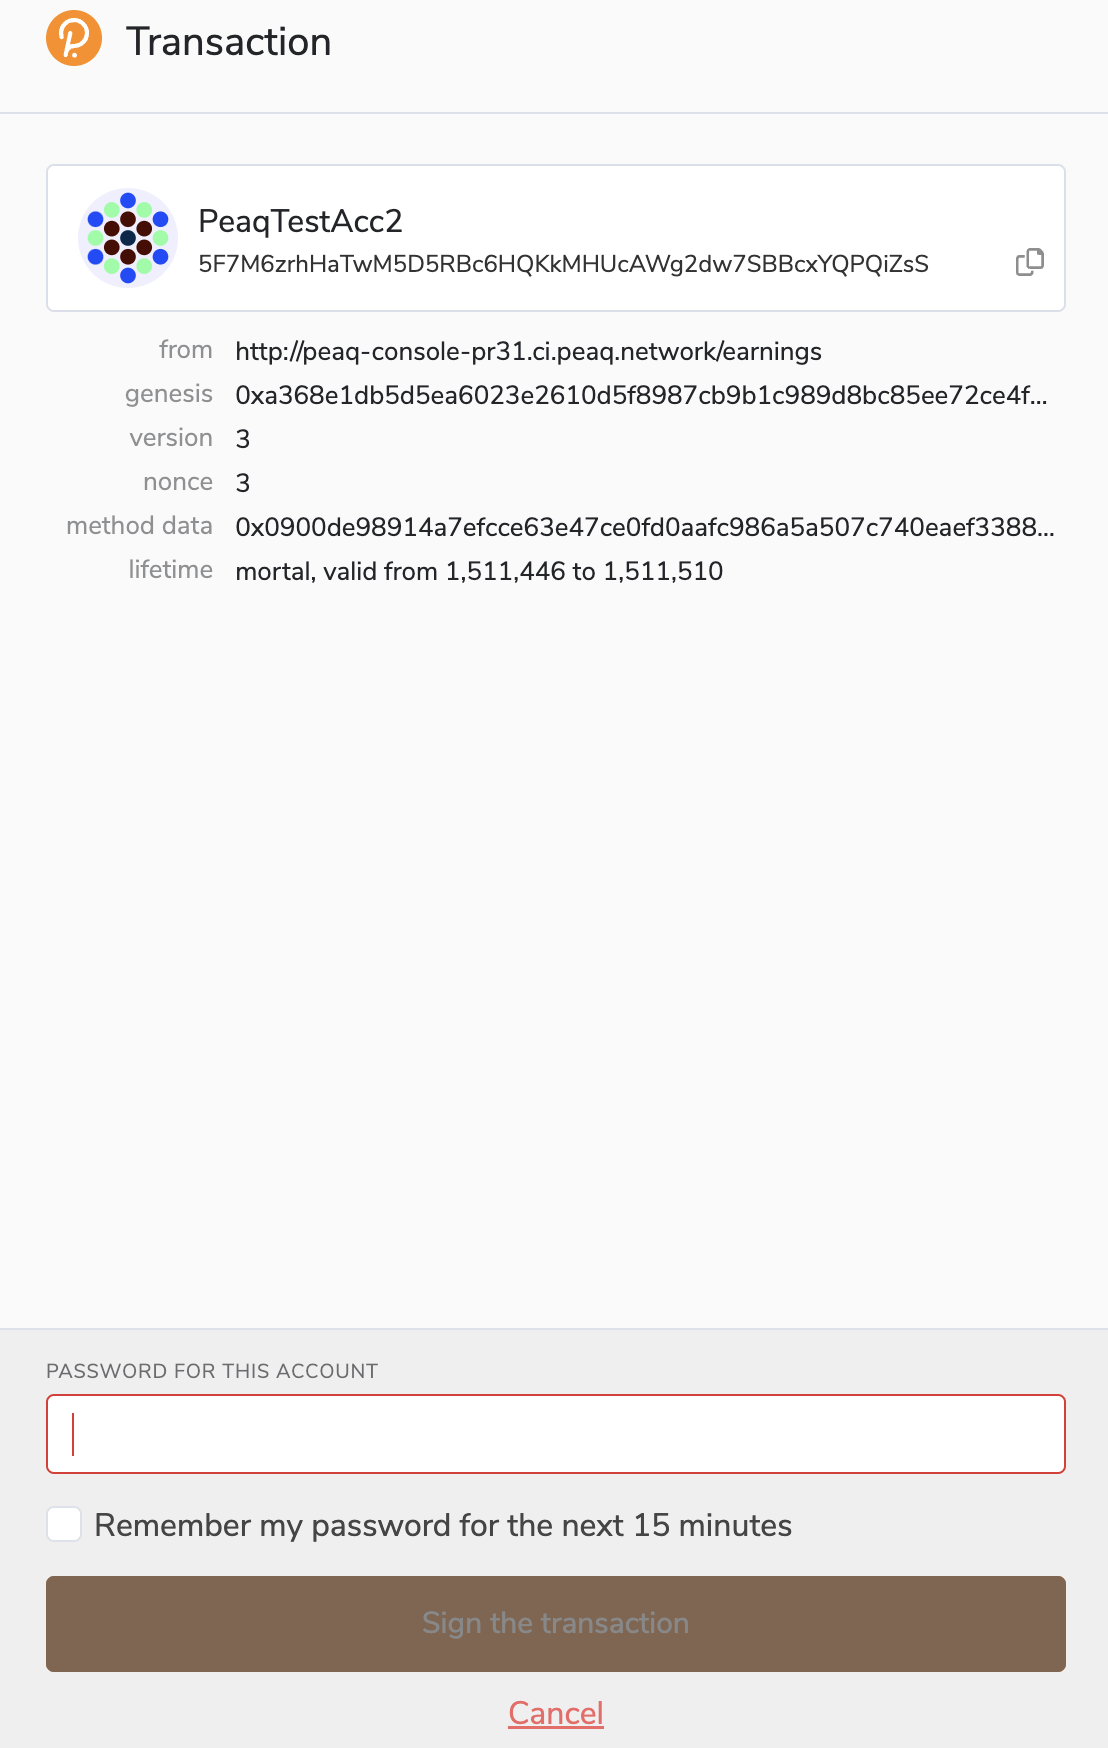
- Next, you will see another pop-up asking you to sign a transaction which will generate a peaqID for your machine. Enter your password and click "Sign the transaction".
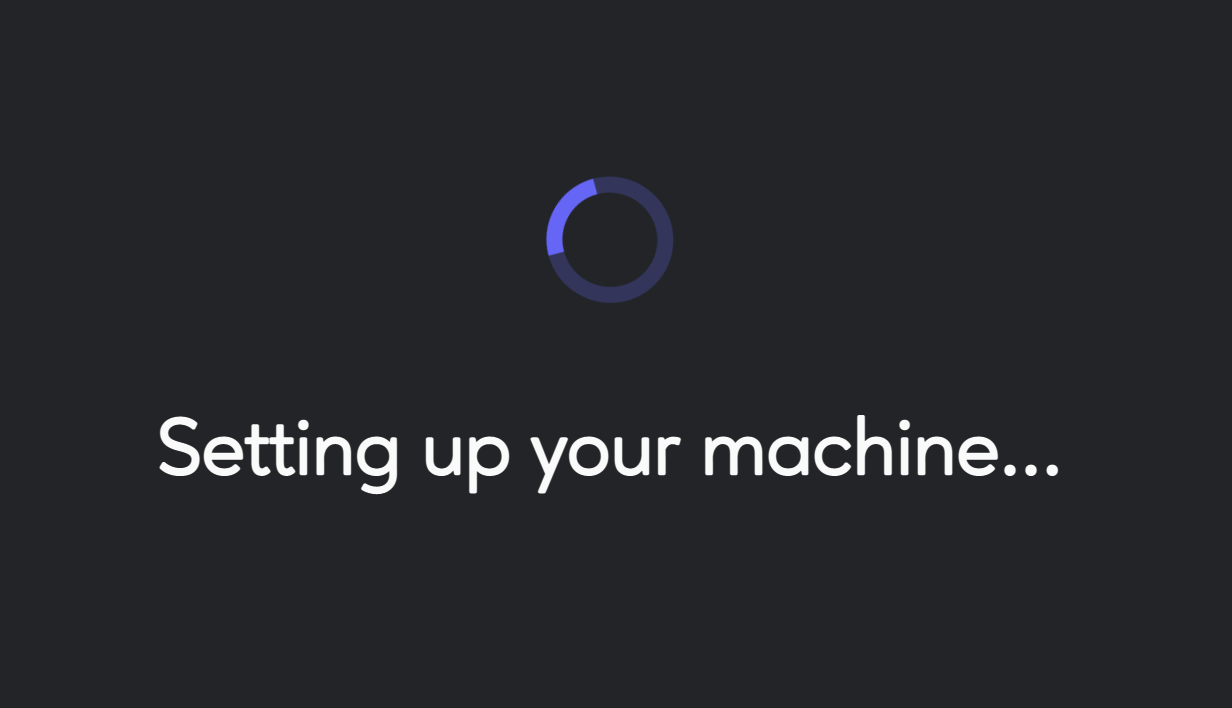
- Next, you'll see this loading screen (which normally takes <30 seconds to finish).
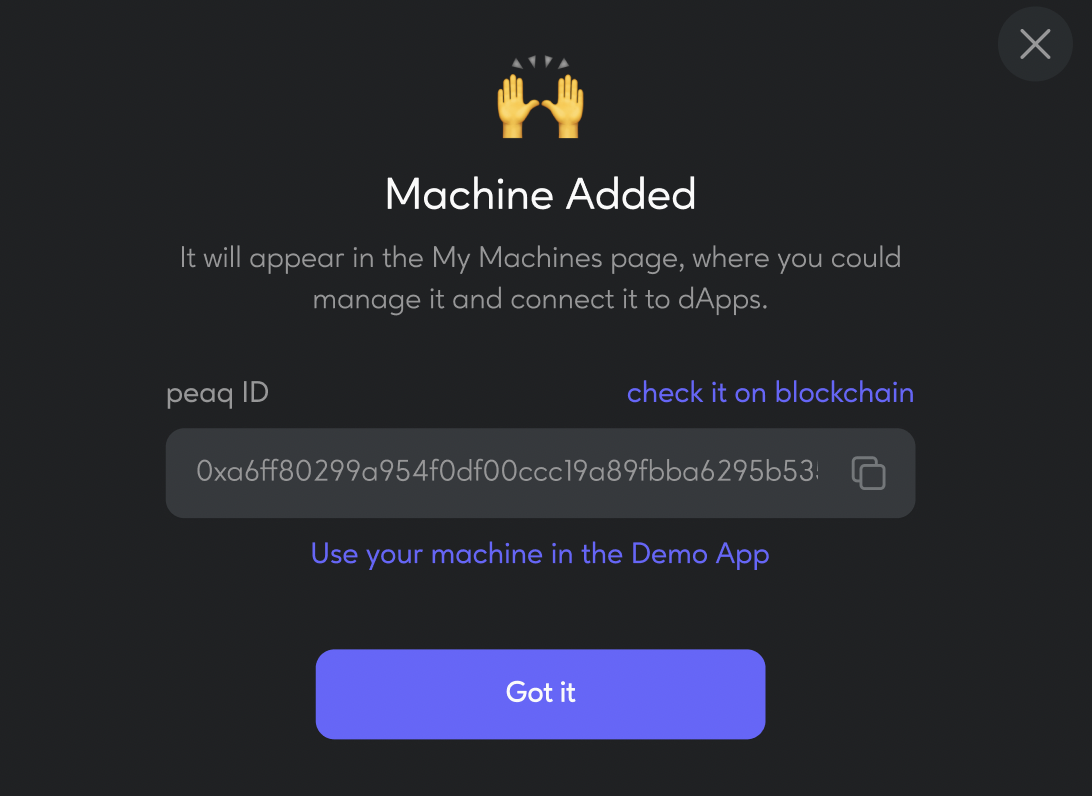
- Finally, you will see a message confirming that your machine is now part of the Economy of Things on peaq. If you want, you can review the appropriate transaction on the blockchain through the link in the message.
Raspberry Pi Onboarding
- To begin connecting your Raspberry Pi to peaq, click on "Add Machine" and select Raspberry Pi as the machine type and click "Continue →".
- Your Raspberry Pi can simulate a variety of devices on peaq network. Select the machine class you would like your it to act as and click "Continue →"
- Enter the name for your Raspberry Pi and select its model in the drop-down menu.
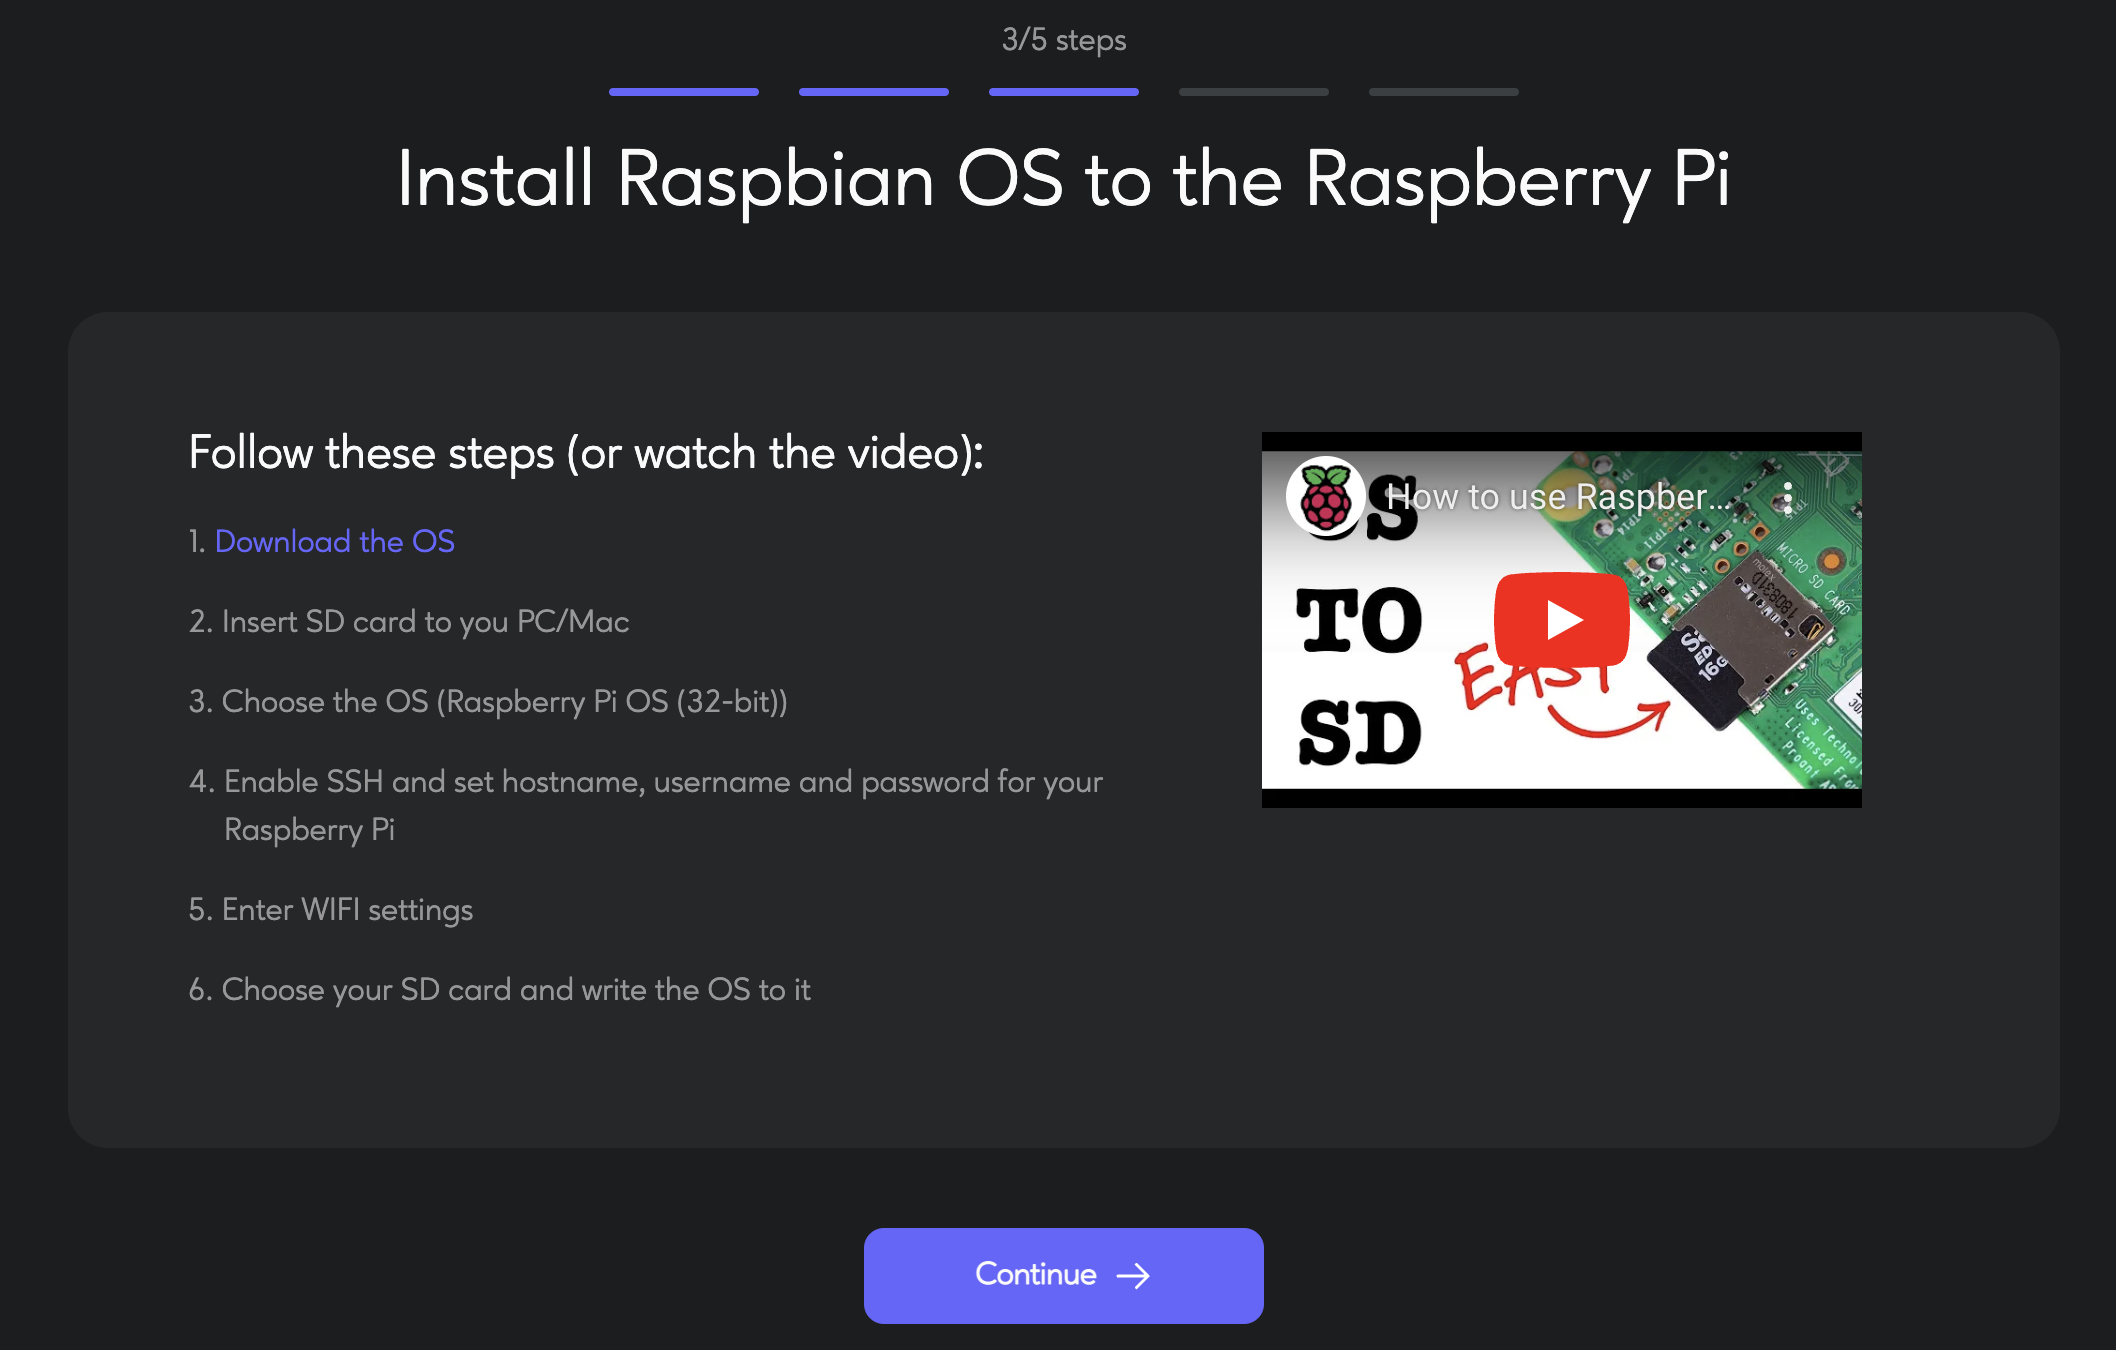
- Next, you'll need to install Raspbian OS on your Raspberry Pi. To do that, follow the steps listed:
- Enter your Raspberry Pi's domain name and its name that you assigned in the previous step.

- Open the terminal or the command line on your PC or Mac and paste the command you see on the screen (the command's exact configuration depends on your domain name and Raspberry Pi name).
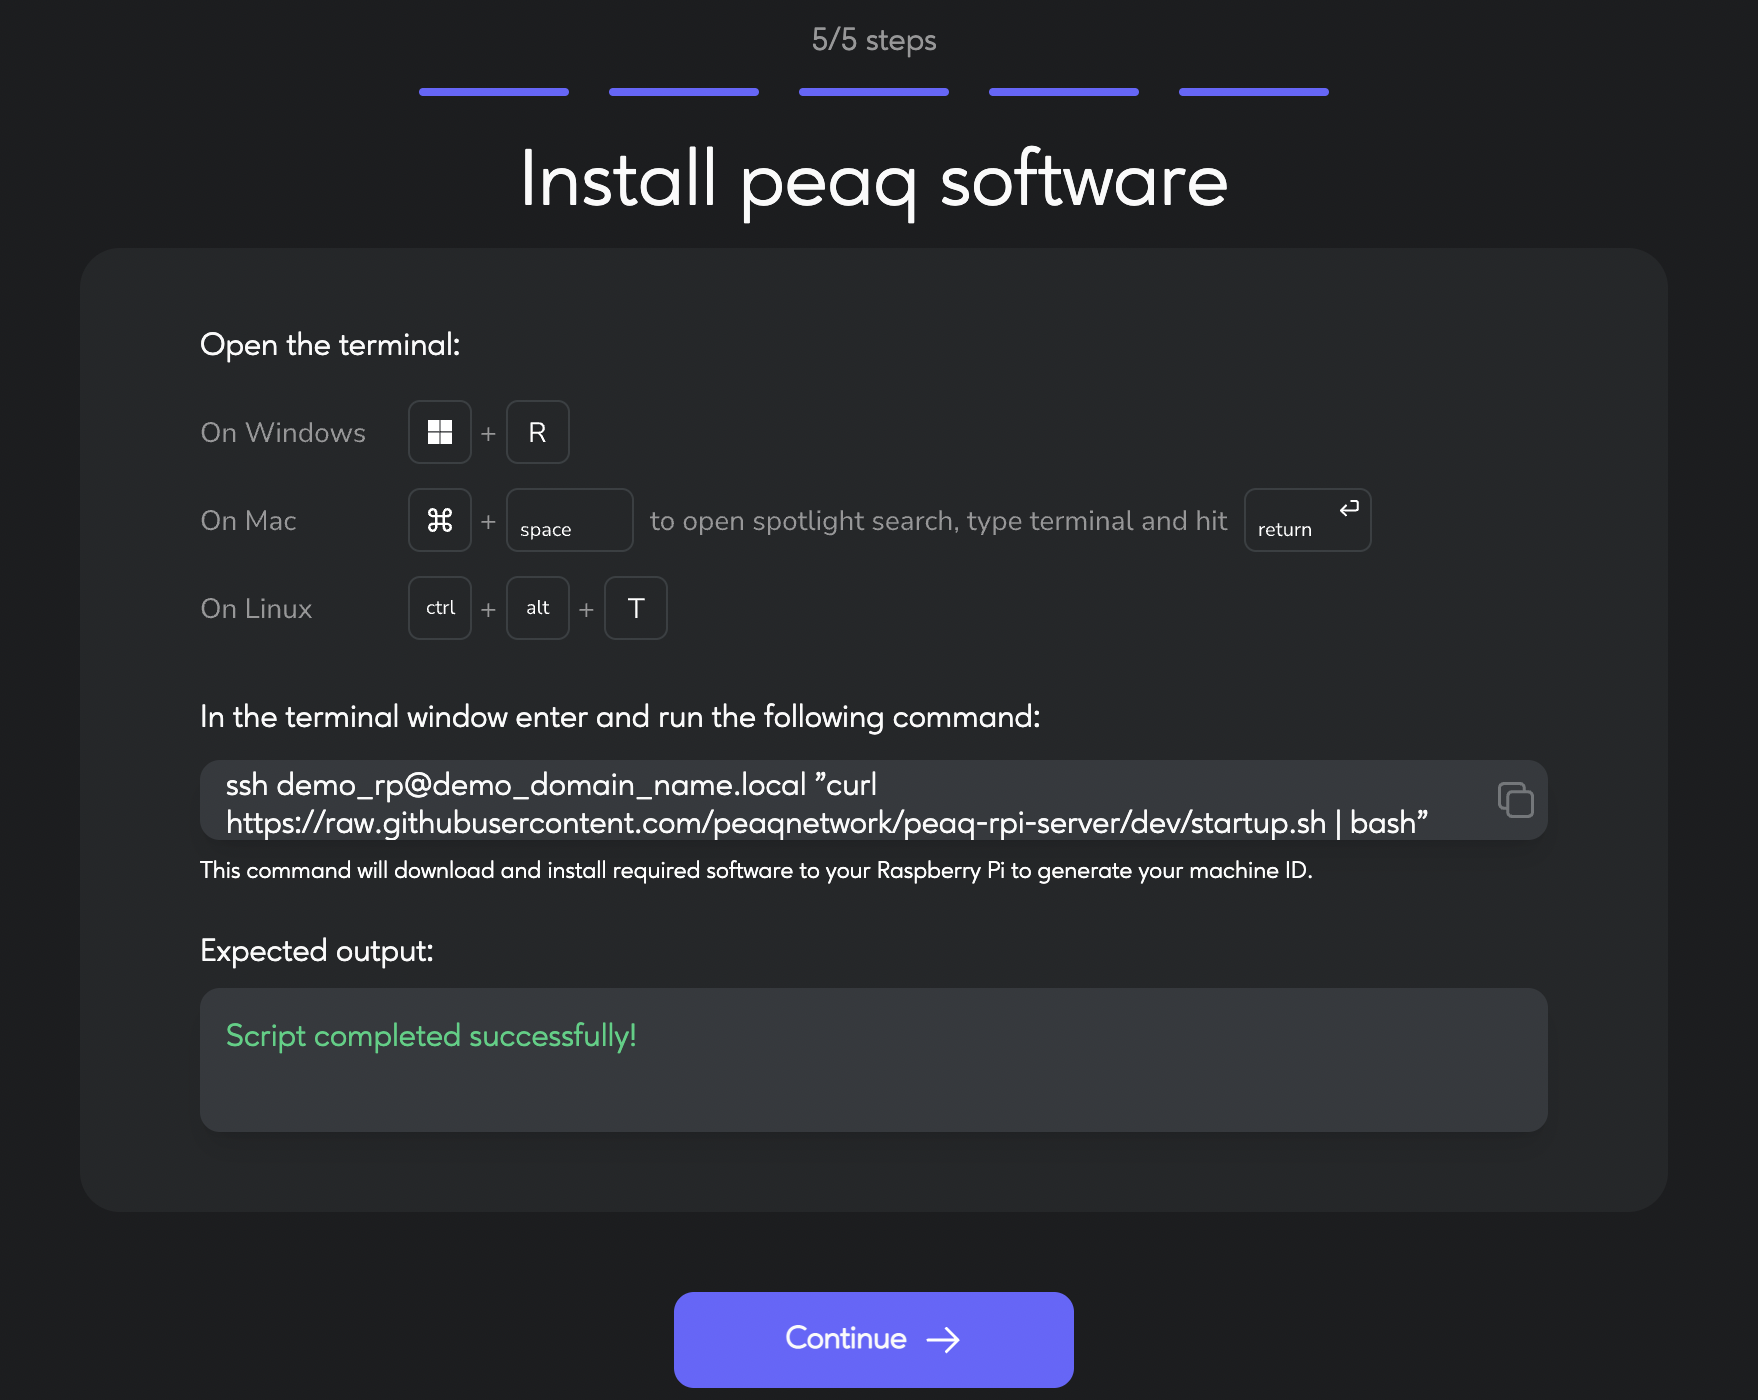
- If installed successfully, you will see this pop-up.

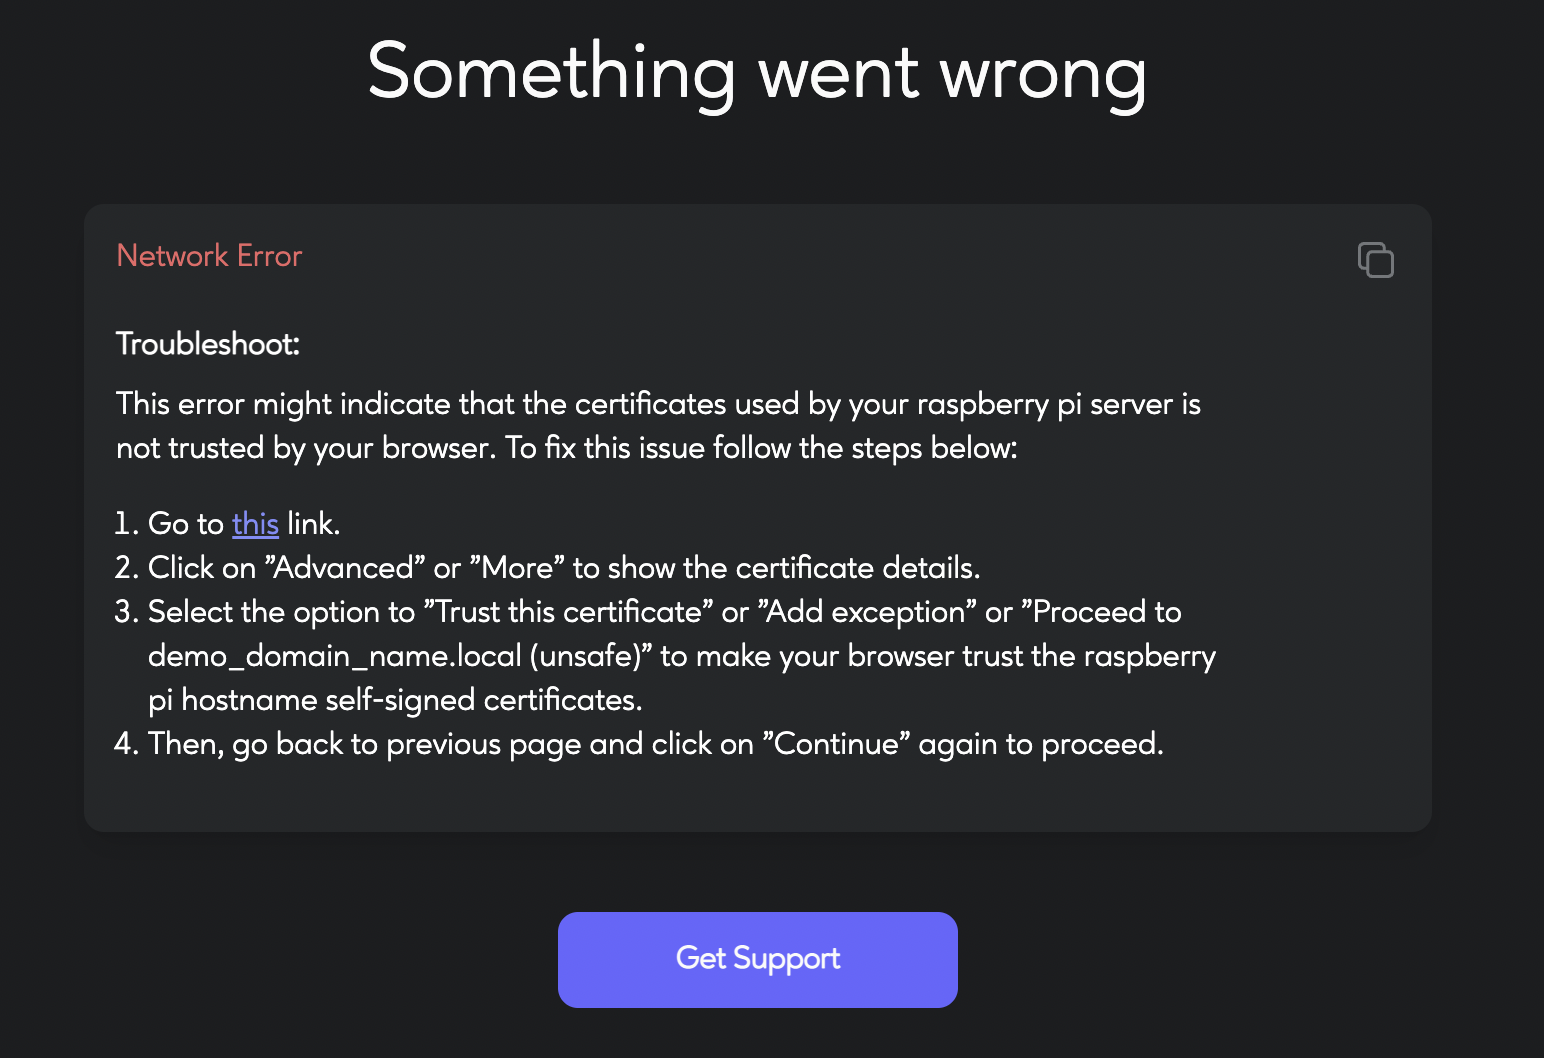
- If the process fails, you'll see the error message and a tip on how to fix the issue yourself. If you don't manage to solve the problem yourself, follow the link to the Discord channel where you could get all the needed support.
Connect your machine to a dApp
- The next step is to connect your machine to a dApp to make it discoverable for the dApp's users. First, head to the dApp store page on peaq control.
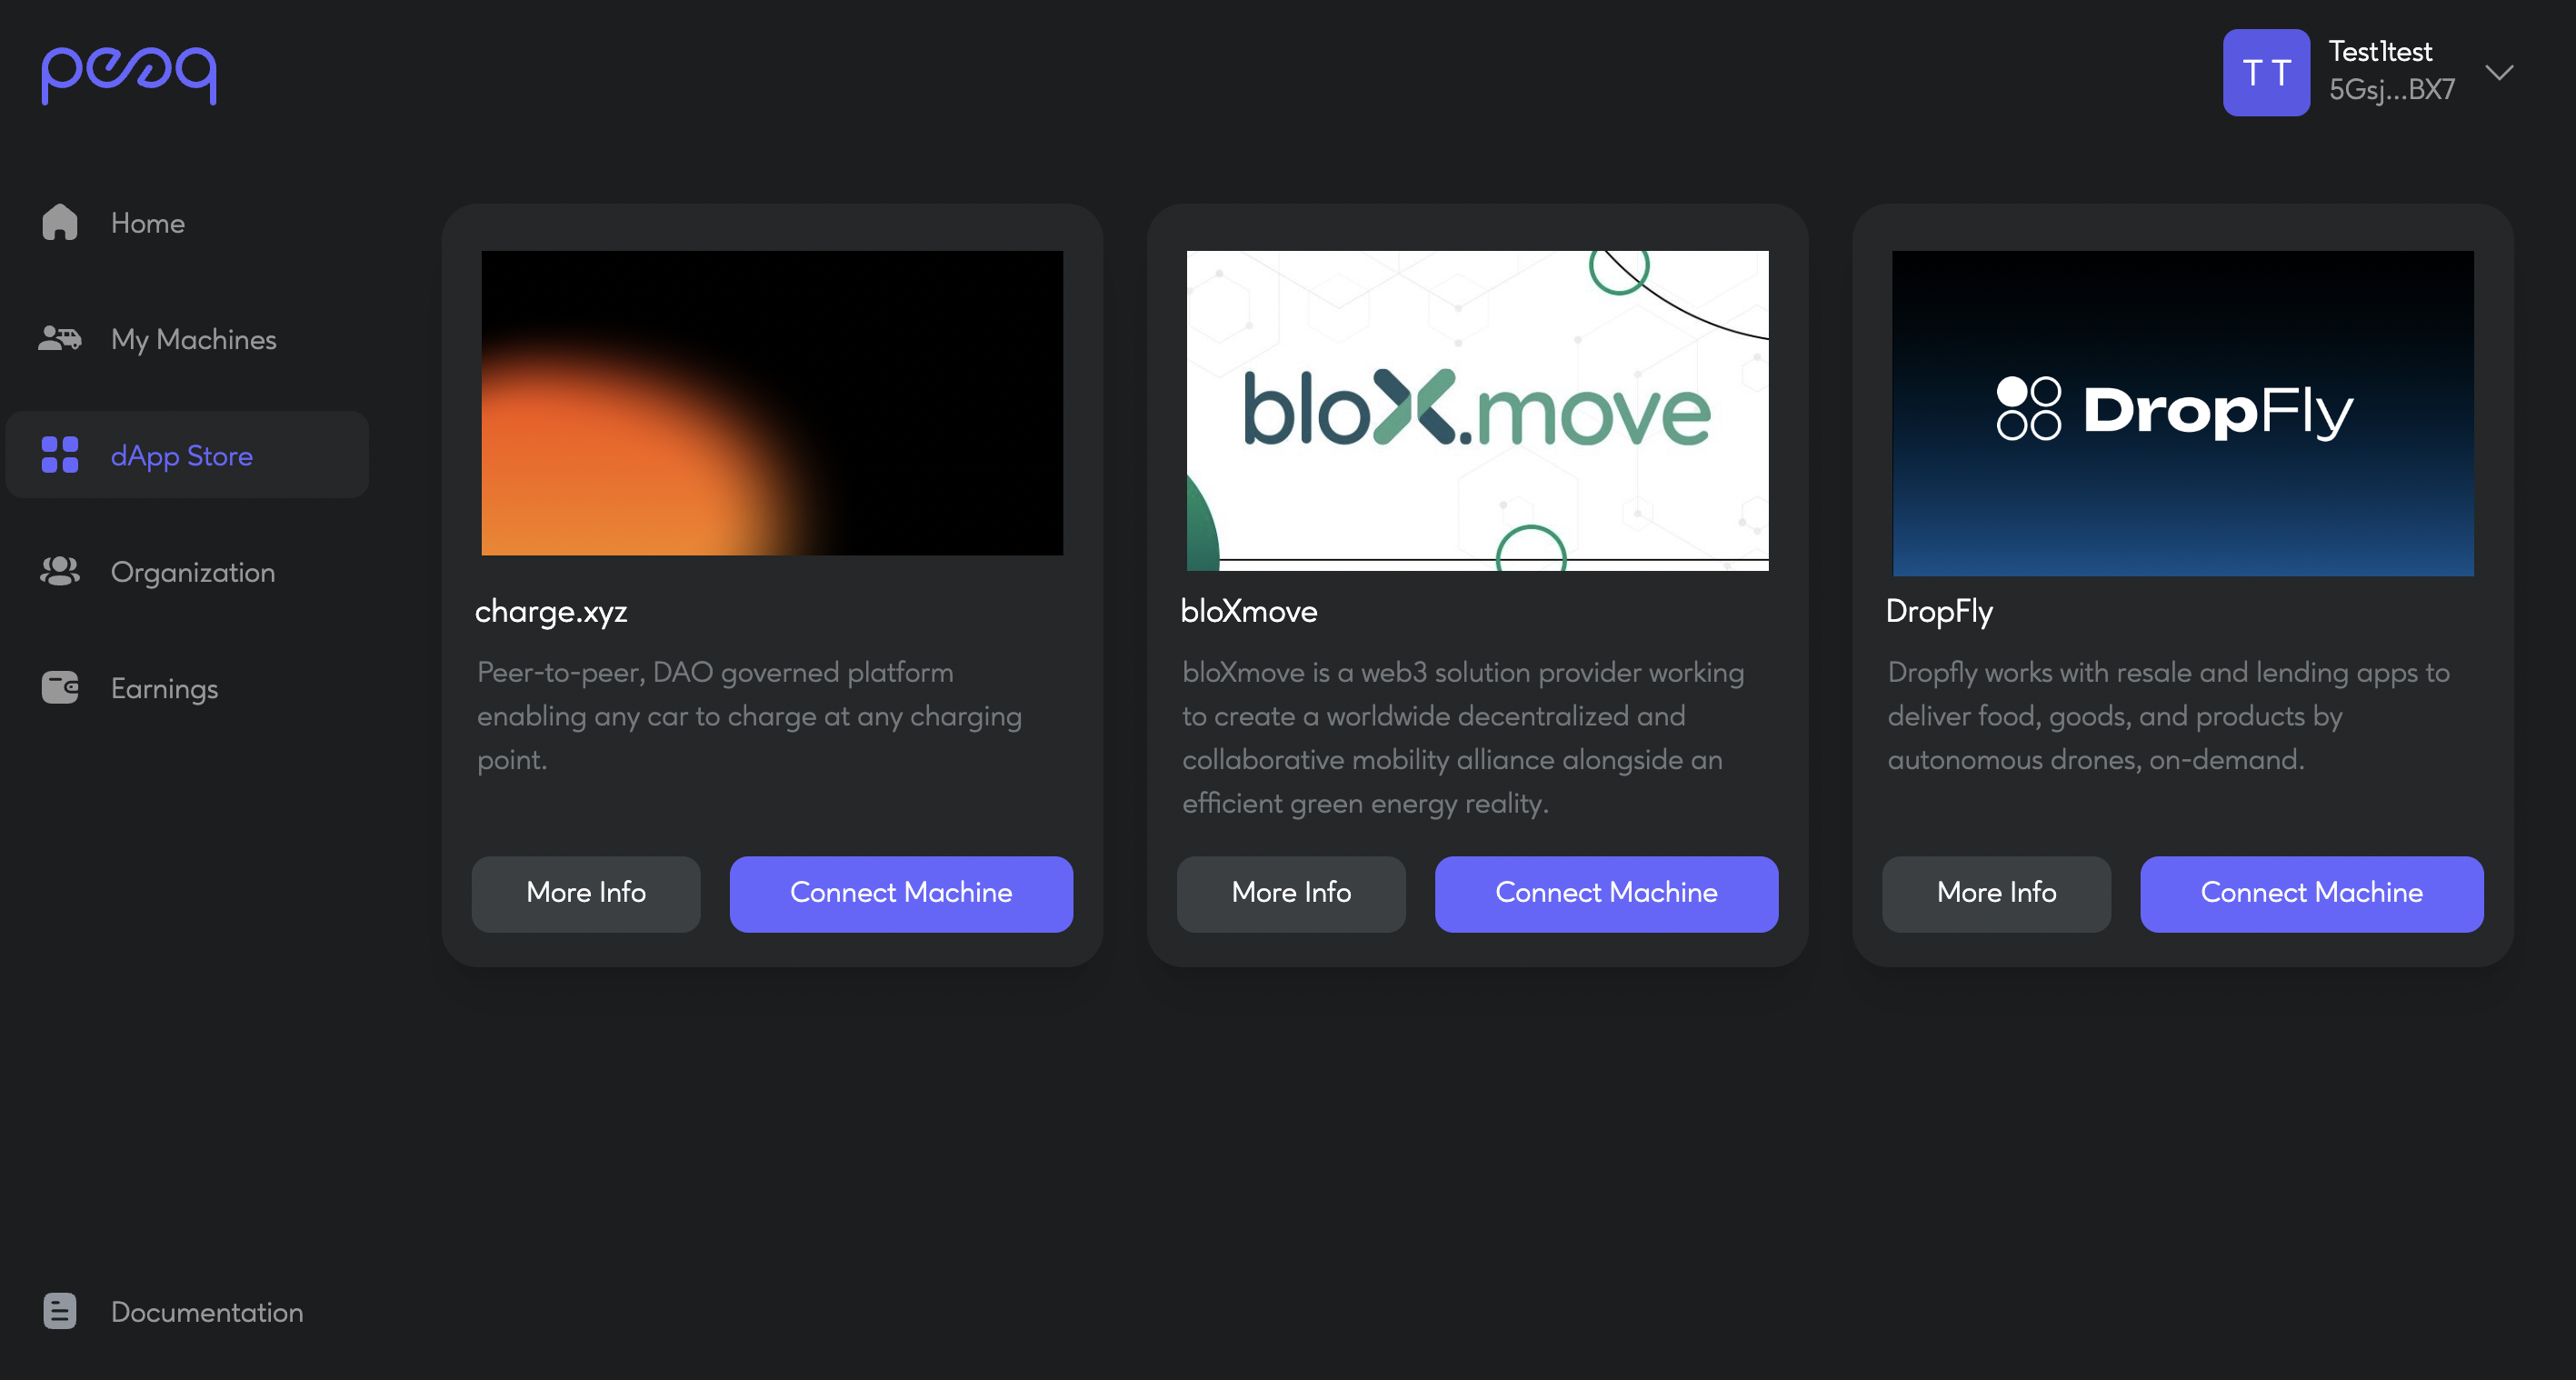
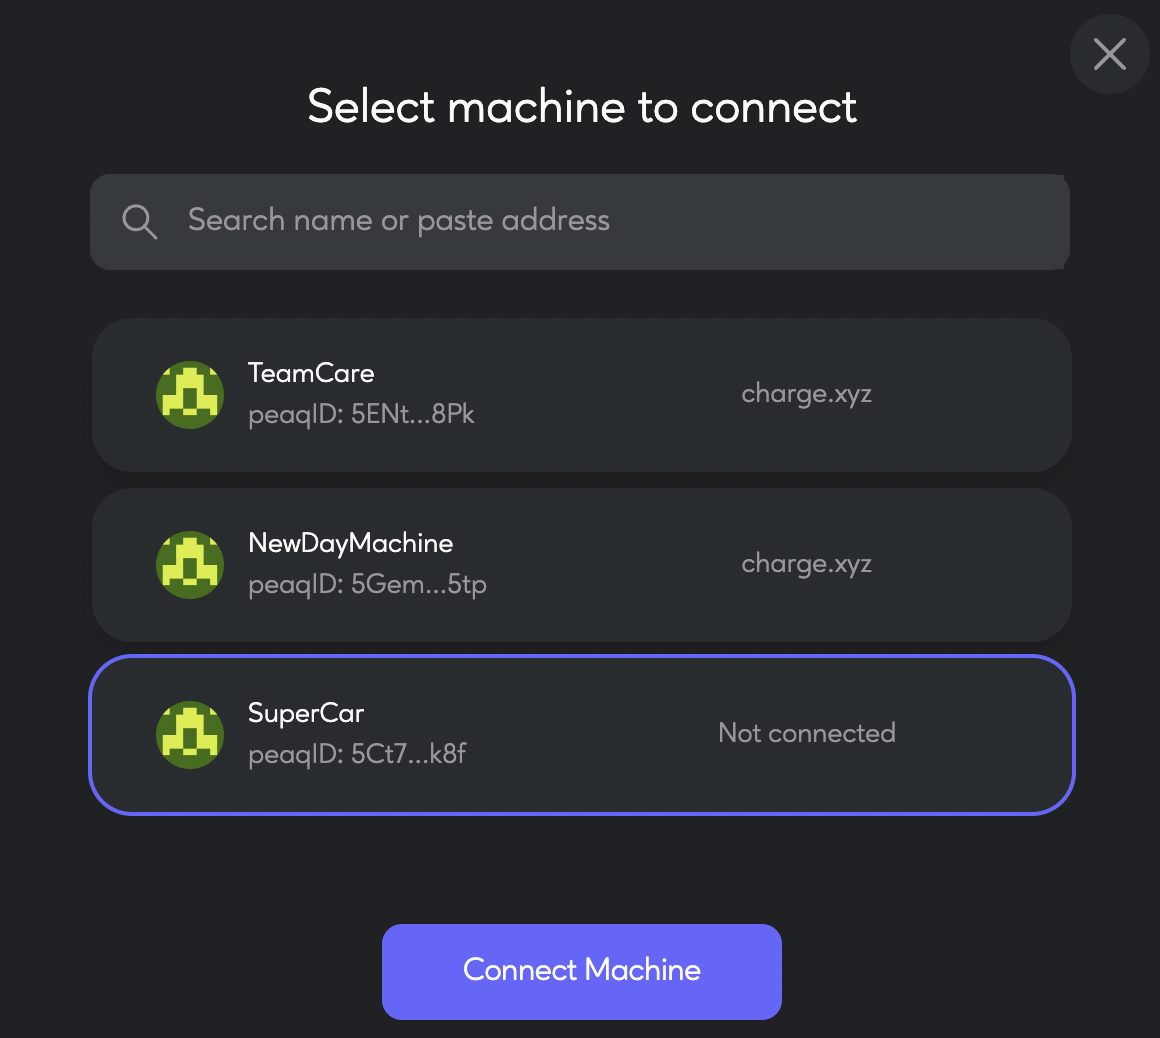
- Click "Connect Machine" on the dApp compatible with your machine type. In this case the dApp is charge.xyz, a decentralized peer-to-peer electrical vehicle charging platform.
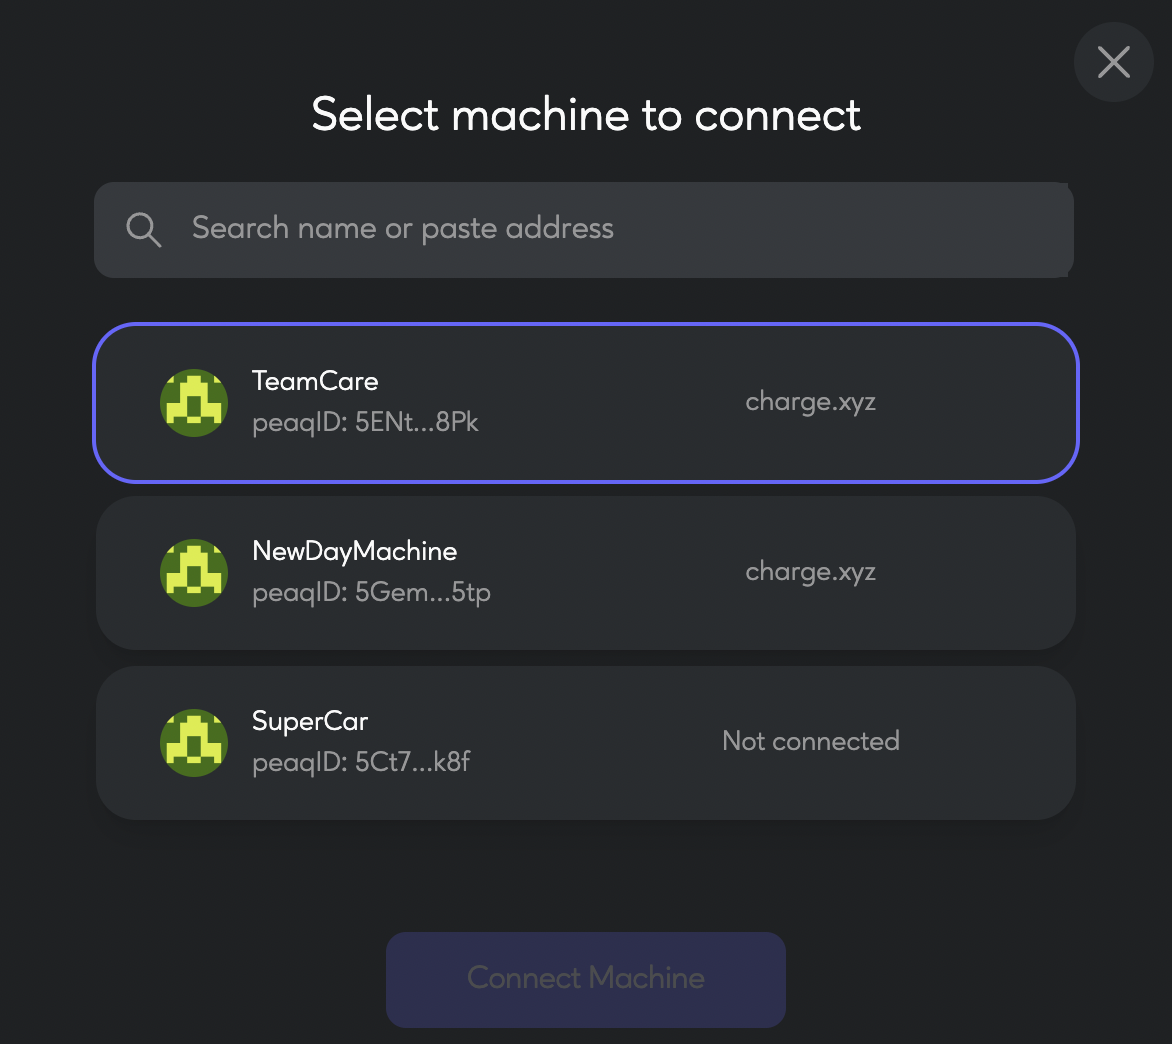
- After clicking "Connect Machine", you will see the list of your machines which are not yet connected to dApps. Select the machine you would like to connect to the dApp and click "Connect Machine".
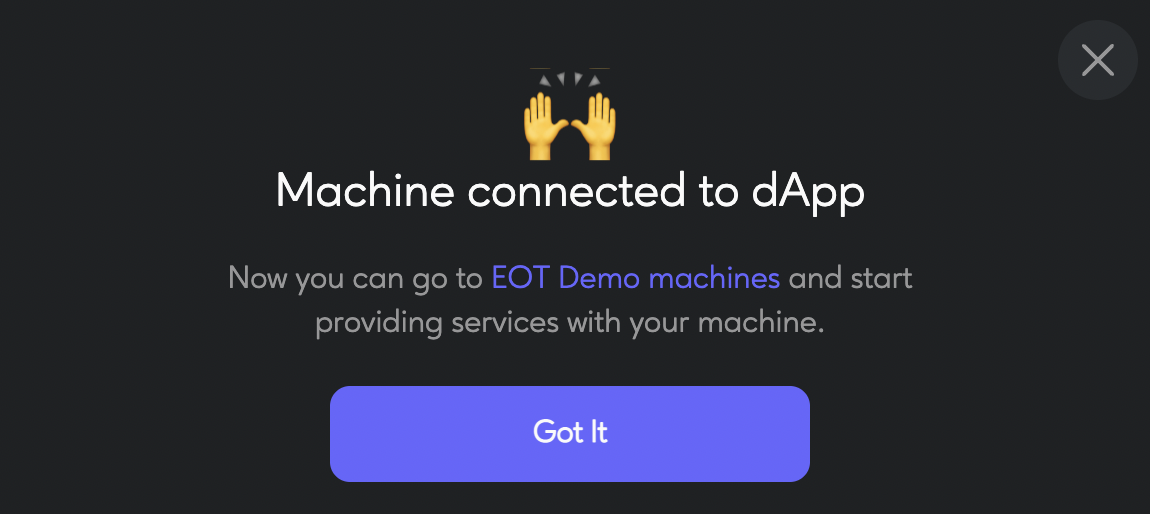
- Congratulations! You connected your first machine to the dApp. Now, let's go to eot demo to use your machine.
Provide a service with your machine
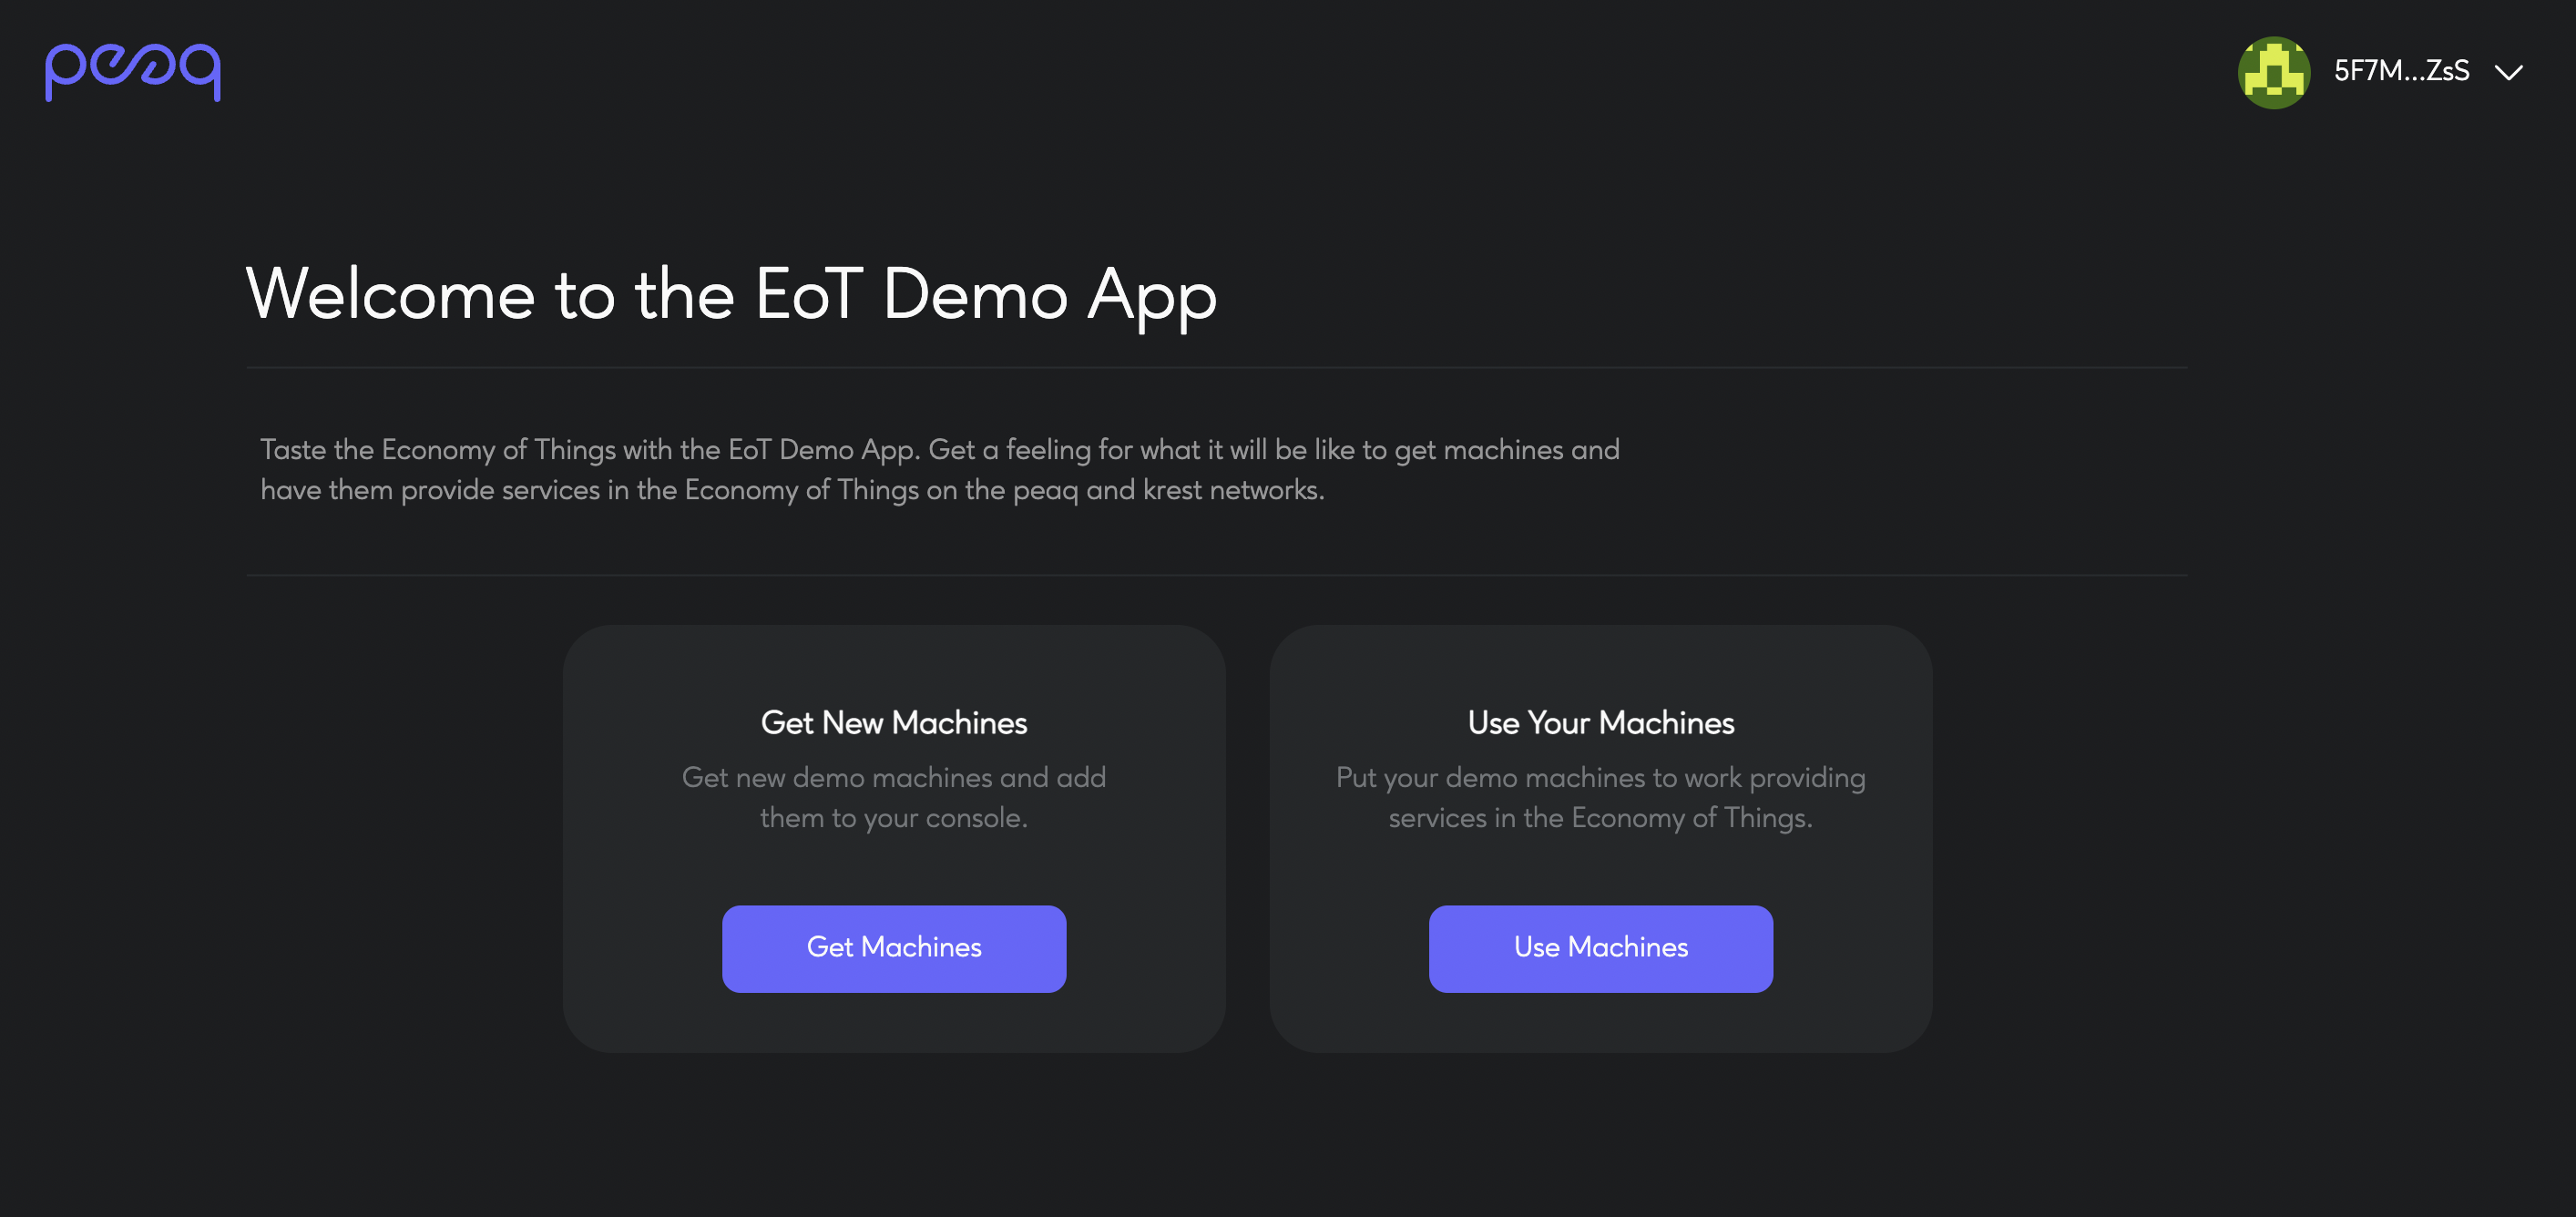
- Let's put your machine to use! Click "Use Machines" on the eot demo app's home screen.
- On the next page, you will see the entire fleet of your demo machines broken down by machine class:
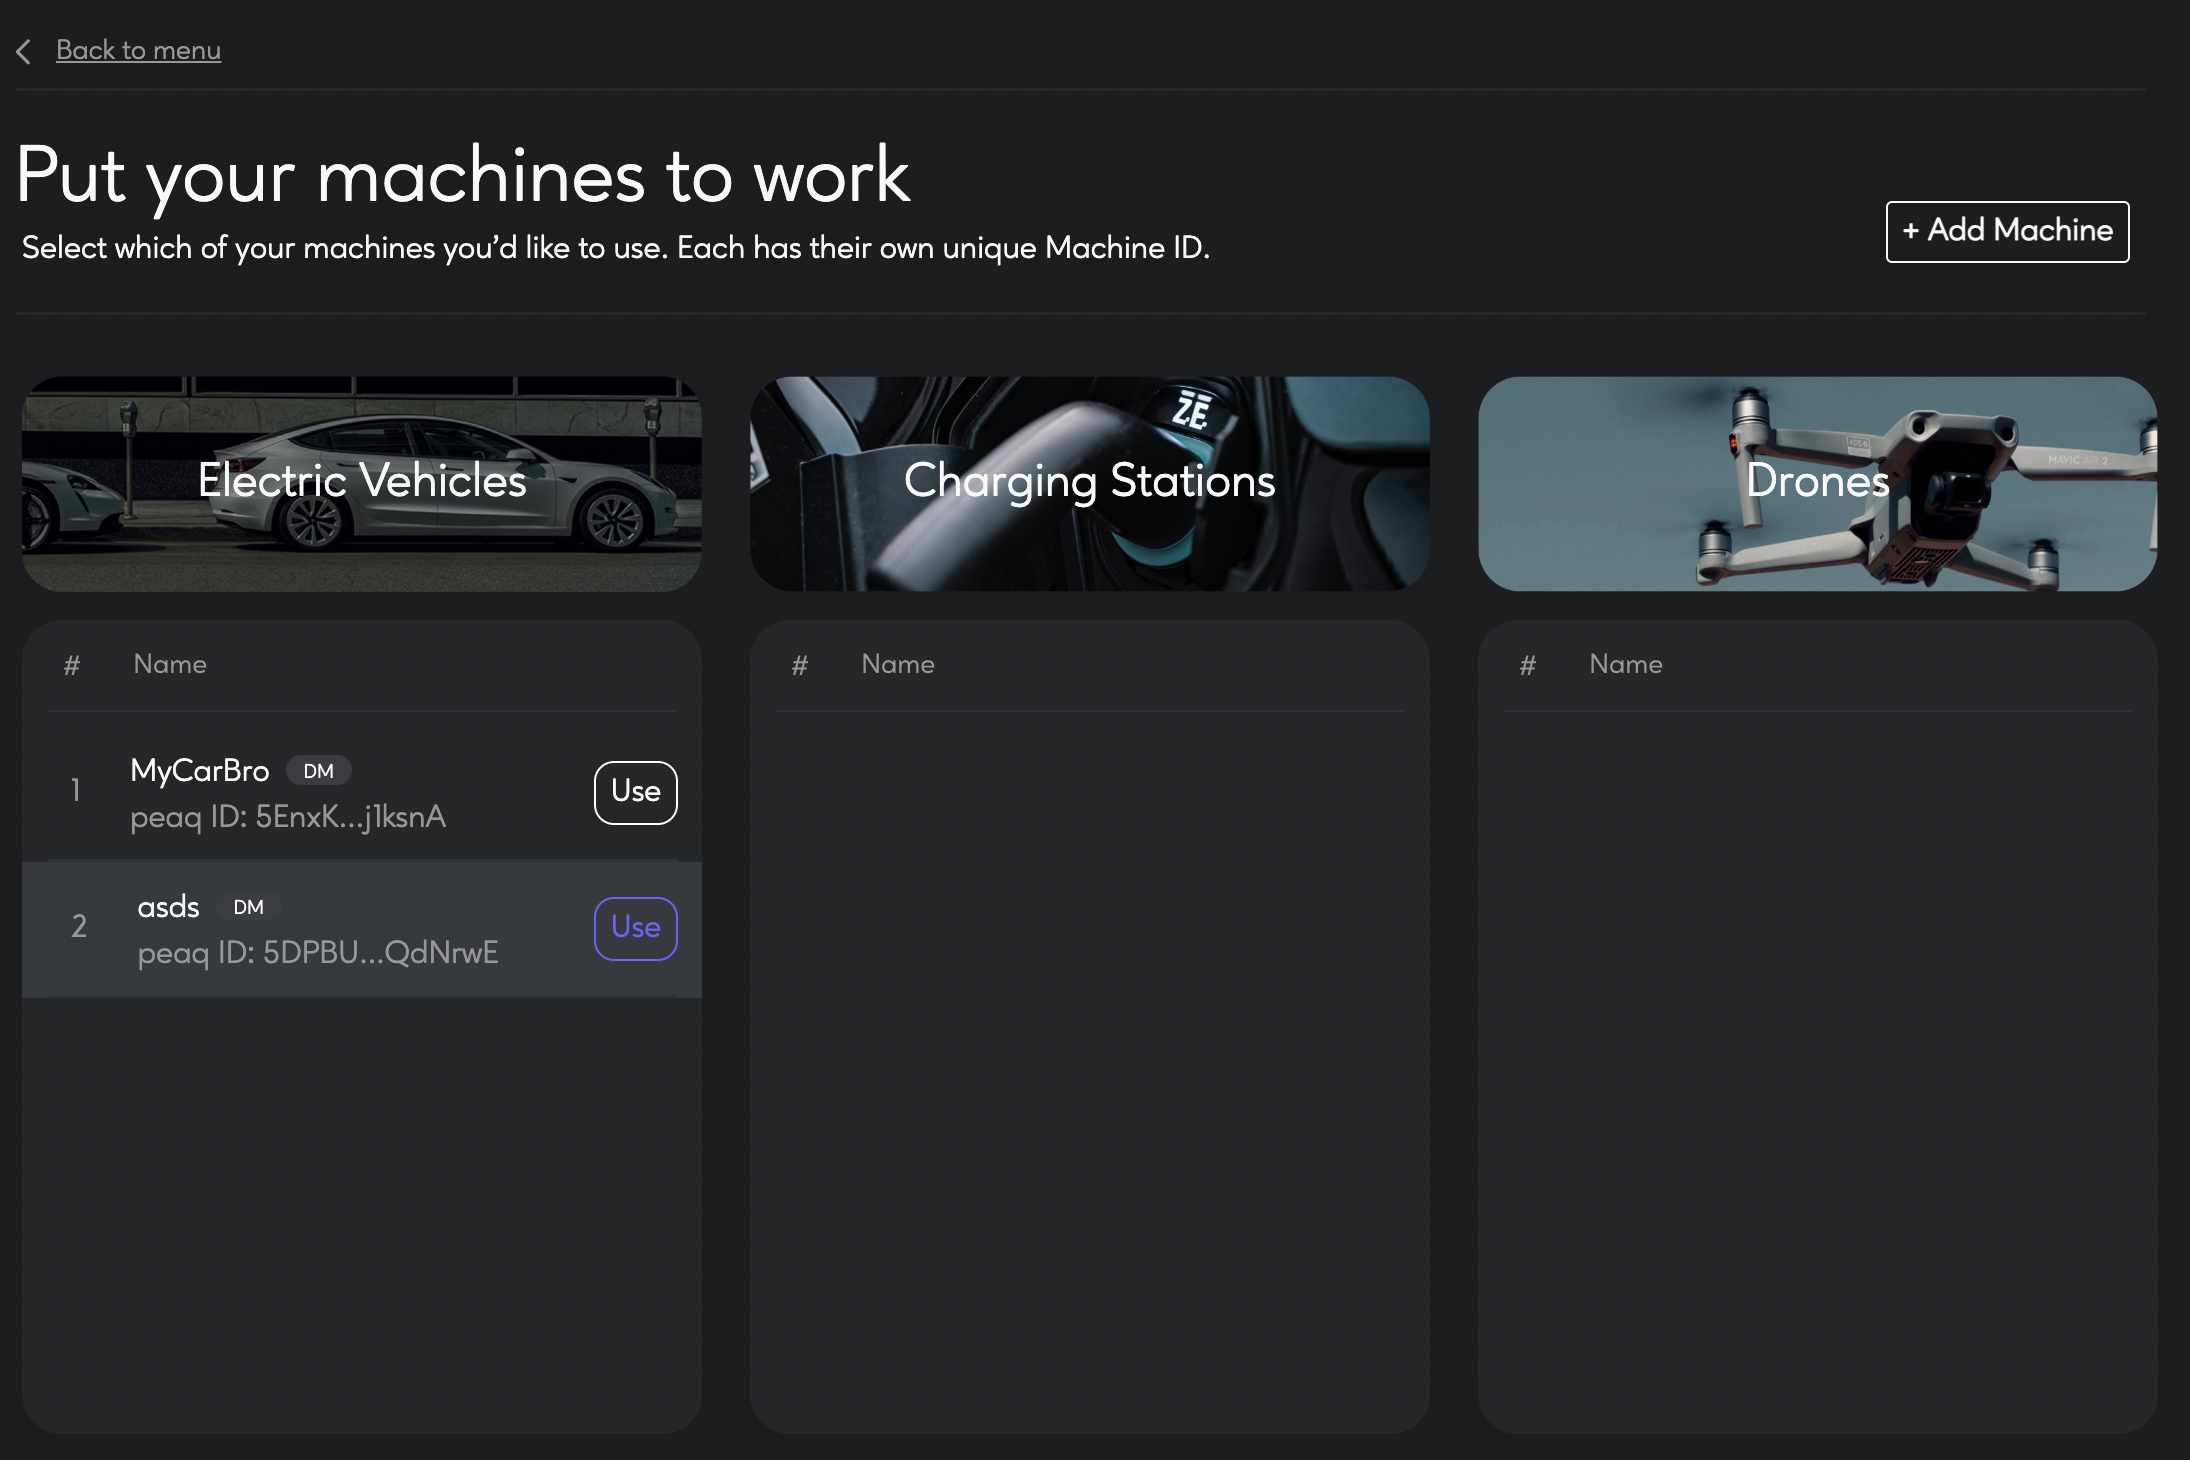
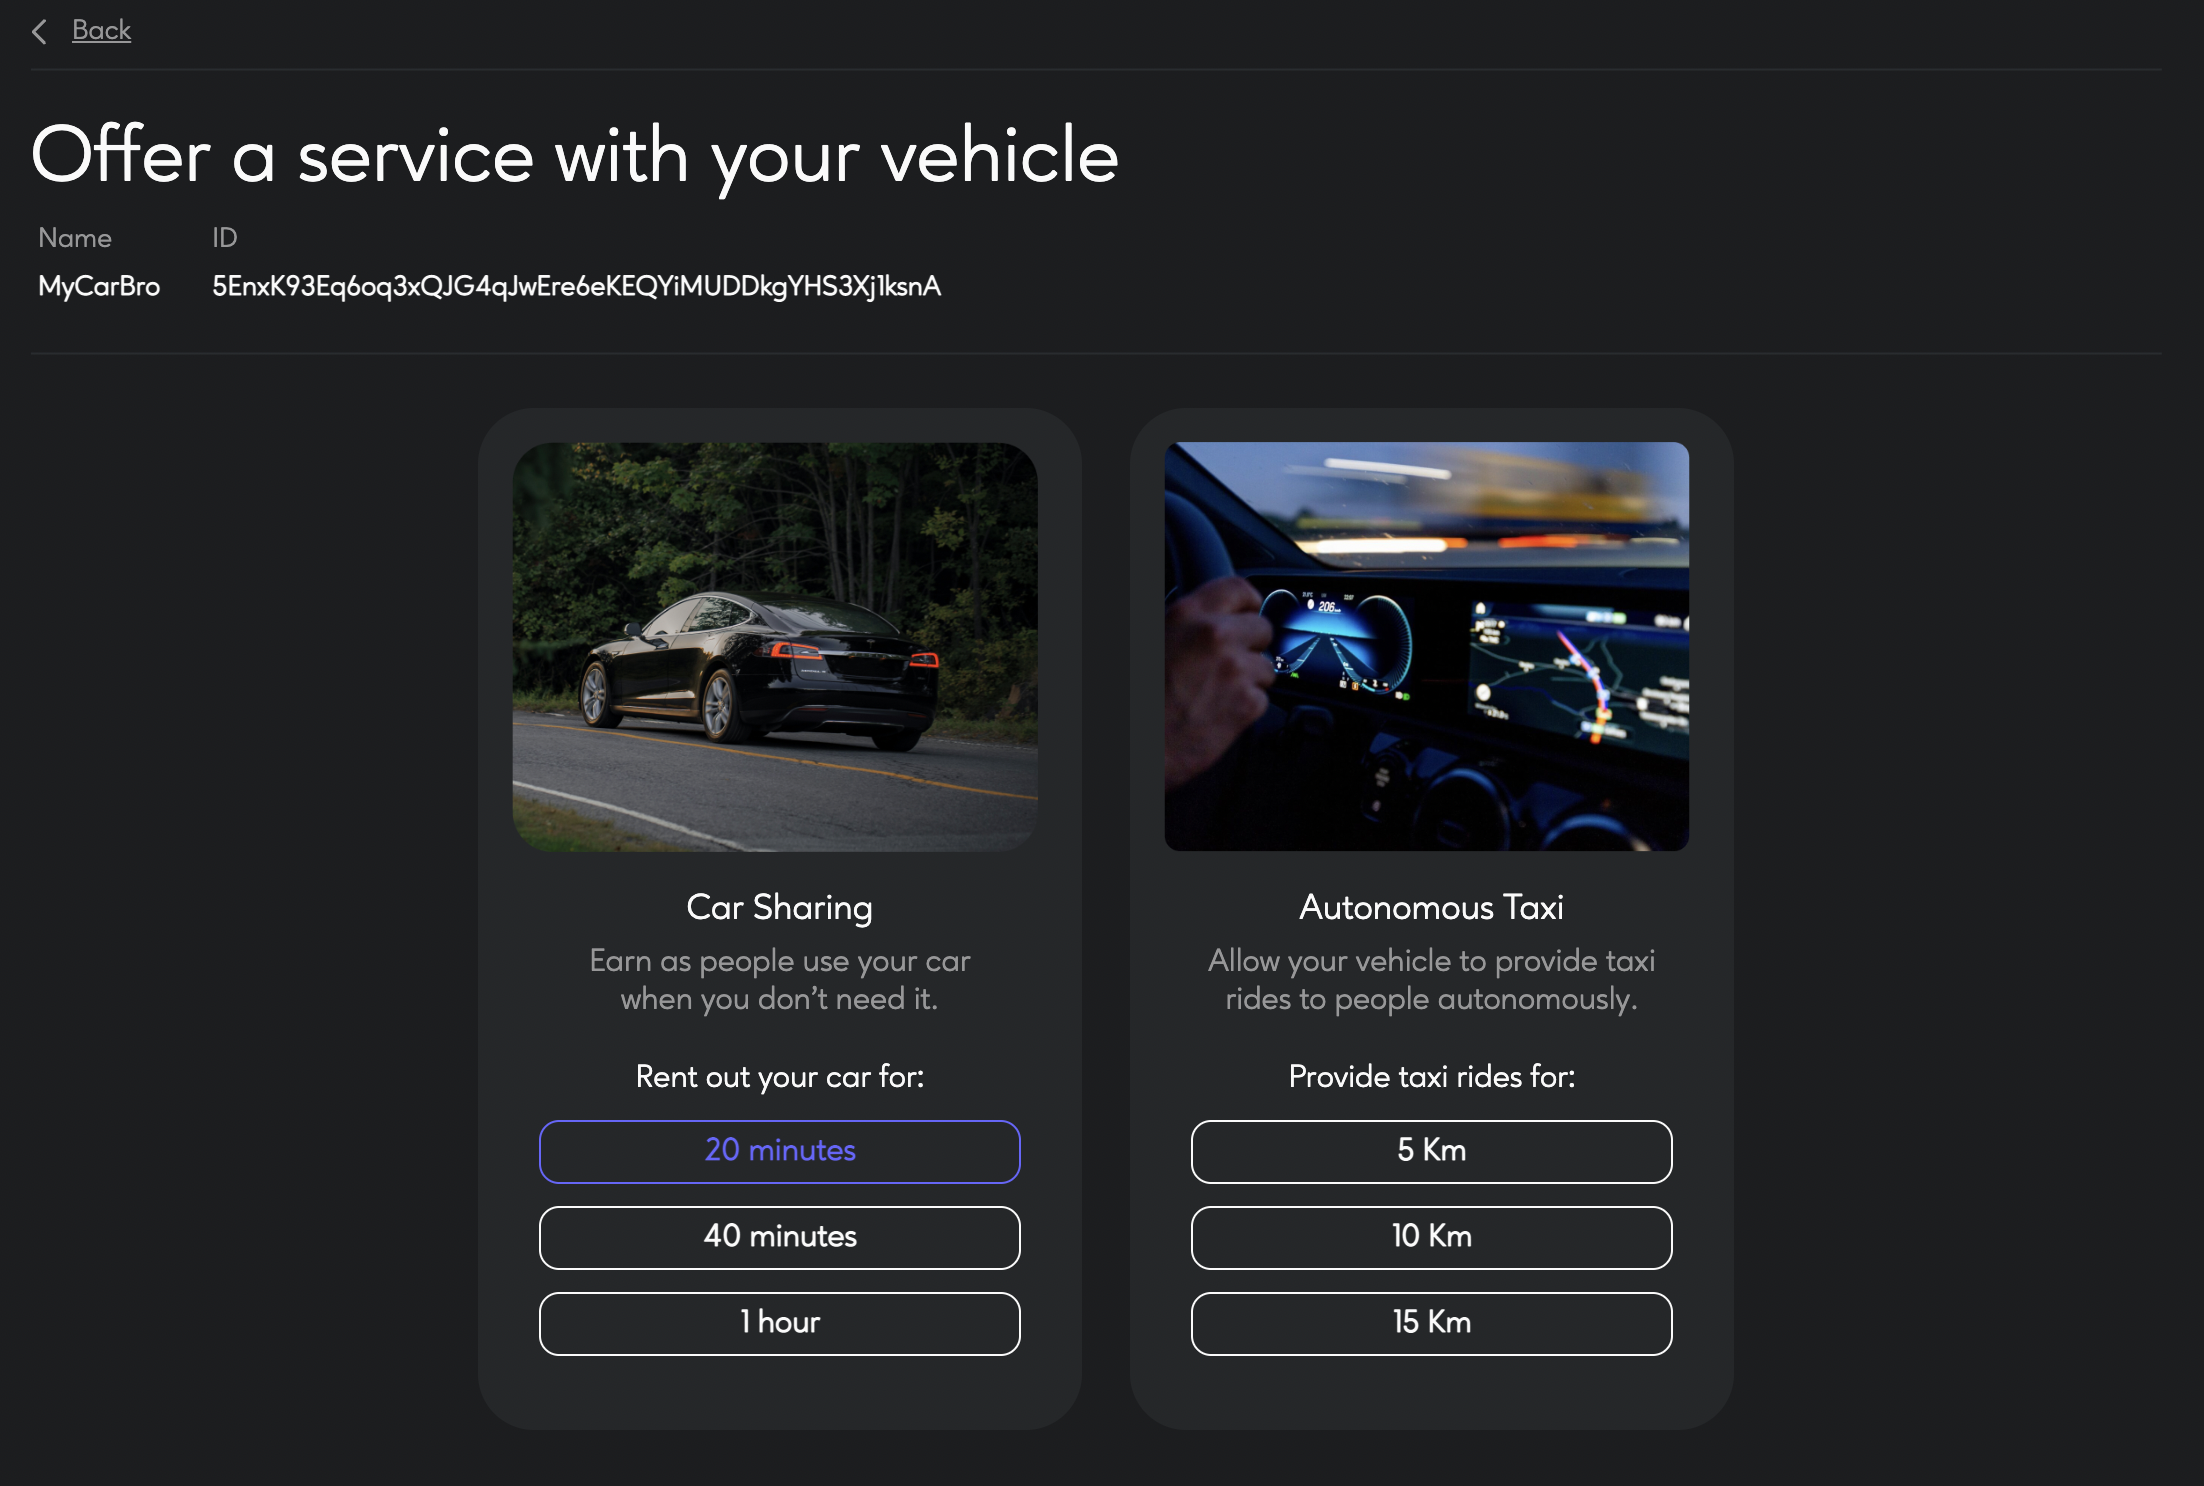
Select any machine you'd like to put to work and click "Use".
On the next screen, select a service you would like to provide and click on it.
- After successfully providing a service with your demo machine, you will see a pop-up window informing you how many test tokens you've earned.

- Now you can navigate back to peaq control and explore the Home, My Machines, and Earnings pages to get more information about the performance and earnings of your machines.
Home page
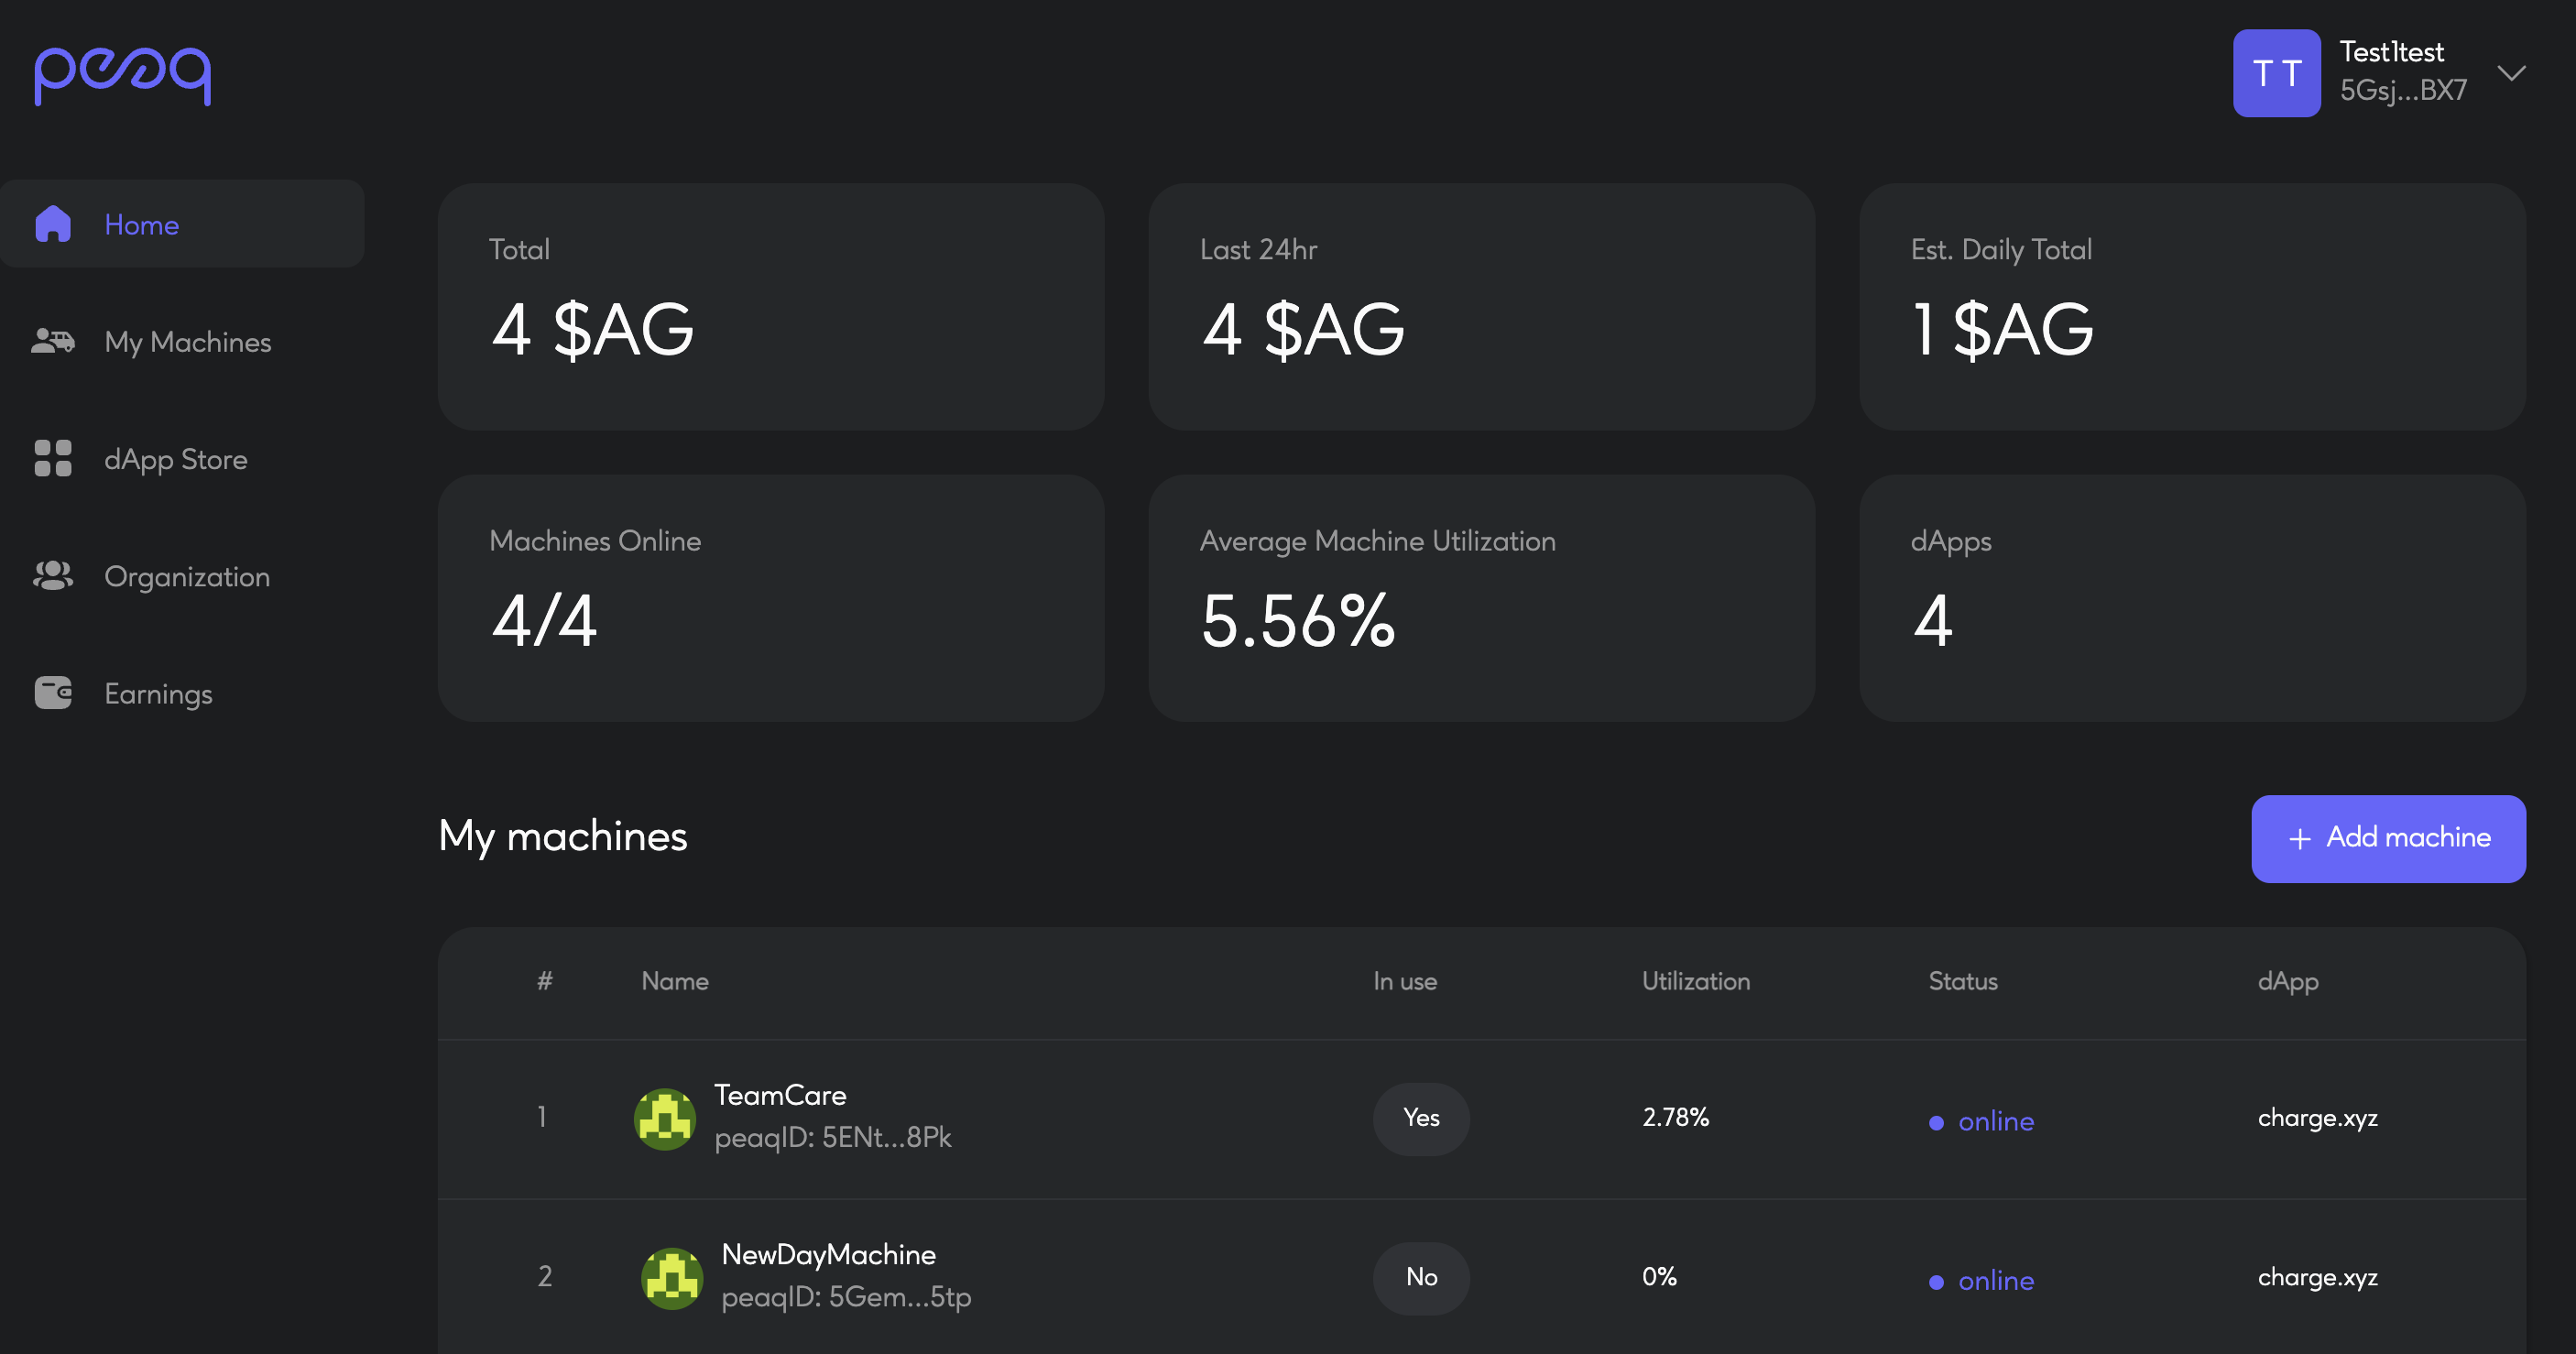
On the Home page, you can view basic statistics about your earnings and machine's performance
My Machines
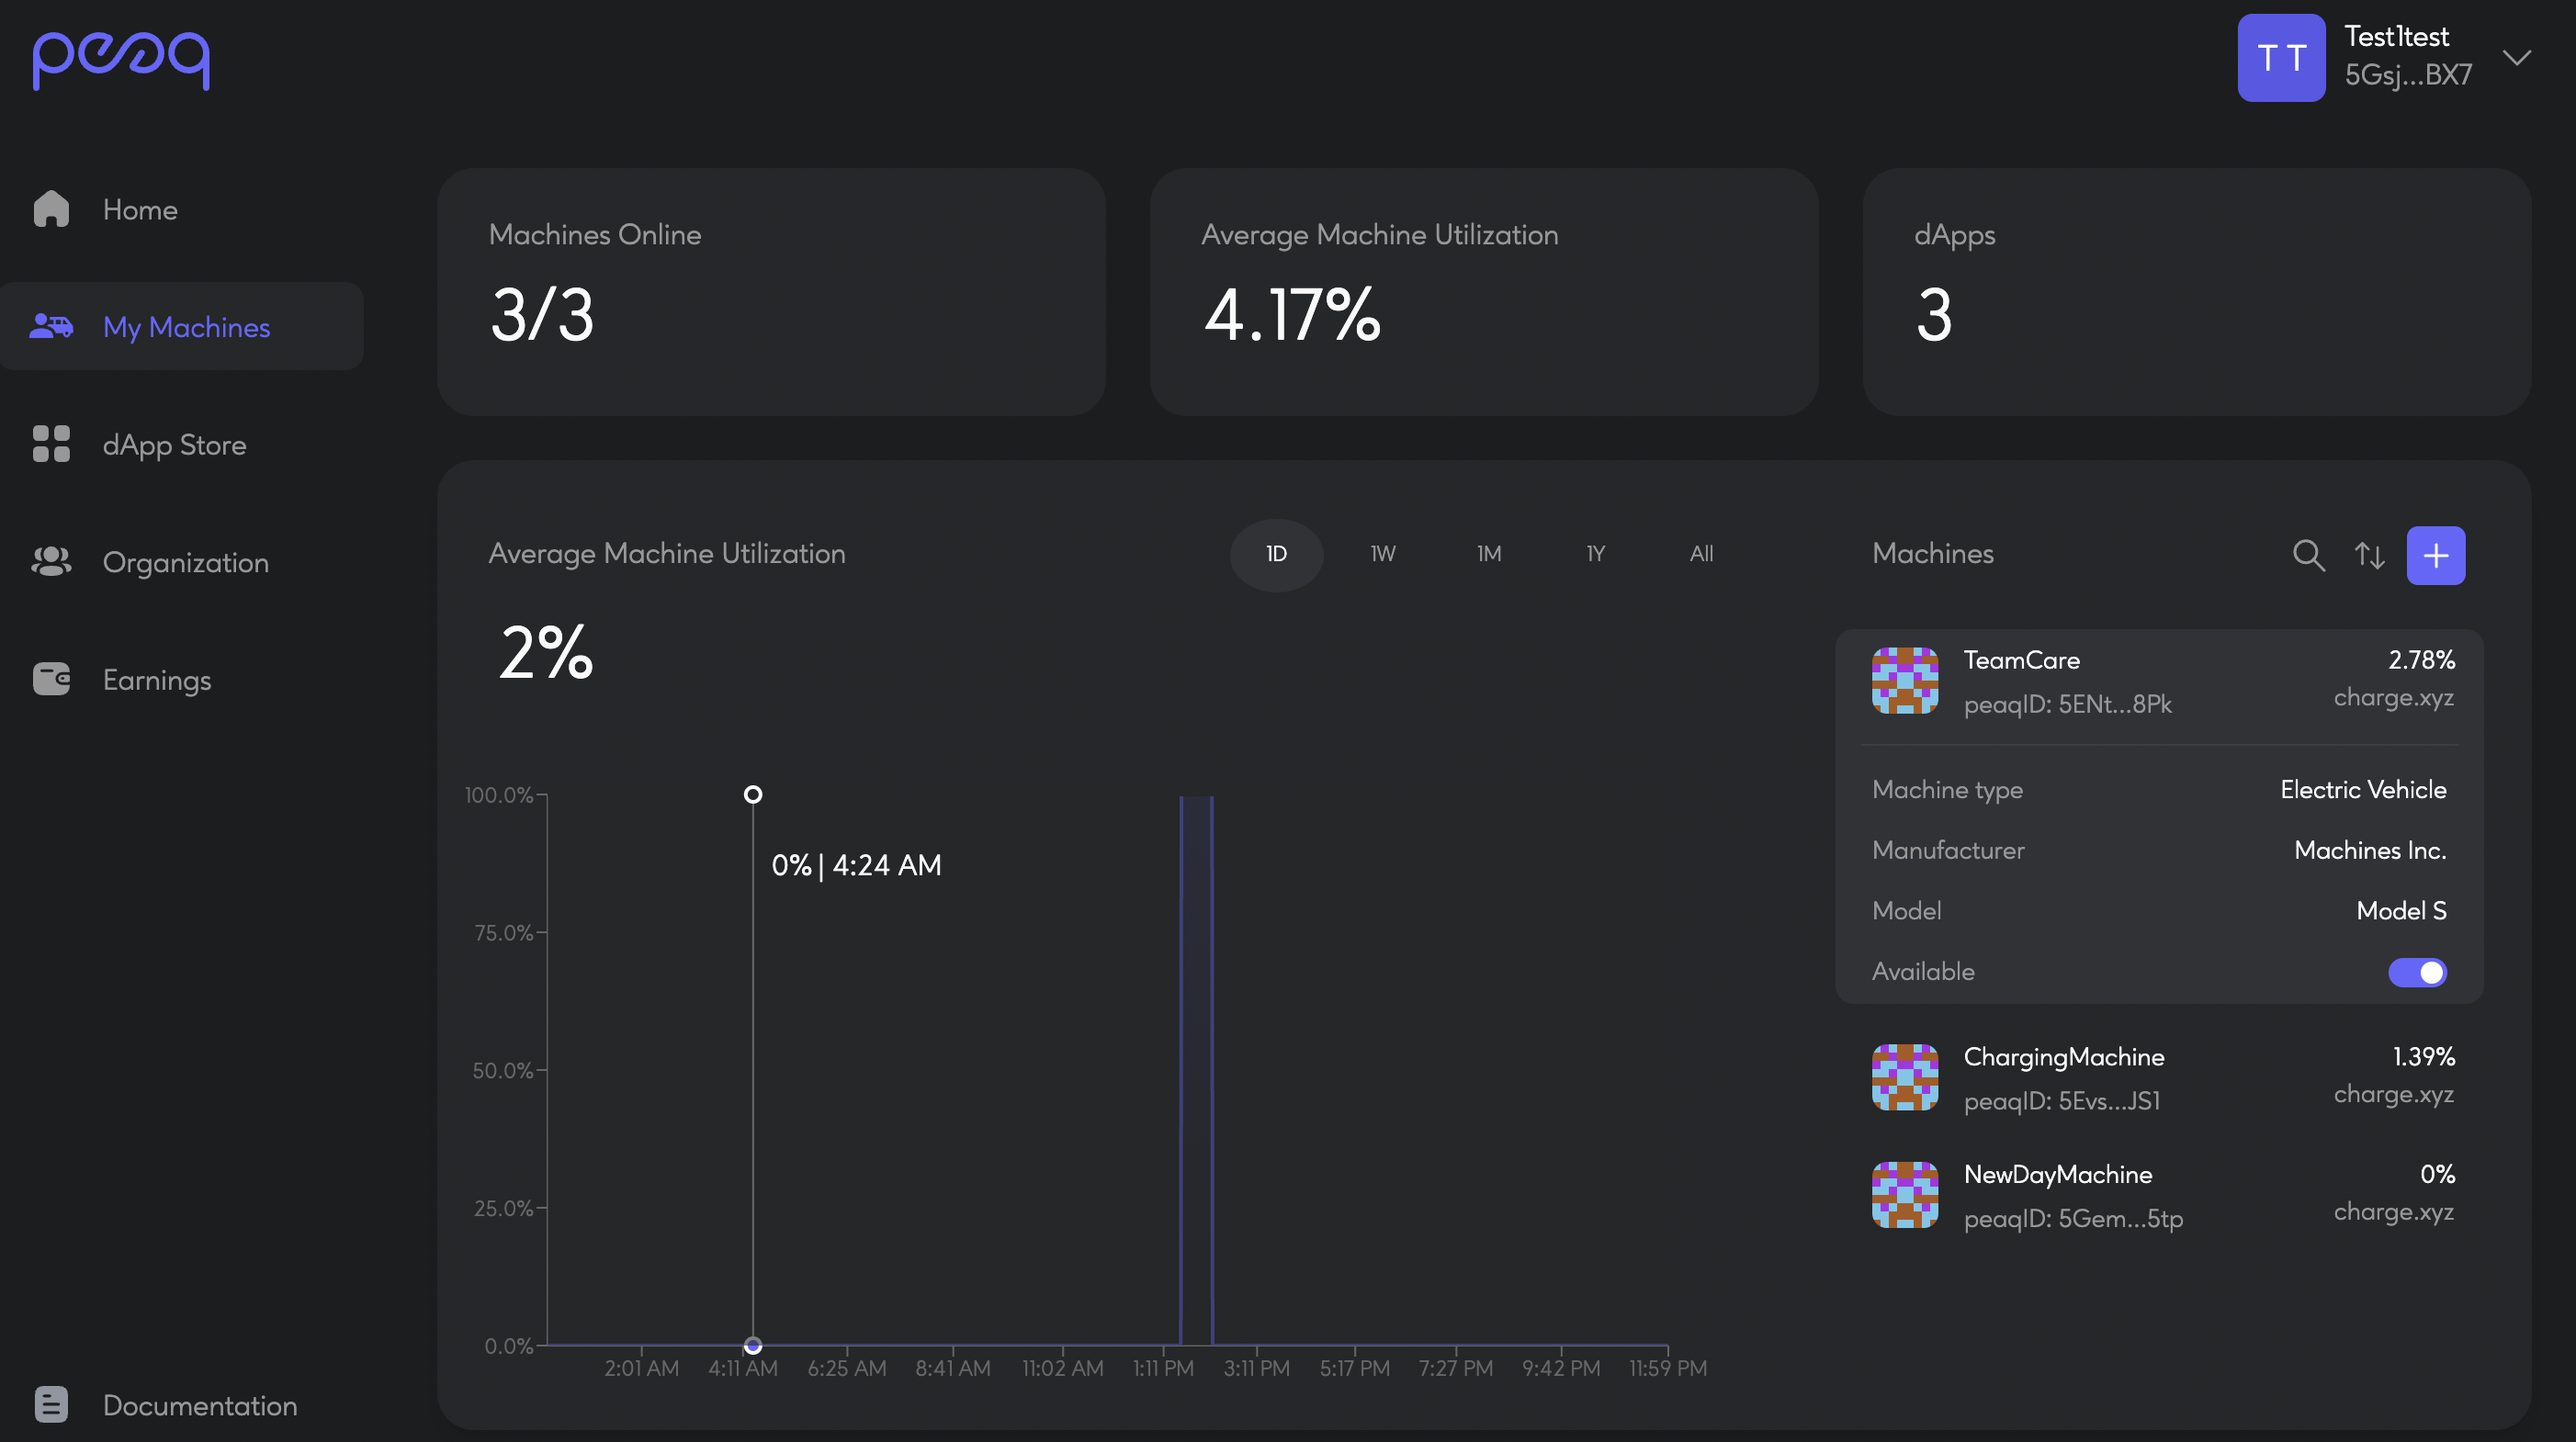
On the My Machines page you can view the history of utilization for any of your machines
Earnings
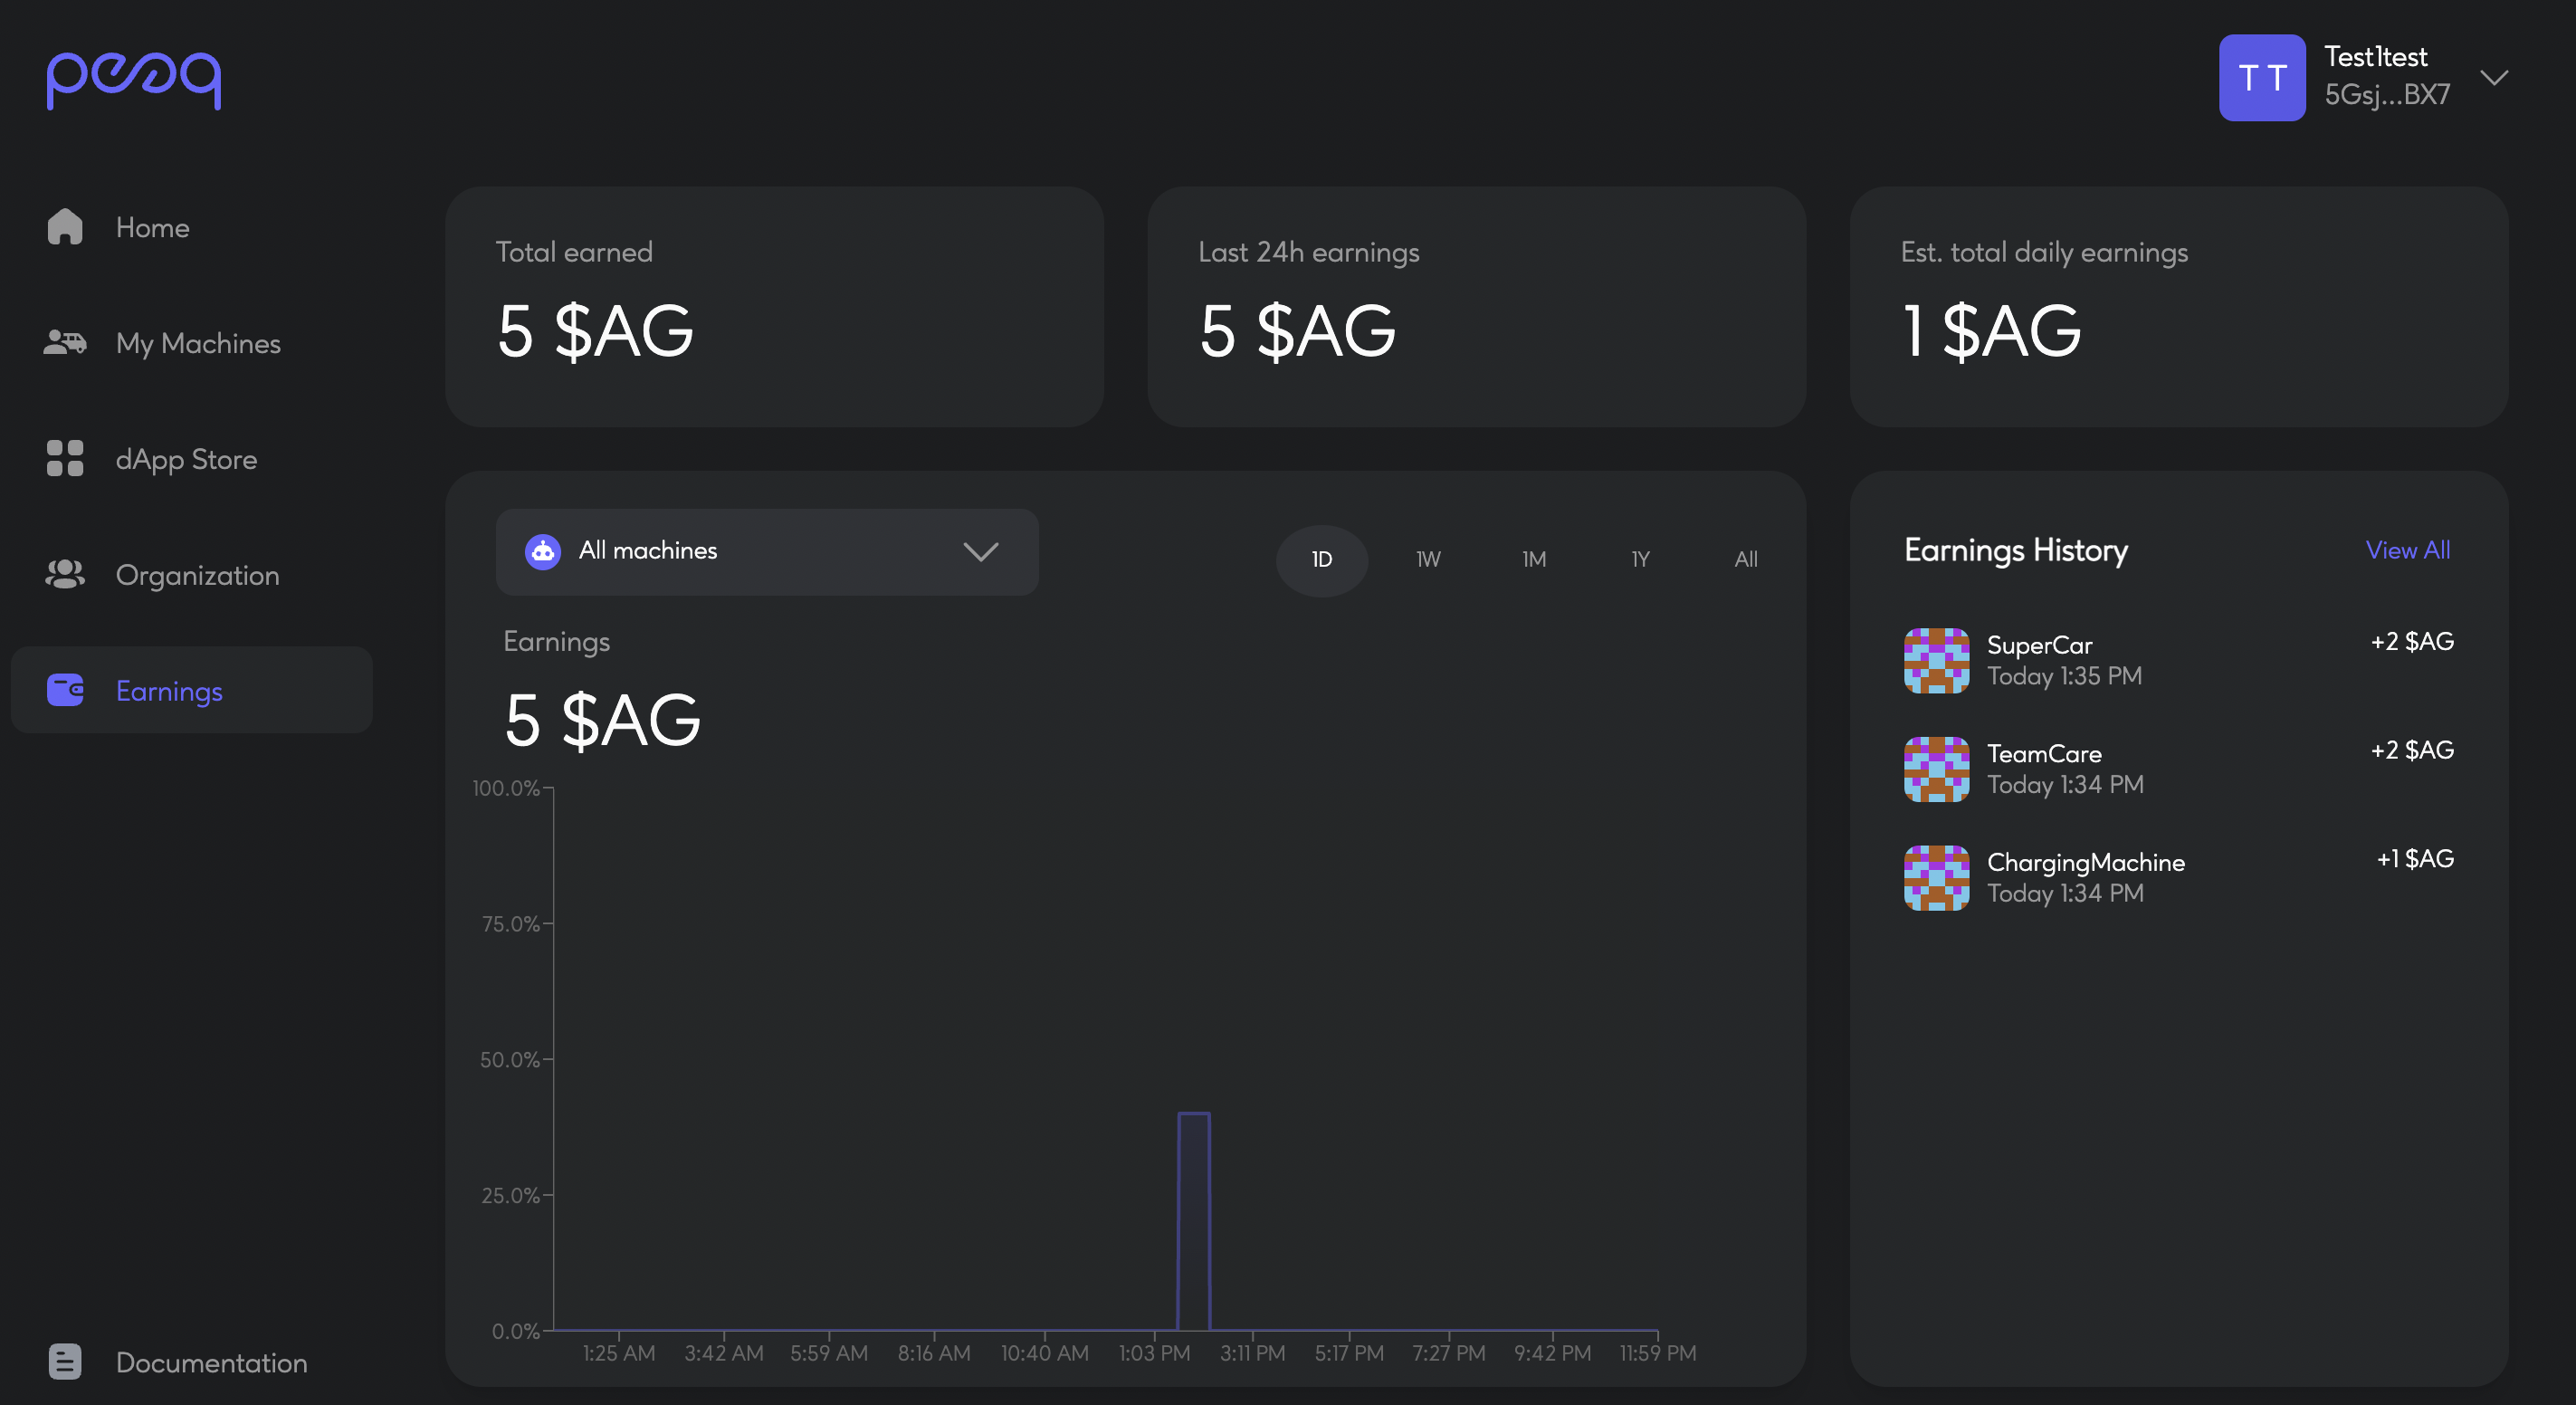
On the Earnings page, you can see the whole history of your machines earnings and transactions
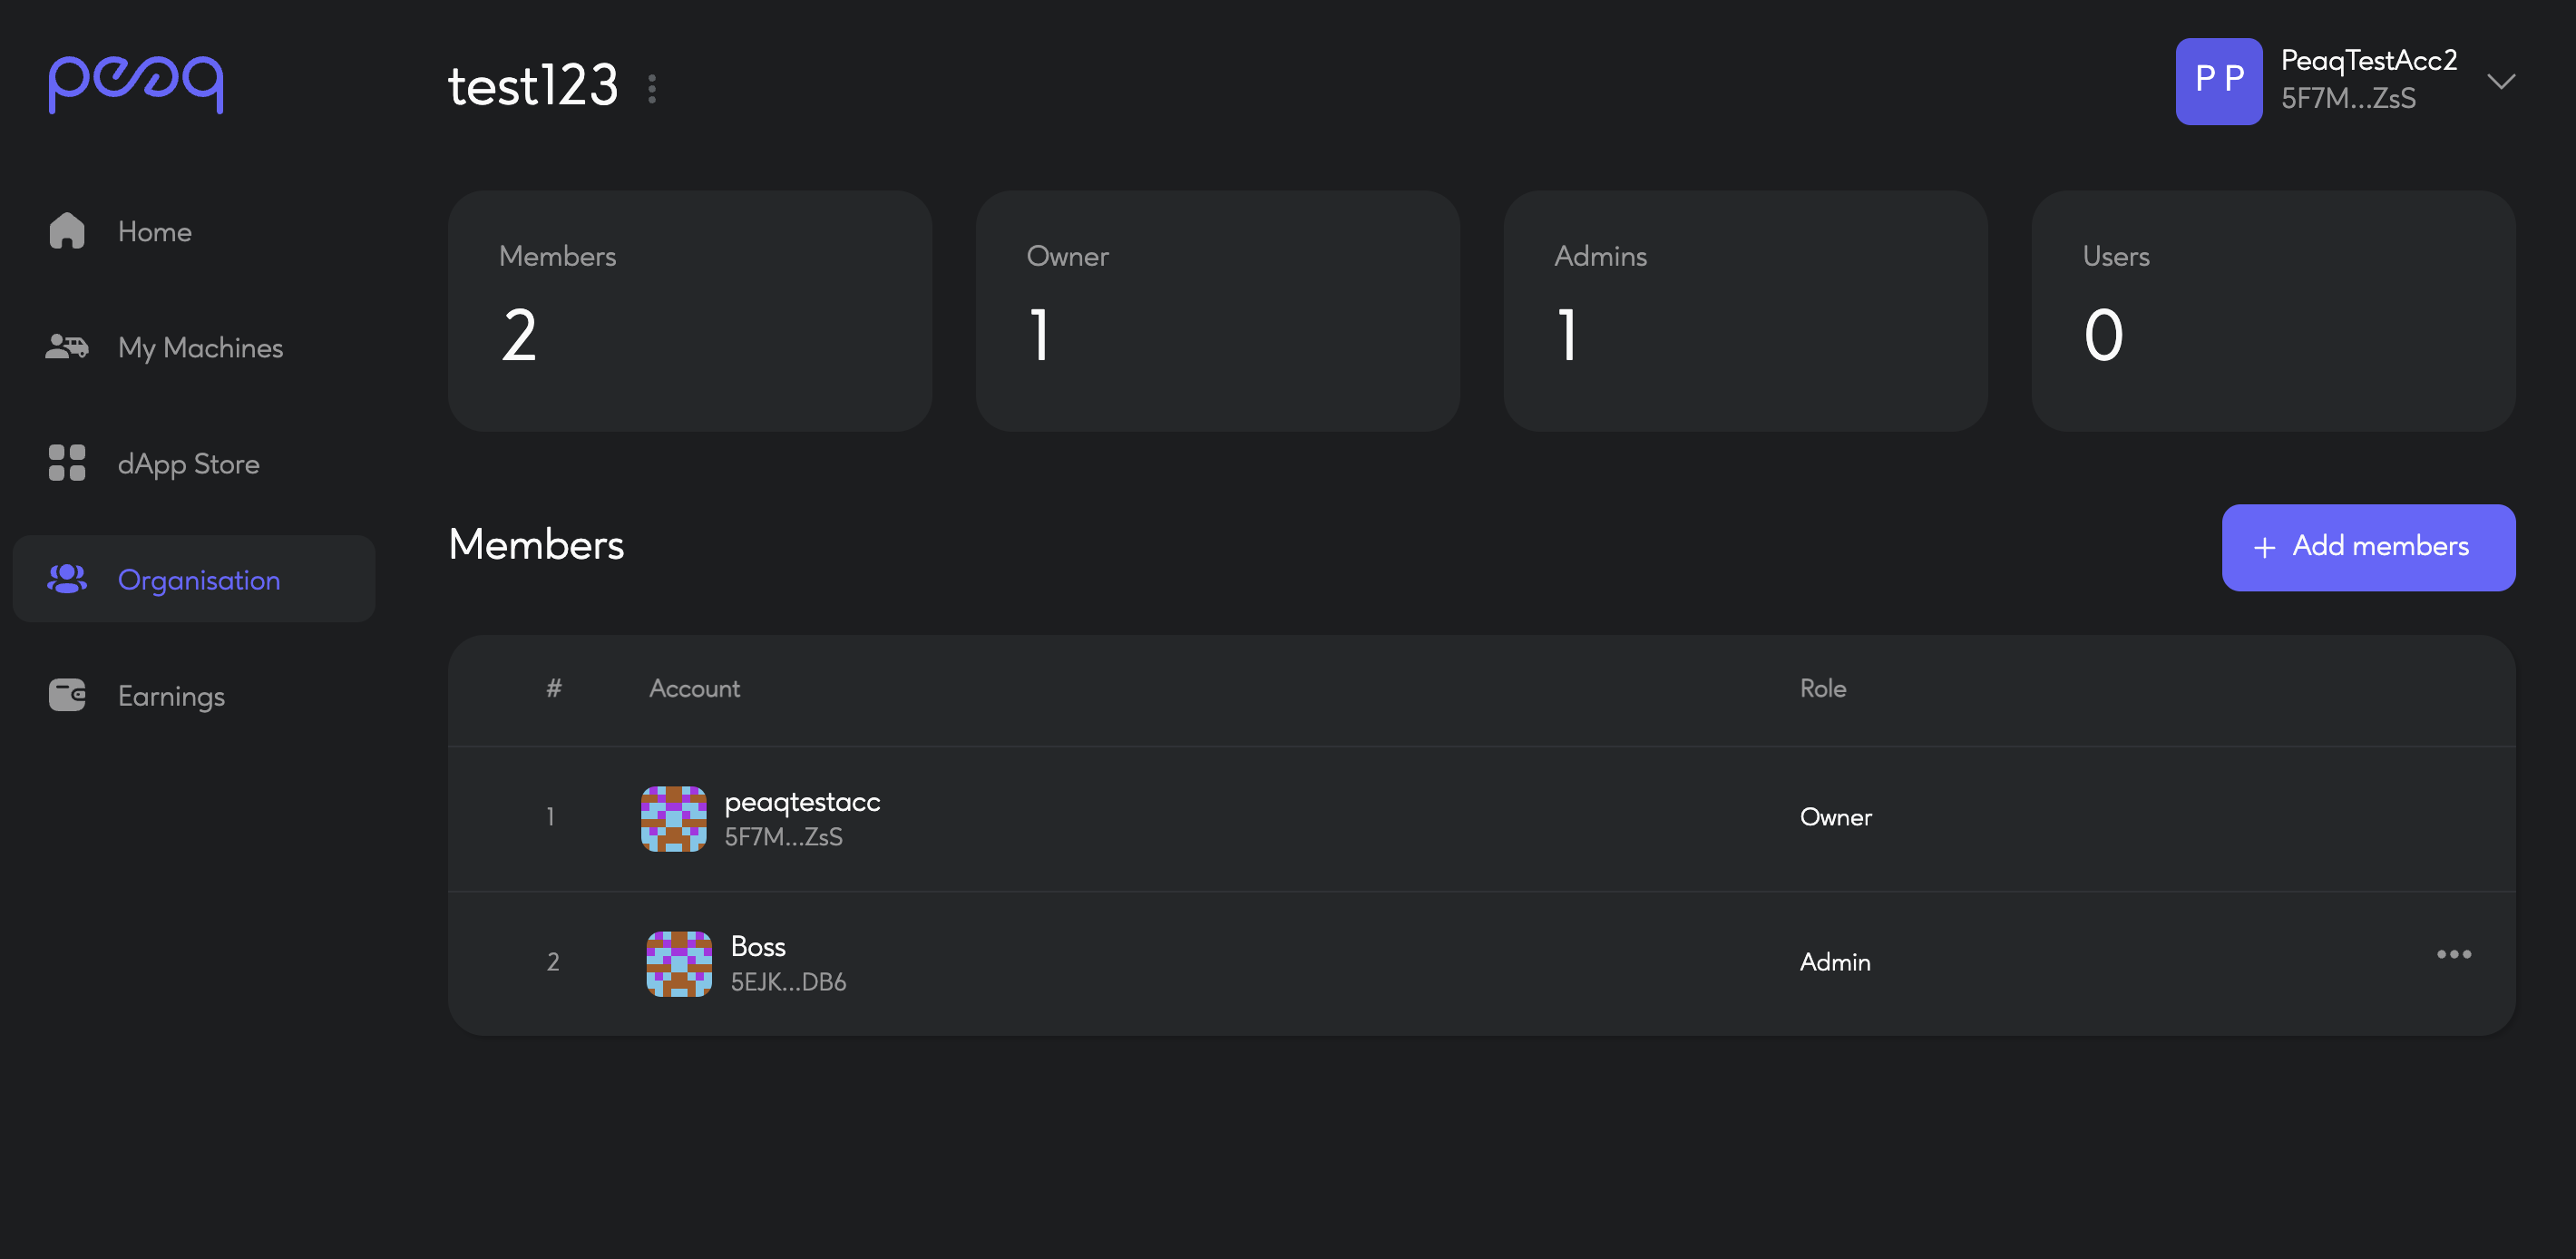
Organization
- On the Organization page, you can provide access to your machines and organization to your teammates.
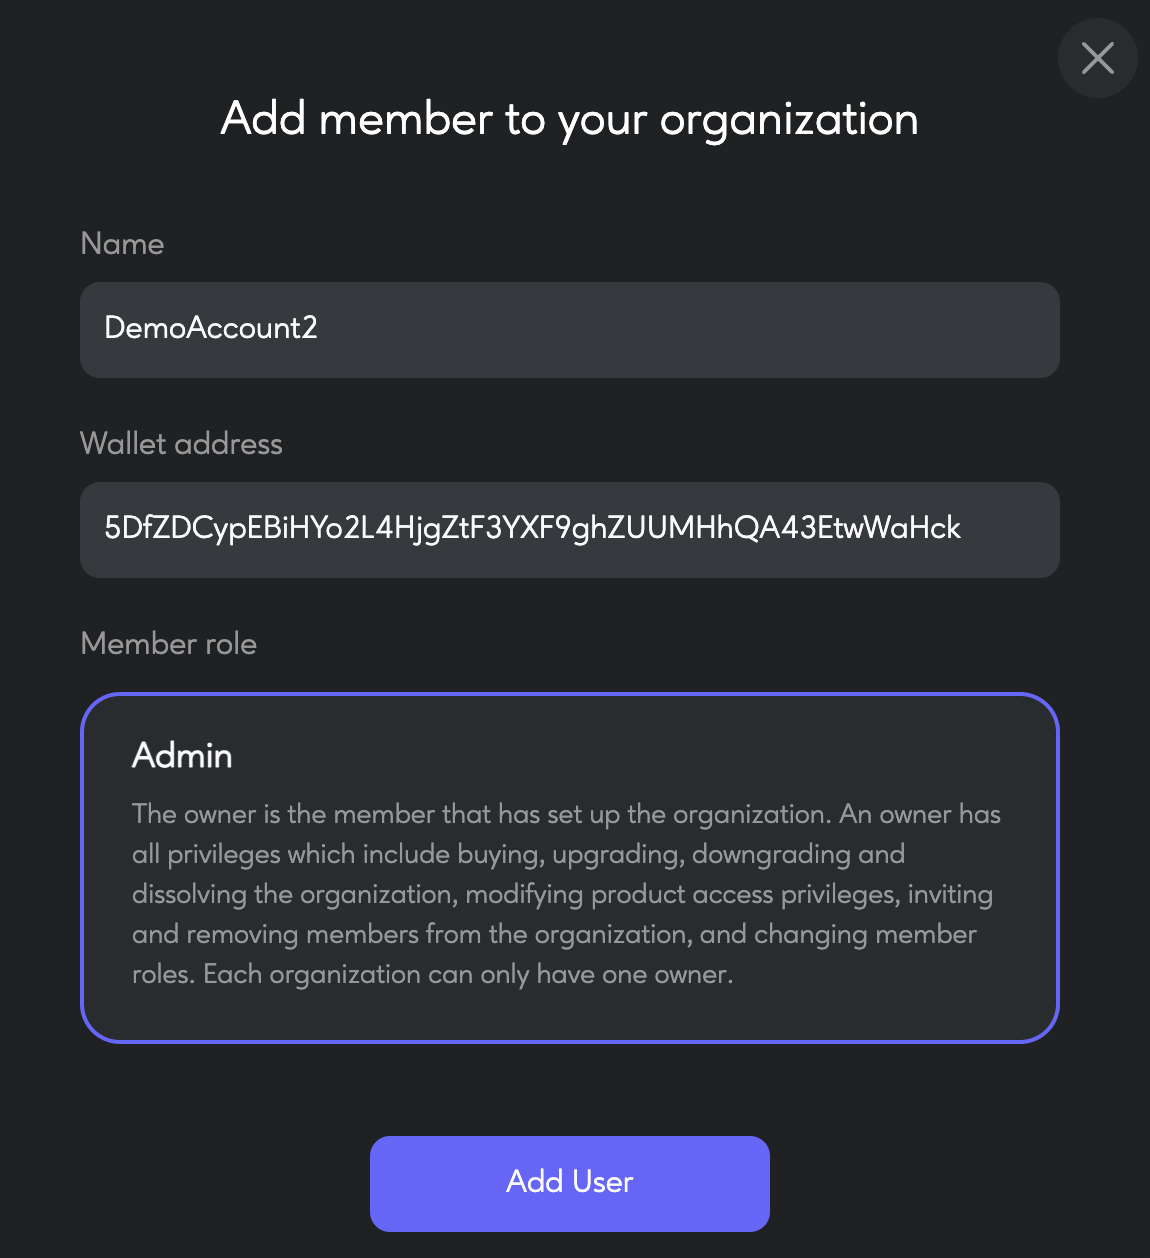
- To let another person access your machine fleet, click on the "+Add Members" button.
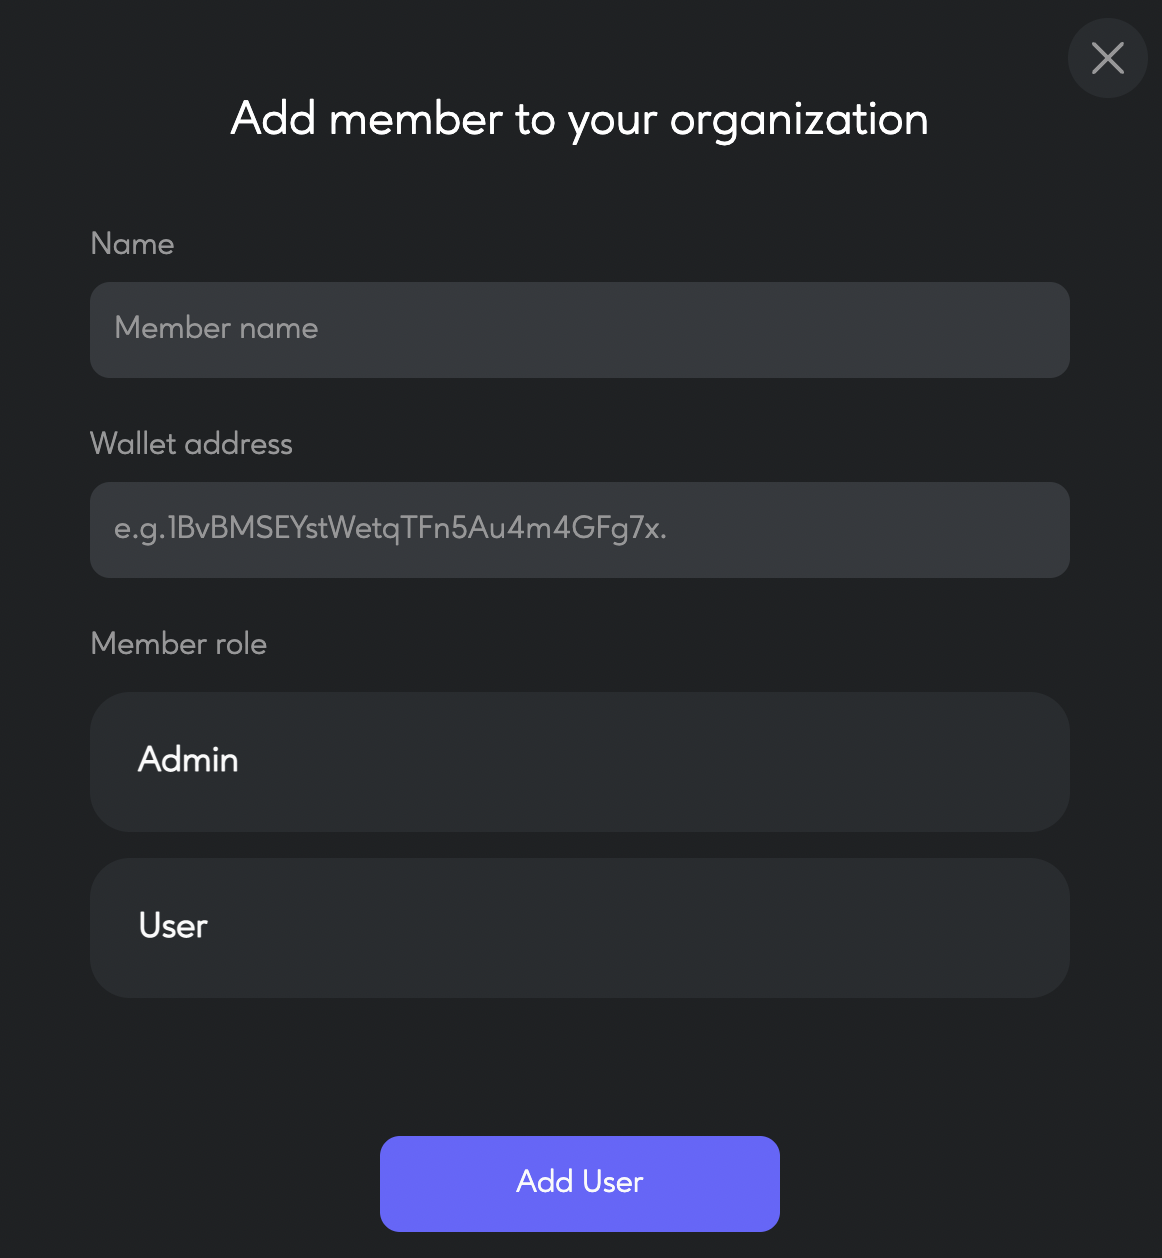
- Come up with the name for the user, paste their wallet address, and select the role for them which best suits your needs. After that, click "Add User".
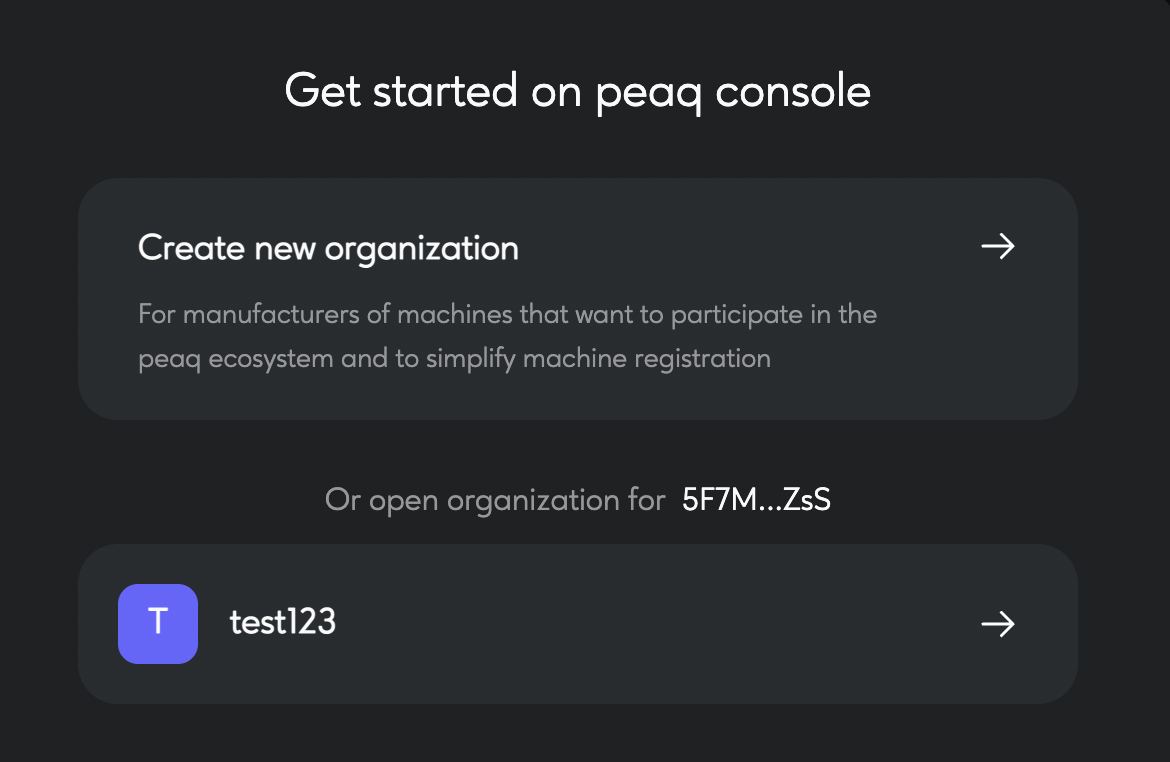
- Now the owner of this wallet can go to peaq control and connect to it their wallet. When doing so, they will be offered a choice between opening your organization or creating a new one (see steps 8-11 on how to create an Organization).