WASM
WASM (WebAssembly) is a standard for web browsers, like Google, Mozilla, and others. It was developed so that code can be deployed in any browser with the same result. Wasm is high-performance, it's as close to native machine code as possible while still being platform-independent. Most importantly, it supports a variety of languages, including Rust, C/C++, C#, Typescript, Haxe, and Kotlin.
Ink! is a language, which inherits a lot from Rust, it's tailored specifically for authoring smart contracts. After smart contract was written in ink! it needs to be compiled into WebAssembly (WASM) format to be deployed on peaq/krest/agung networks.
1. Deploy WASM Smart Contract Using The Local Node
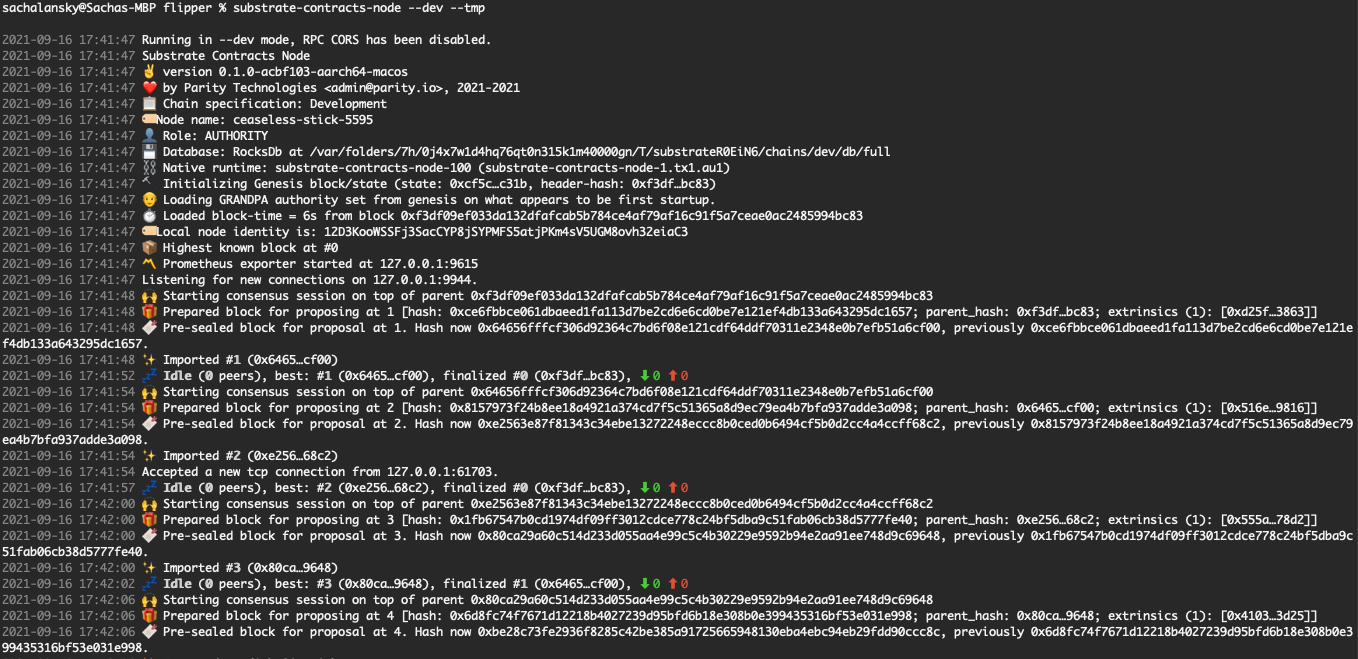
After successfully installing substrate-contracts-node, you can start a local development chain by running:
substrate-contracts-node --dev --tmp
2. Connect to your node from Canvas UI or polkadot.js portal
You can connect to your node from 2 tools: Canvas UI or polkadot.js.
Canvas UI: Go to the hosted version of Canvas UI to interact with your node. You first need to configure the UI to connect to it:
- Click on the dropdown selector at bottom left corner.
- Choose the Local Node

polkadot.js portal
To connect to your node from polkadot.js portal specify the node endpoint in the UI.
3.Build Smart Contract
Flipper: For demonstration purposes we will use the flipper contract. Here is the contract, which we are going to use.
In order to deploy WASM smart contract on chain, we first need to compile it into the WASM binary from the ink! smart contract.
Smart contract deployment on Substrate is a little different than on EVM-based blockchains.
Whereas a completely new blob of smart contract source code is deployed each time you push a contract on other platforms, Substrate opts to optimize this behavior. For example, the standard ERC20 token has been deployed to Ethereum thousands of times, sometimes only with changes to the initial configuration (through the Solidity constructor function). Each of these instances take up space on the blockchain equivalent to the contract source code size, even though no code was actually changed.
In Substrate, the contract deployment process is split into two steps:
- Putting your contract code on the blockchain
- Creating an instance of your contract
With this pattern, contract code like the ERC20 standard can be put on the blockchain one single time, but instantiated any number of times. No need to continually upload the same source code over and waste space on the blockchain.
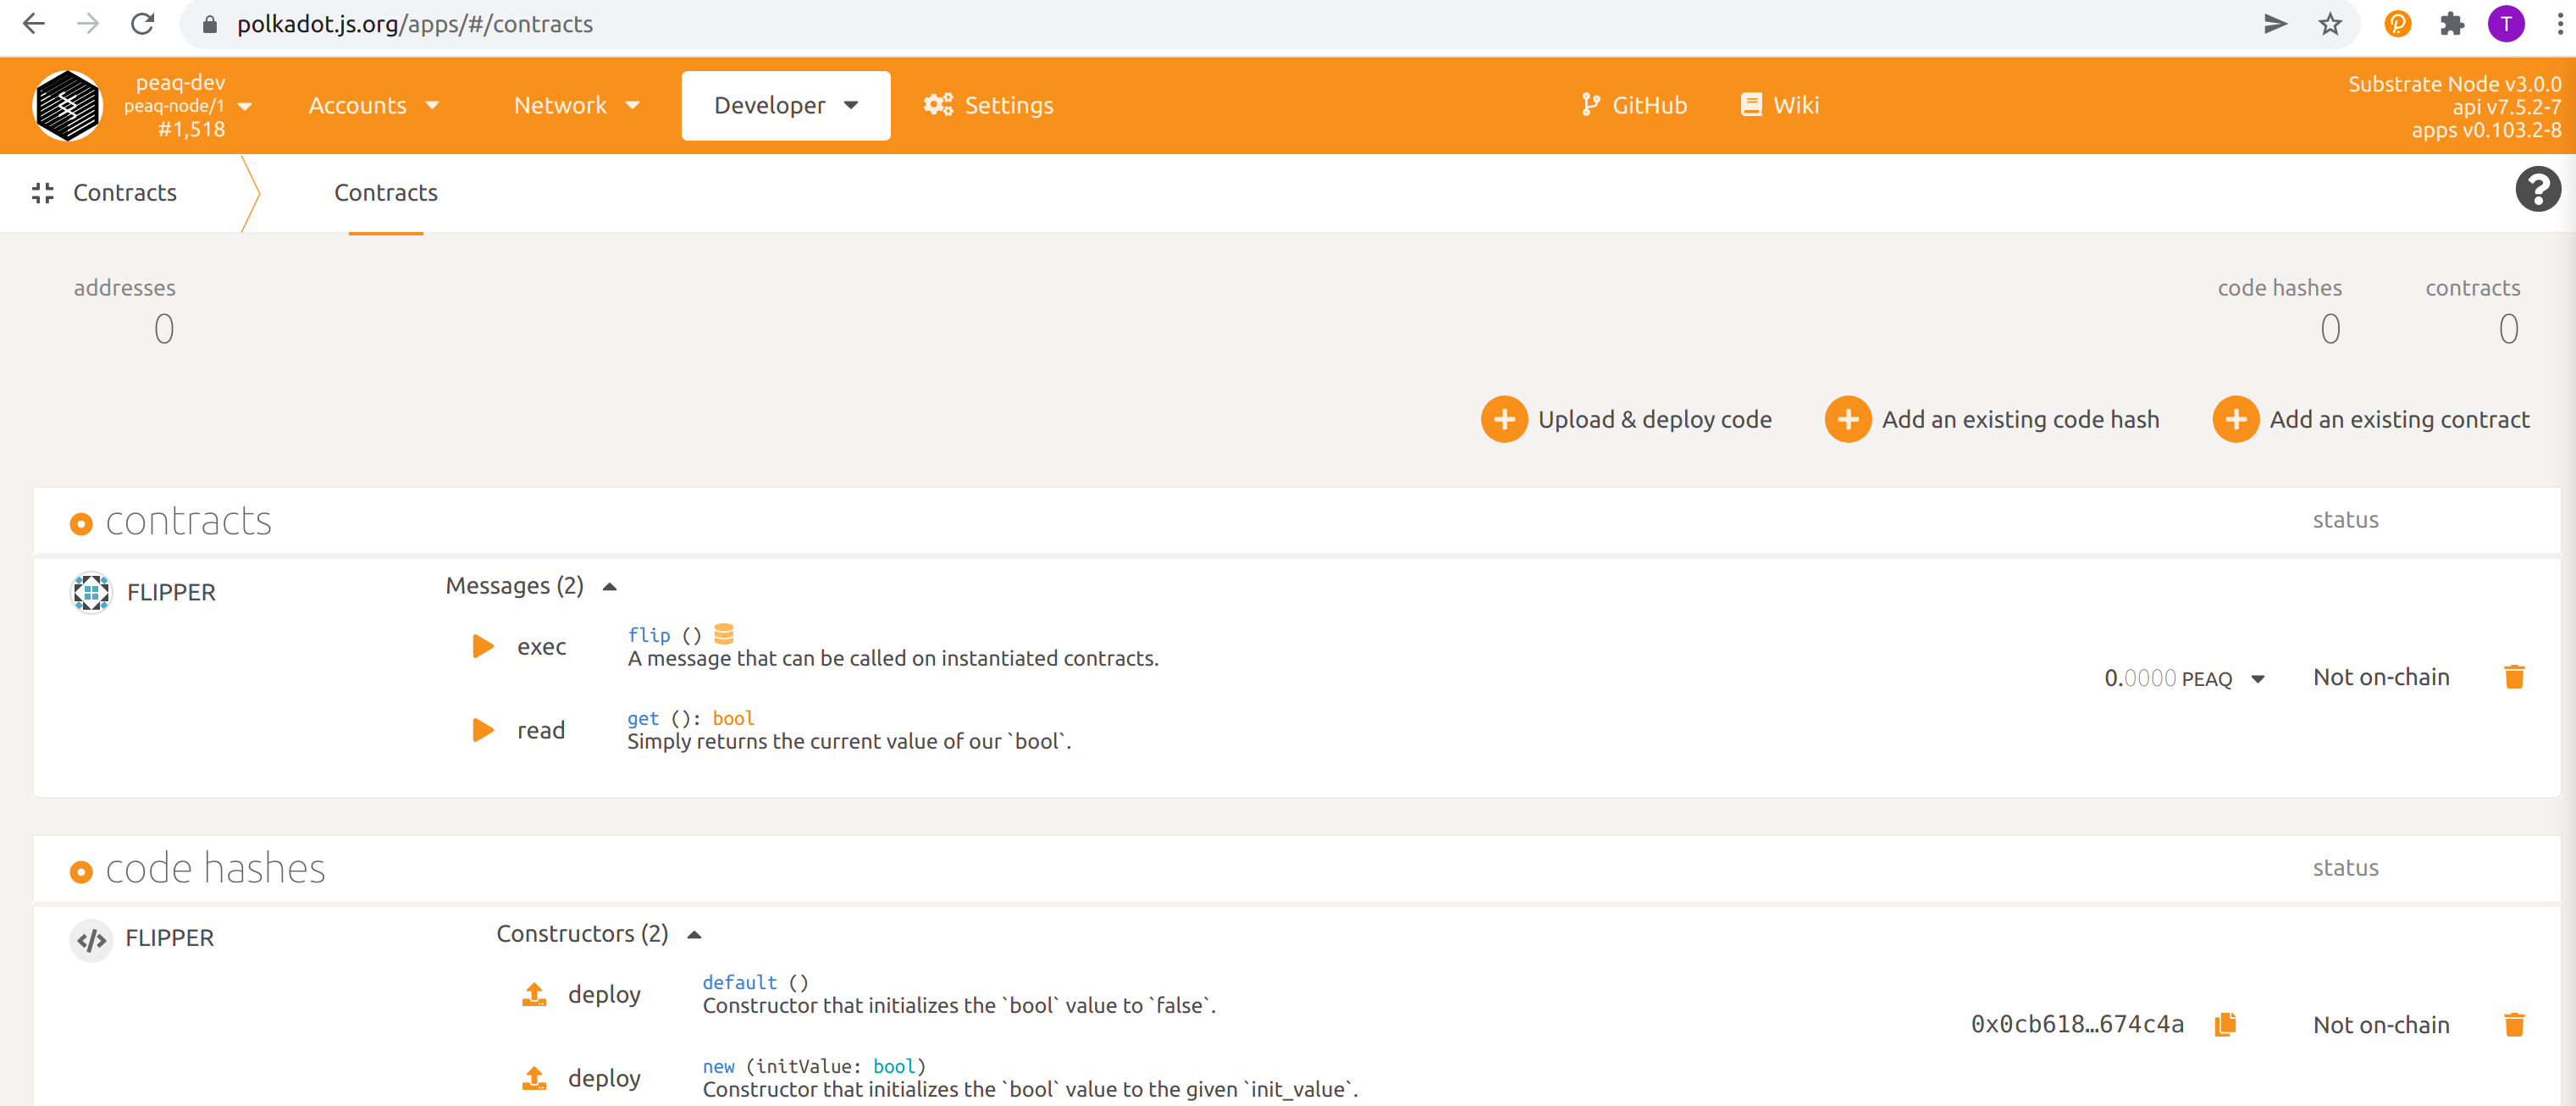
1. Upload Contract Code to Canvas UI or polkadot.js portal
Option 1- Canvas UI
Here we will upload the contract code and instantiate one copy of the contract on the blockchain (which is usually why we upload the contract code in the first place):
- Click the Upload & Instantiate Contract button.
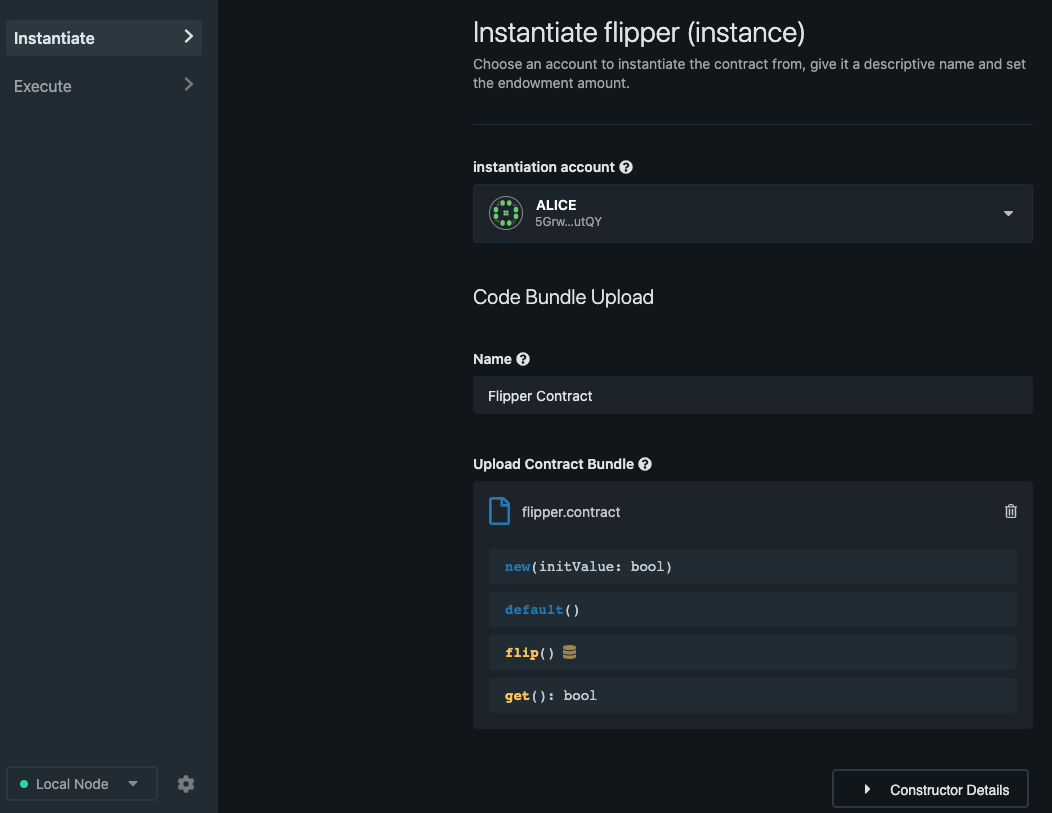
- Choose an Instantiation account (e.g. ALICE).
- Give the contract a descriptive Name (e.g. flipper Contract).
- Drag the
flipper.contractfile that contains the bundled Wasm blob and metadata into the drag & drop area. You will see the UI parse the metadata and showing what functions the contract contains. - Click the Constructor Details
Option 2- Polkadot.js
- Go to polkadot.js portal
- Click Developer Menu → Contract
- Click the Upload & Deploy code
- Upload the
flipper.contractfile that contains the bundled Wasm
Then you can see the contract and can intereact with it.
2. Instantiate the Contract on the Blockchain
Smart contracts exist as an extension of the account system on the blockchain. Thus creating an instance of this contract will create a new Account.
Id which will store any balance managed by the smart contract and allow us to interact with the contract.
Now a screen displays the information that represents our smart contract. We are going to instantiate a copy of the smart contract:
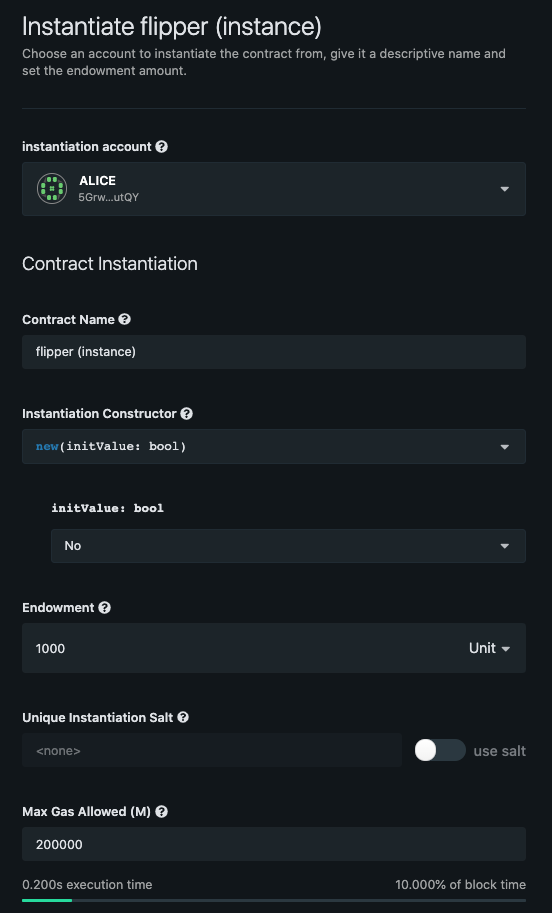
- Give the contract instance a Contract Name (e.g. The First Flipper).
- Accept the default options for the contract Instantiation Constructor.
- Accept the default options Endowment of
1000 Unitsto pay the storage rent and Max Gas Allowed of200000. - Click on
Instantiate
Note As mentioned earlier, contract creation involves creation of a new account. As such, you must be sure to give the contract account at least the existential deposit defined by your blockchain. We also need to be able to pay the contract's rent (endowment). If we consume all of this deposit, the contract will become a tombstone. We can always refill the contract's balance and keep it on chain.
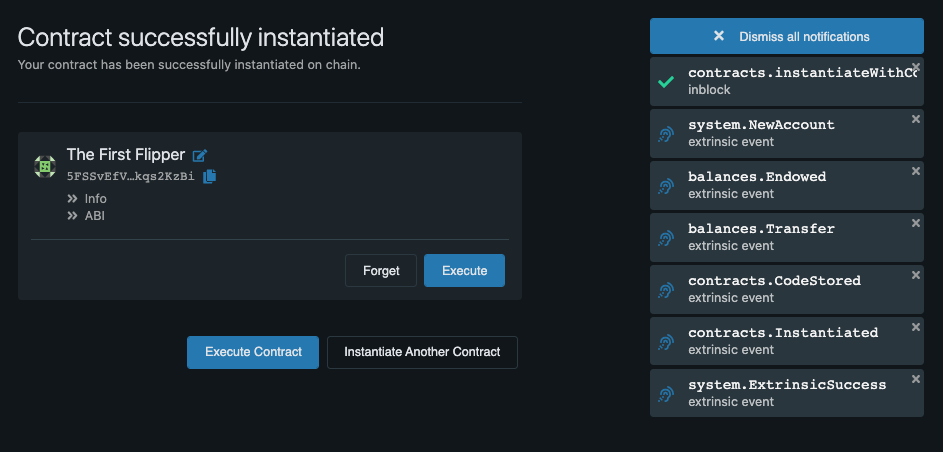
When you click Instantiate, and in the next confirmation screen Sign & Submit, you should see the extrinsic contracts.instantiateWithCode is called, and a flurry of events appear including the creation of a new account (system.NewAccount) and the instantiation of the contract (contracts.Instantiated):
4. Call your Contract
Now that your contract has been fully deployed, we can start interacting with it! Flipper only has two functions, flip() and get() so we will show you what it's like to play with both of them. Click the Execute button under the contract after you instantiate the Flipper contract in the previous step.
1. get() function
Take a look at our contract's default() function, we set the initial value of the Flipper contract value to No when we instantiated the contract. Let's check that this is the case.
In the Message to Send section, select the "get(): bool" message and accept the default values for the other options.
Press "Call" and confirm that it returns the value false:
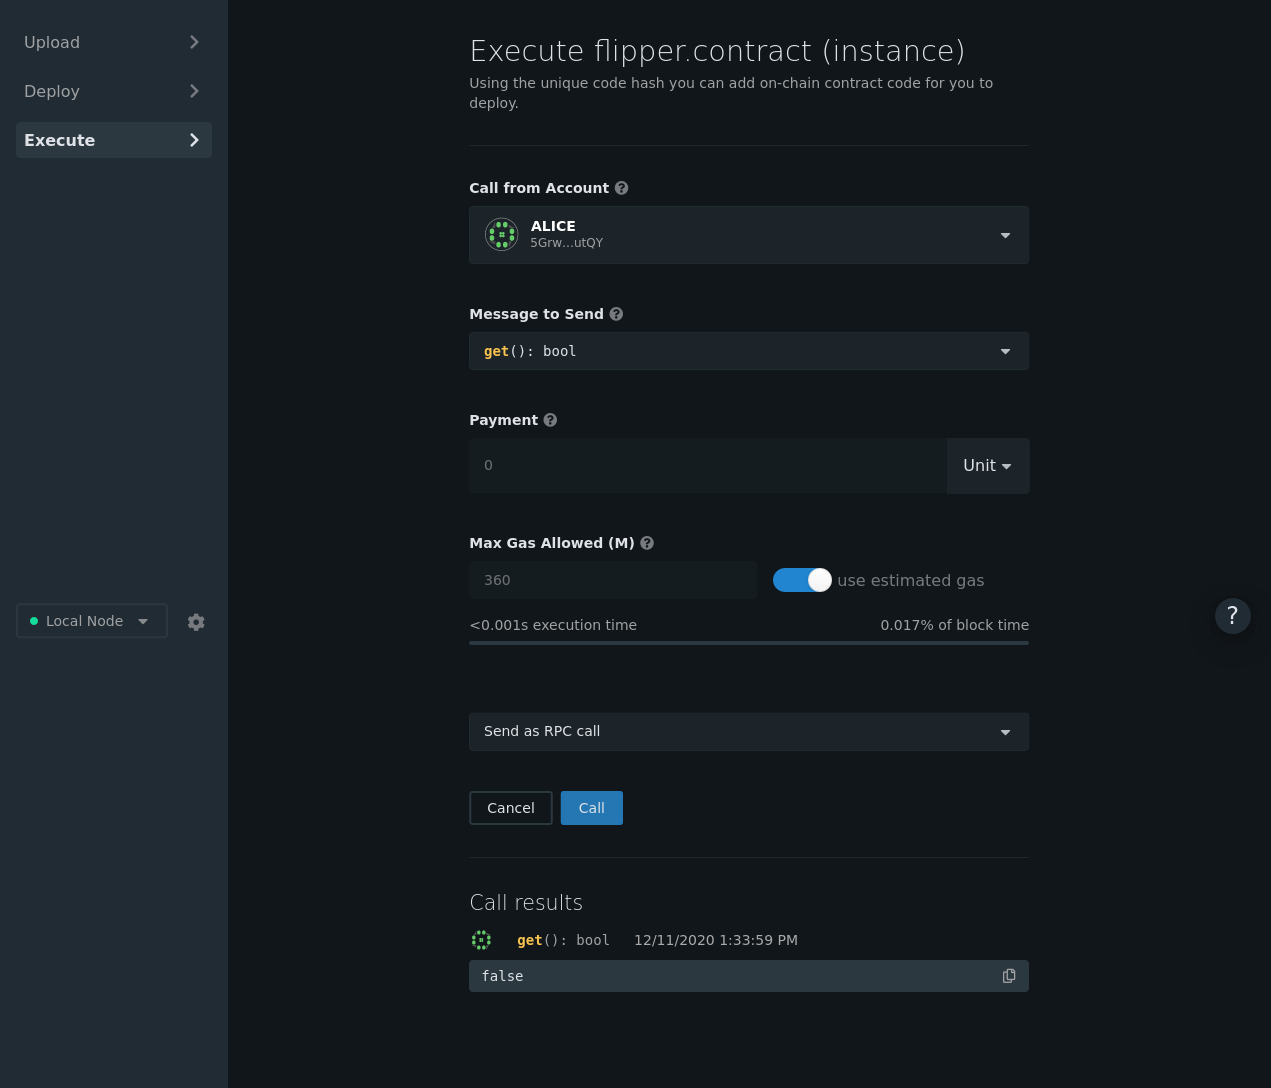
Note You might be wondering "Why did we need to specify gas when reading a value from a contract?" If you notice right above the "Call" button is a dropdown select box that allows you to "Send as RPC call" or "Send as transaction". For a read-only request like this, we can simply use an RPC call which will simulate a transaction, but not actually storing anything on-chain. Thus, you will still need to specify the right amount of gas to cover your "virtual fee". But don't worry, nothing will be charged when making a call this way. 🙂
2. flip() function
So let's make the value turn true now!
The alternative message to send with the UI is flip(). Again, accept the default values for the other options.
You will notice that the flip() message defaults to a transaction call.
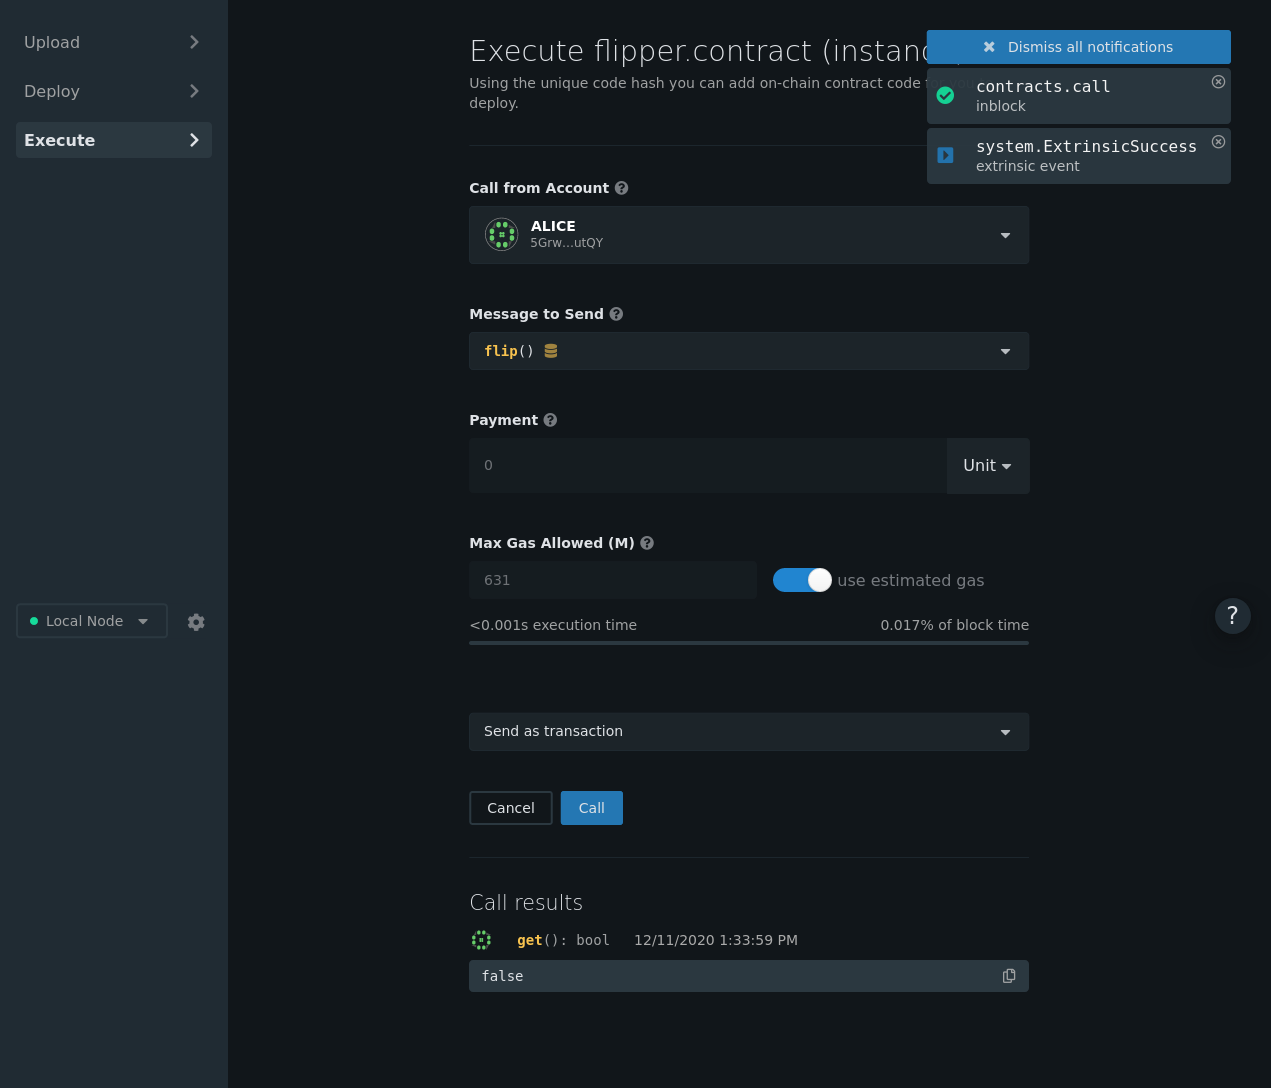
If the transaction was successful, we should then be able to go back to the get() function and see our updated storage:

Congrats! You just deployed contract to the blockchain!